> ## Documentation Index
> Fetch the complete documentation index at: https://docs.aseeflow.org/llms.txt
> Use this file to discover all available pages before exploring further.
# Deploy the Process
This section covers deploying a BPMN process and starting a new instance to verify the simple process works.
BPMN diagrams must be created for the process engine they're deployed on. You cannot run a BPMN diagram modeled for ASEE Flow (Camunda Platform 7) on Camunda 8, or vice versa.
## Using the Camunda Modeler to deploy
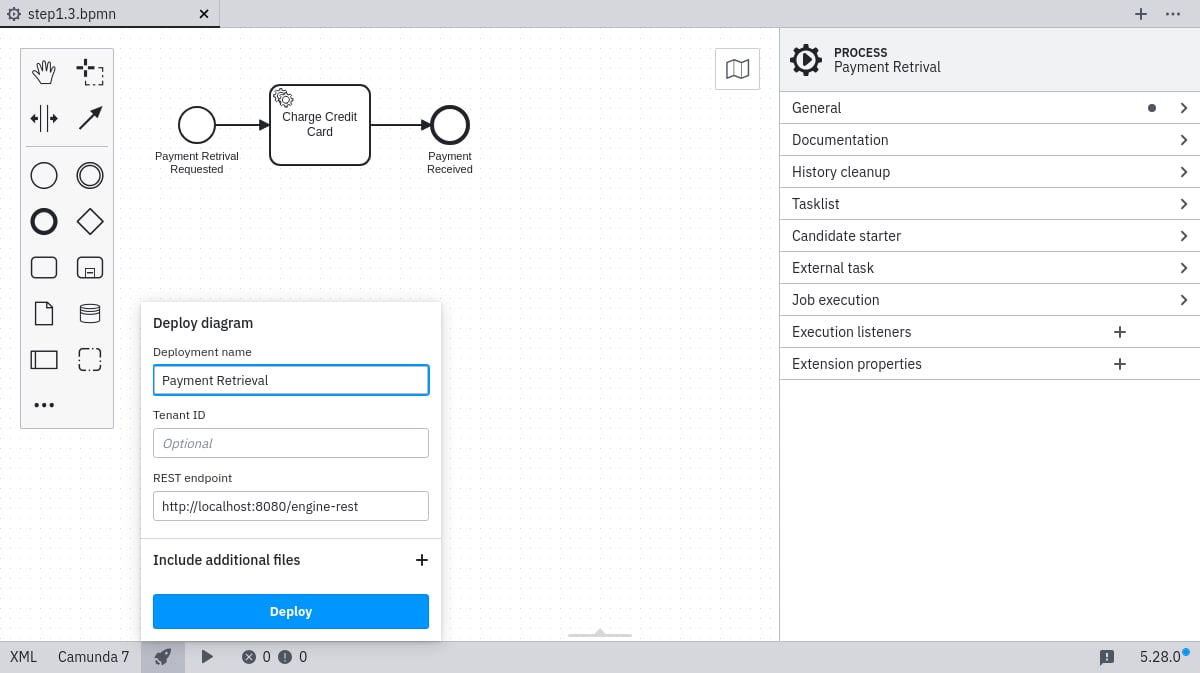
Click the deploy button in the Camunda Modeler and provide the deployment name *Payment Retrieval*. You must supply a URL for endpoint configuration — either the root REST API endpoint (for example `http://localhost:8080/engine-rest`) or the exact deployment-creation endpoint (for example `http://localhost:8080/engine-rest/deployment/create`).

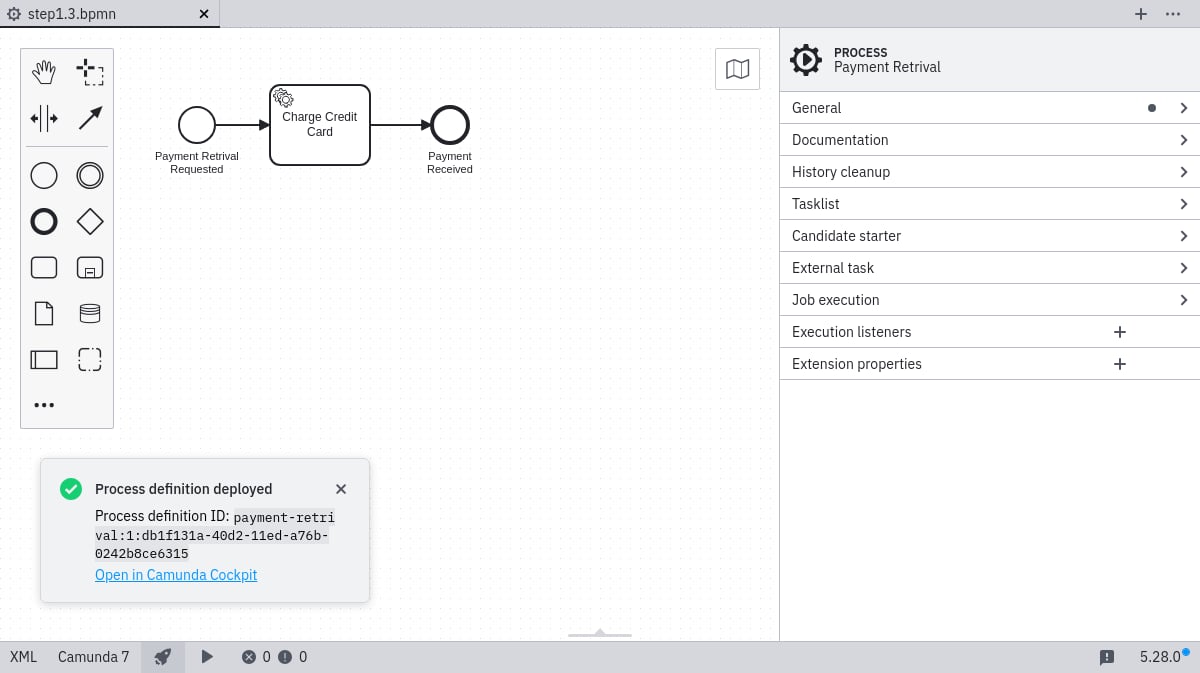
 A success message should appear:
 ## Verify the deployment with Cockpit
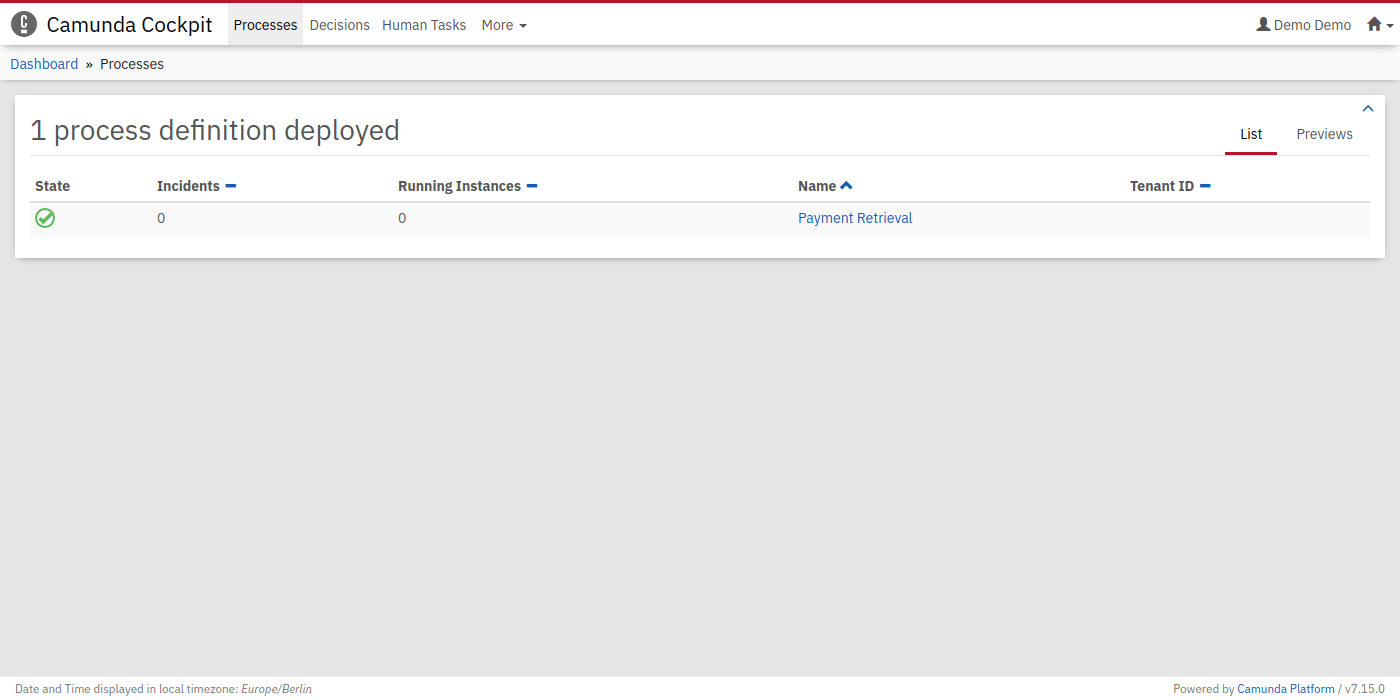
Navigate to `http://localhost:8080/camunda/app/cockpit/` and log in with the credentials `demo` / `demo`. The deployed process appears on the dashboard.
## Verify the deployment with Cockpit
Navigate to `http://localhost:8080/camunda/app/cockpit/` and log in with the credentials `demo` / `demo`. The deployed process appears on the dashboard.
 ## Start a process instance
### Option A: using curl
```bash theme={null}
curl -H "Content-Type: application/json" -X POST \
-d '{"variables": {"amount": {"value":555,"type":"integer"}, "item": {"value":"item-xyz"} } }' \
http://localhost:8080/engine-rest/process-definition/key/payment-retrieval/start
```
### Option B: using a REST client
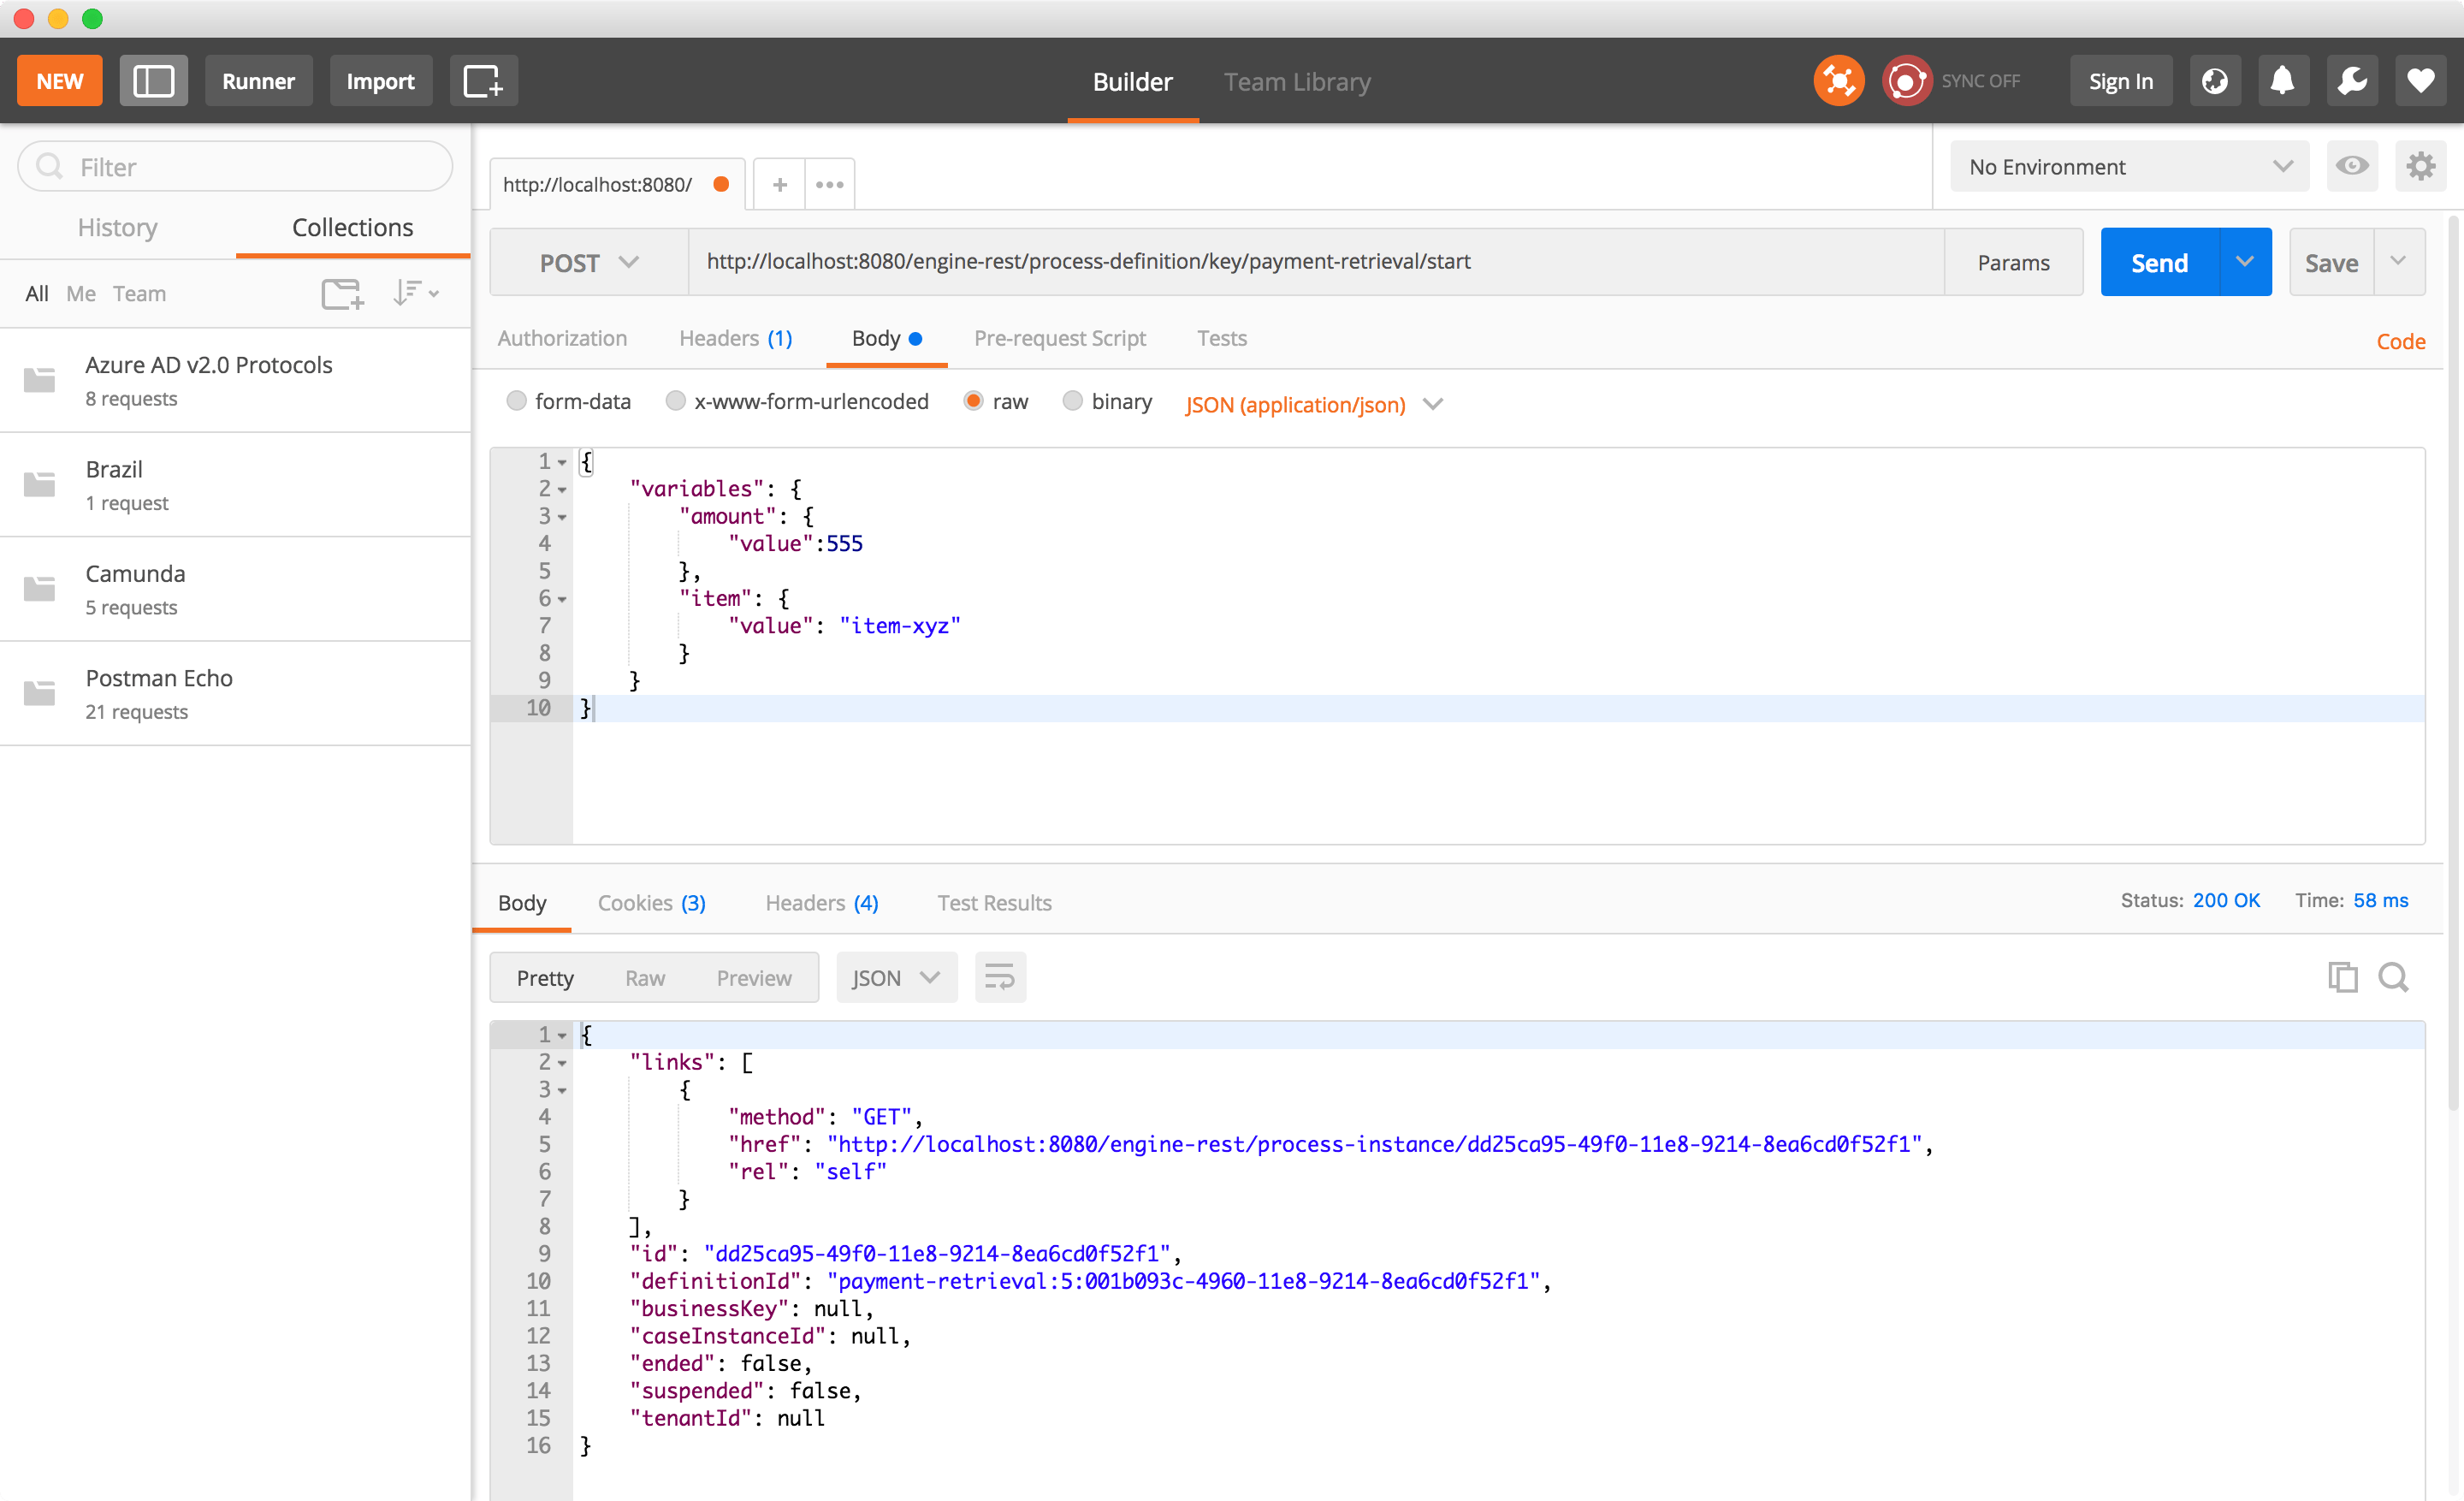
Make a POST request to:
```
http://localhost:8080/engine-rest/process-definition/key/payment-retrieval/start
```
with the JSON body:
```json theme={null}
{
"variables": {
"amount": { "value": 555, "type": "integer" },
"item": { "value": "item-xyz" }
}
}
```
Make sure the header `Content-Type: application/json` is set.
## Start a process instance
### Option A: using curl
```bash theme={null}
curl -H "Content-Type: application/json" -X POST \
-d '{"variables": {"amount": {"value":555,"type":"integer"}, "item": {"value":"item-xyz"} } }' \
http://localhost:8080/engine-rest/process-definition/key/payment-retrieval/start
```
### Option B: using a REST client
Make a POST request to:
```
http://localhost:8080/engine-rest/process-definition/key/payment-retrieval/start
```
with the JSON body:
```json theme={null}
{
"variables": {
"amount": { "value": 555, "type": "integer" },
"item": { "value": "item-xyz" }
}
}
```
Make sure the header `Content-Type: application/json` is set.
 On successful execution, output appears in your worker console.
## Next step
To involve humans in your process, continue to [learn about user tasks](/get-started/quick-start/user-task).
On successful execution, output appears in your worker console.
## Next step
To involve humans in your process, continue to [learn about user tasks](/get-started/quick-start/user-task).