> ## Documentation Index
> Fetch the complete documentation index at: https://docs.aseeflow.org/llms.txt
> Use this file to discover all available pages before exploring further.
# Add a User Task to the Process
This guide teaches you how to involve humans in your BPMN 2.0 process by adding user tasks.
## Add a user task
Open your process in the Camunda Modeler and follow these steps:
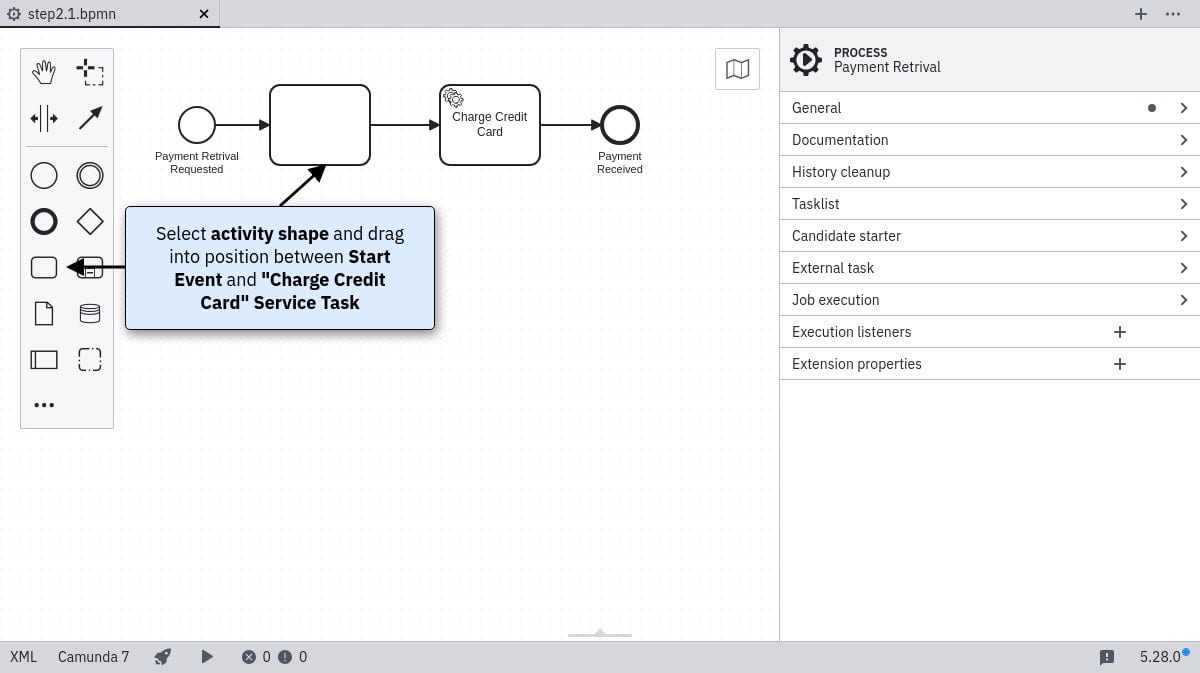
1. Use the create/remove space tool to add space between the start event and the *Charge Credit Card* service task.
2. Select the activity shape (rounded rectangle) and drag it between these elements.
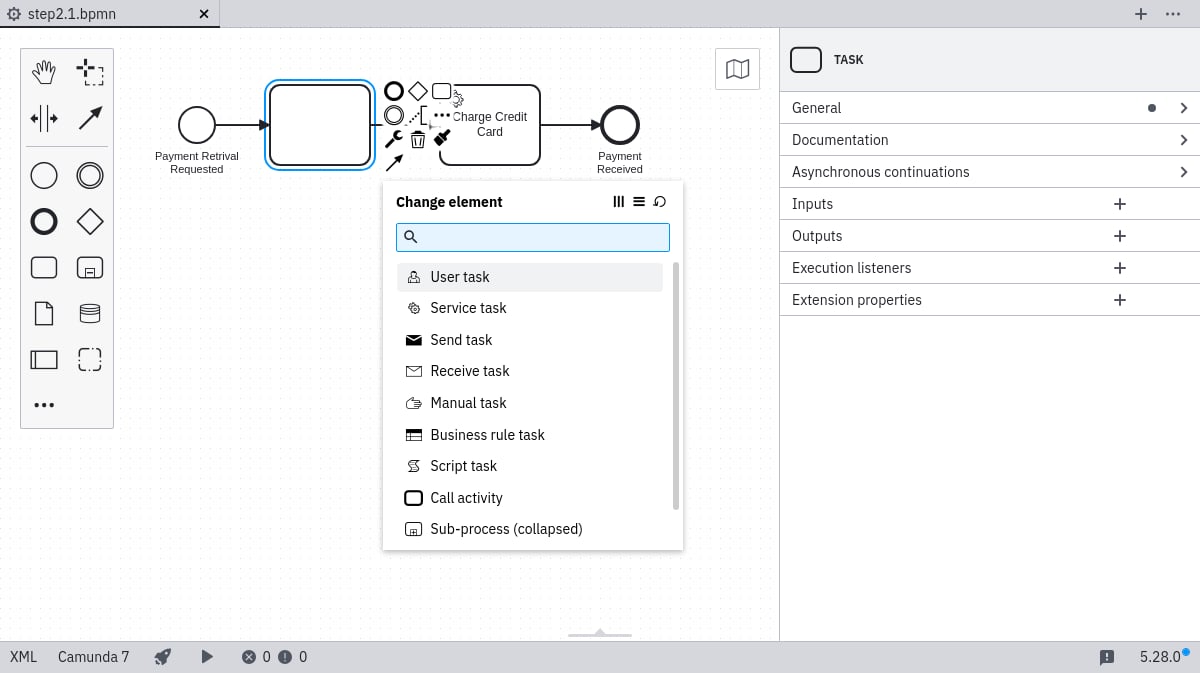
3. Name the new activity *Approve Payment*.
4. Change its type to *User Task* using the wrench button.
 ## Configure the user task
In the properties panel on the right:
1. Select your user task.
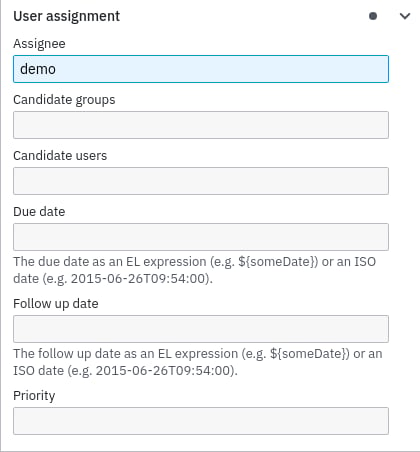
2. Scroll to the `Assignee` property.
3. Enter *demo* to automatically assign the task to the demo user.
## Configure the user task
In the properties panel on the right:
1. Select your user task.
2. Scroll to the `Assignee` property.
3. Enter *demo* to automatically assign the task to the demo user.
 ## Configure a basic form
Still in the properties panel:
1. Select the user task.
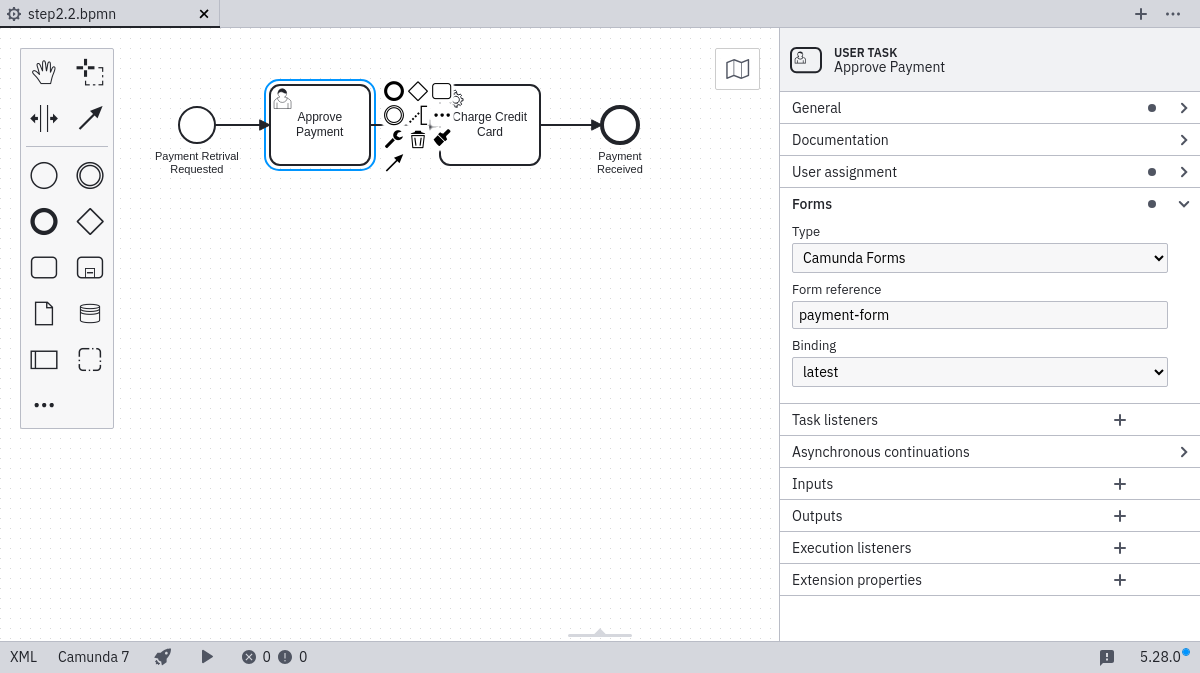
2. Click the *Forms* tab.
3. Set the following properties:
* **Type:** Camunda Forms
* **Form Ref:** payment-form
* **Binding:** deployment
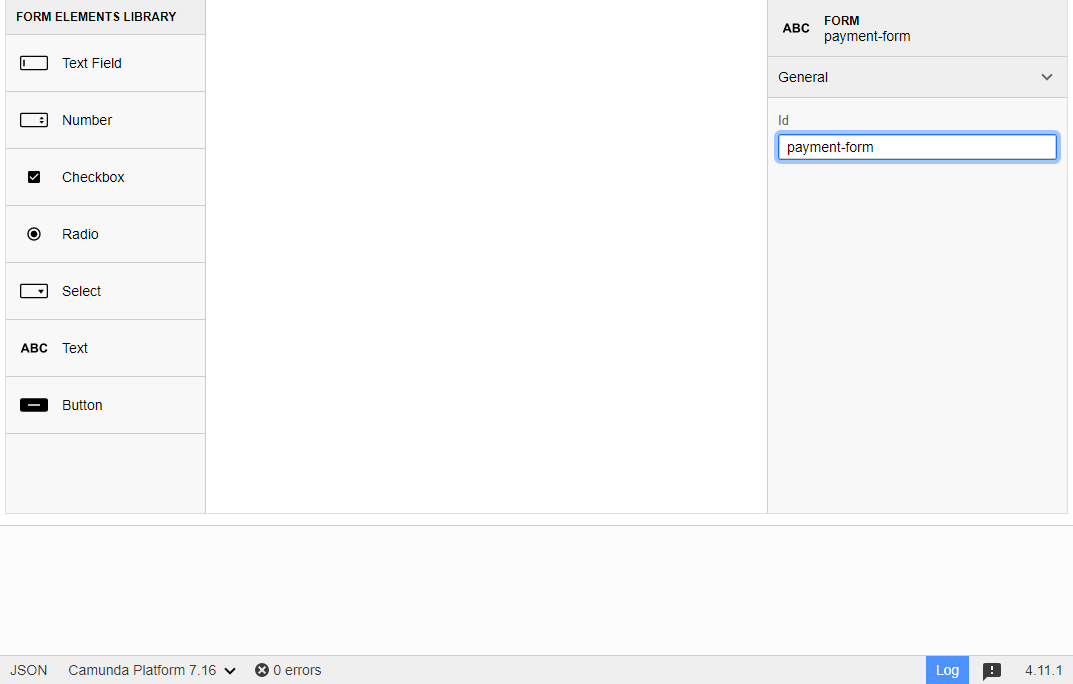
Create a new form file by selecting **File > New File > Form** and set the `Id` to `payment-form`.
## Configure a basic form
Still in the properties panel:
1. Select the user task.
2. Click the *Forms* tab.
3. Set the following properties:
* **Type:** Camunda Forms
* **Form Ref:** payment-form
* **Binding:** deployment
Create a new form file by selecting **File > New File > Form** and set the `Id` to `payment-form`.
 ### Add form fields
Drag elements from the form elements library to create three fields:
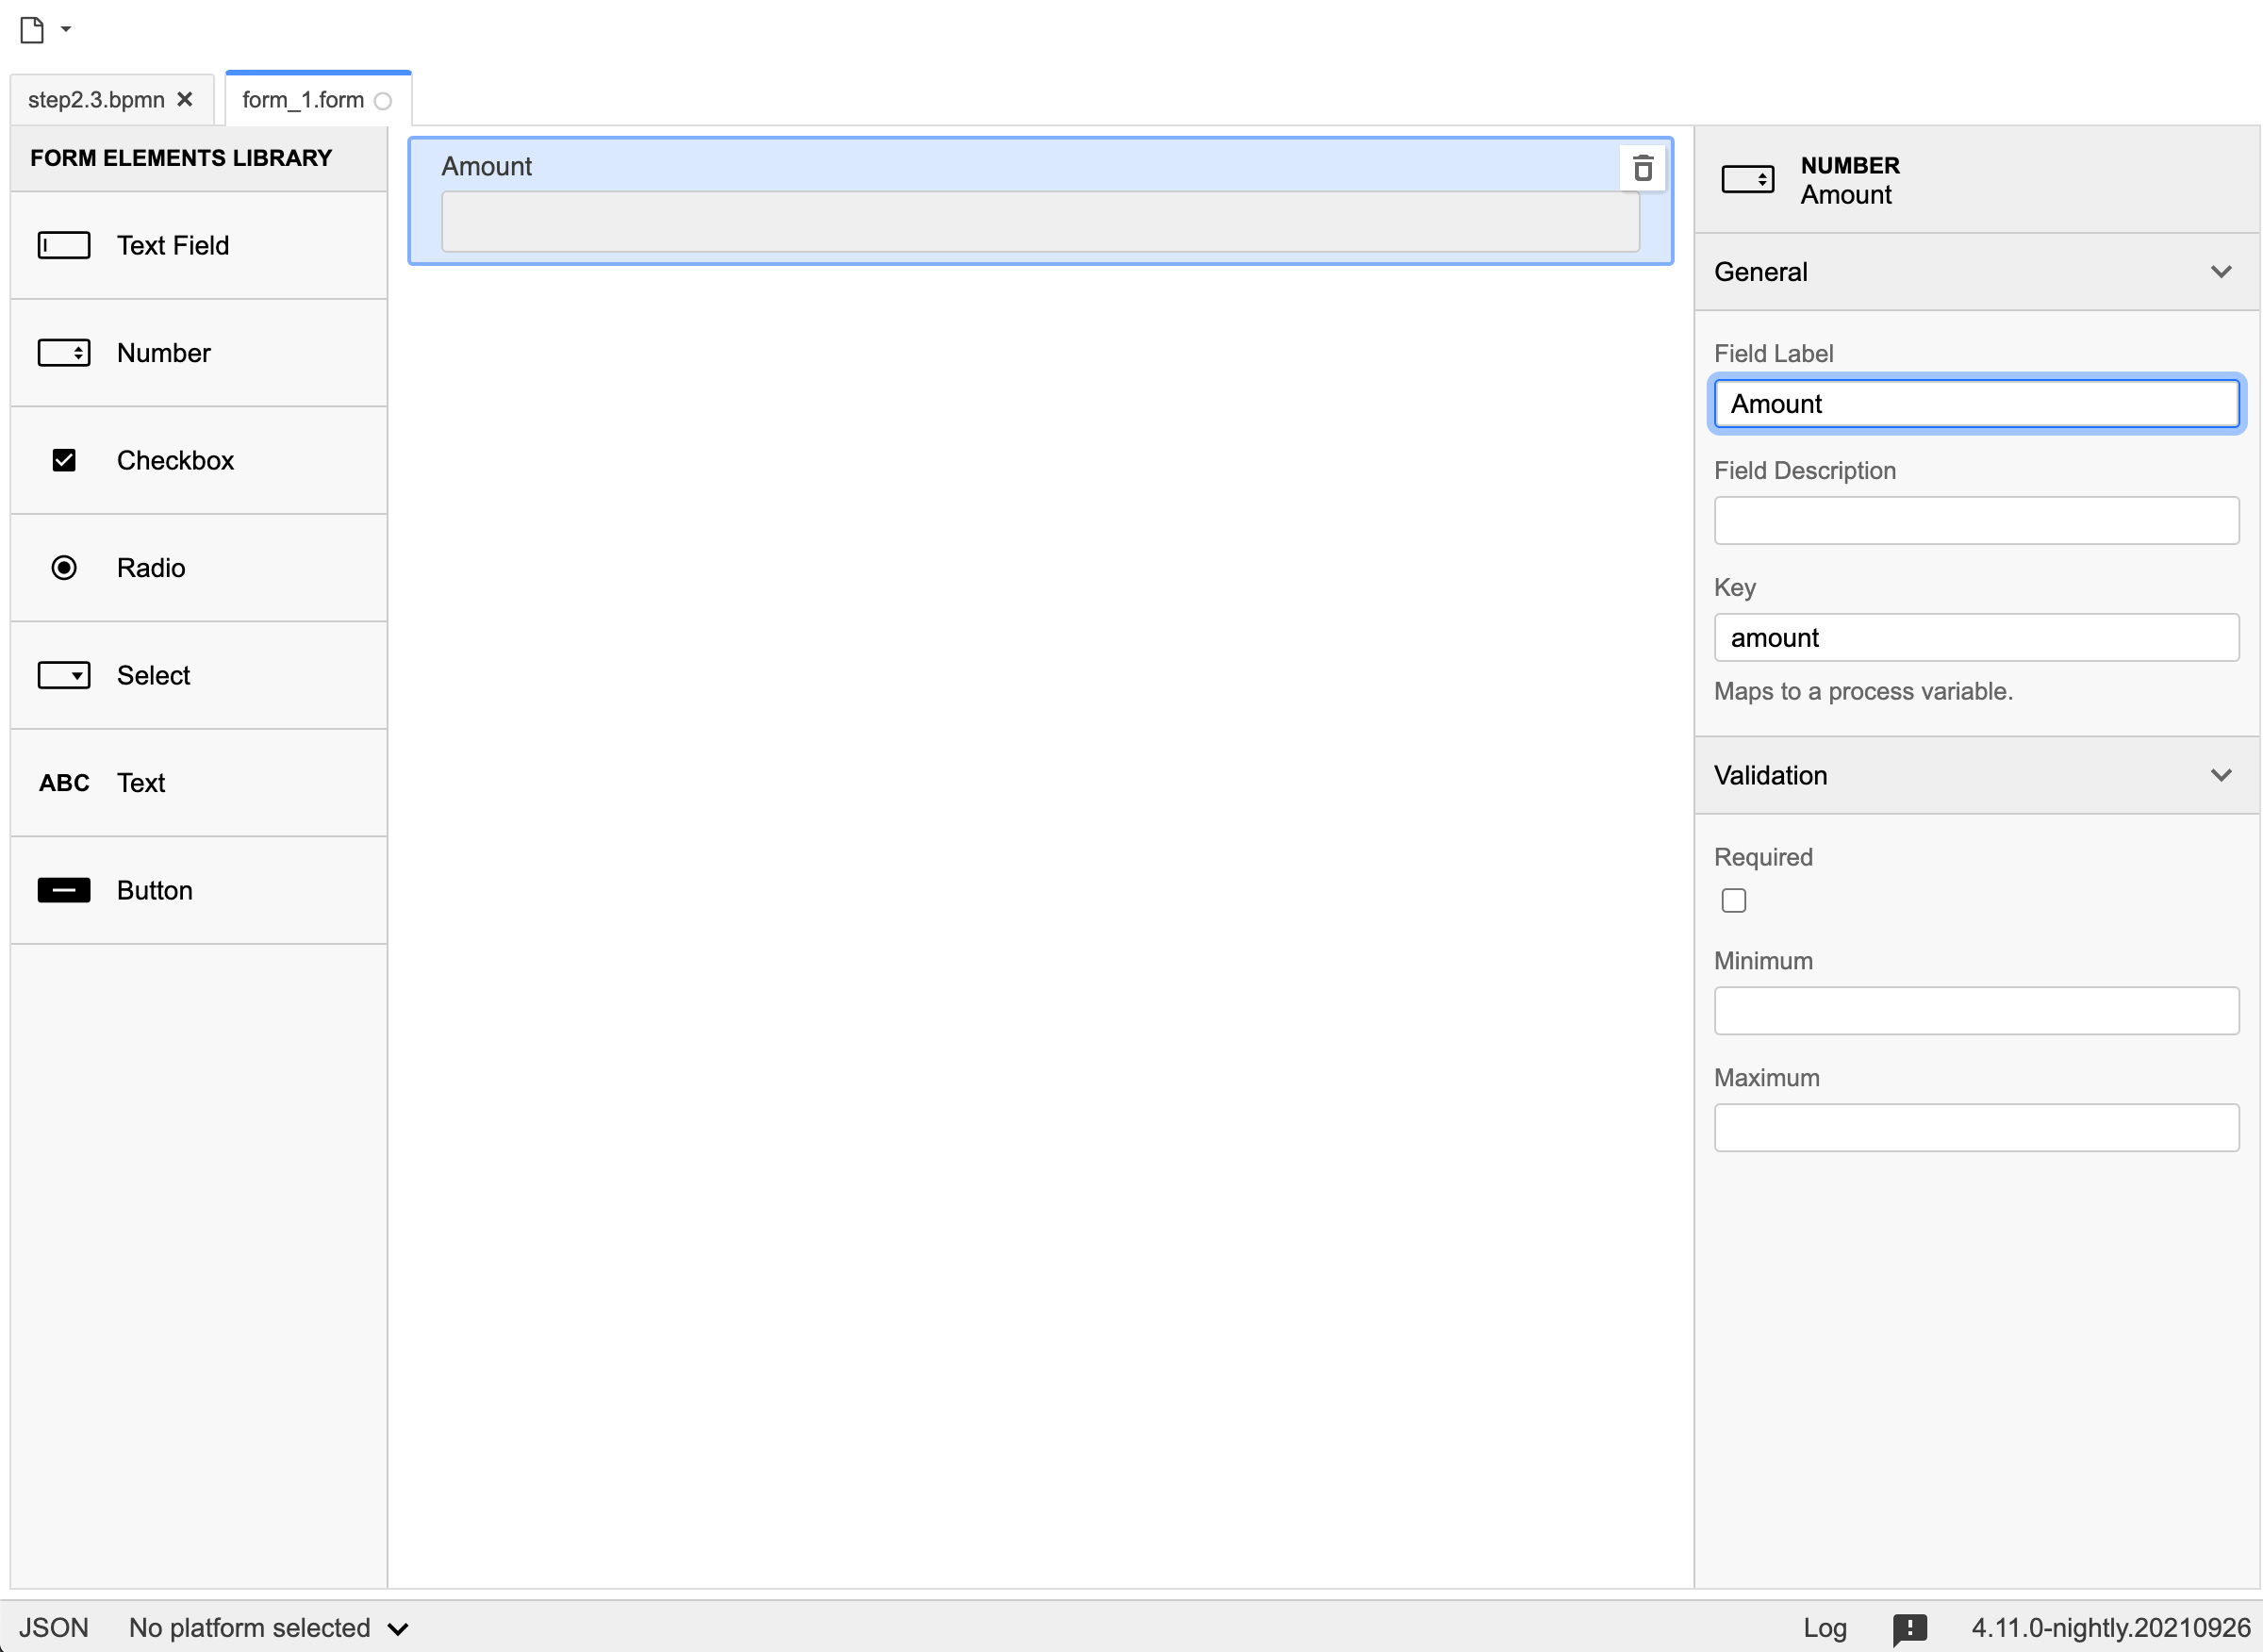
**Field 1 (Number)** — Key: `amount`, Label: *Amount*
### Add form fields
Drag elements from the form elements library to create three fields:
**Field 1 (Number)** — Key: `amount`, Label: *Amount*
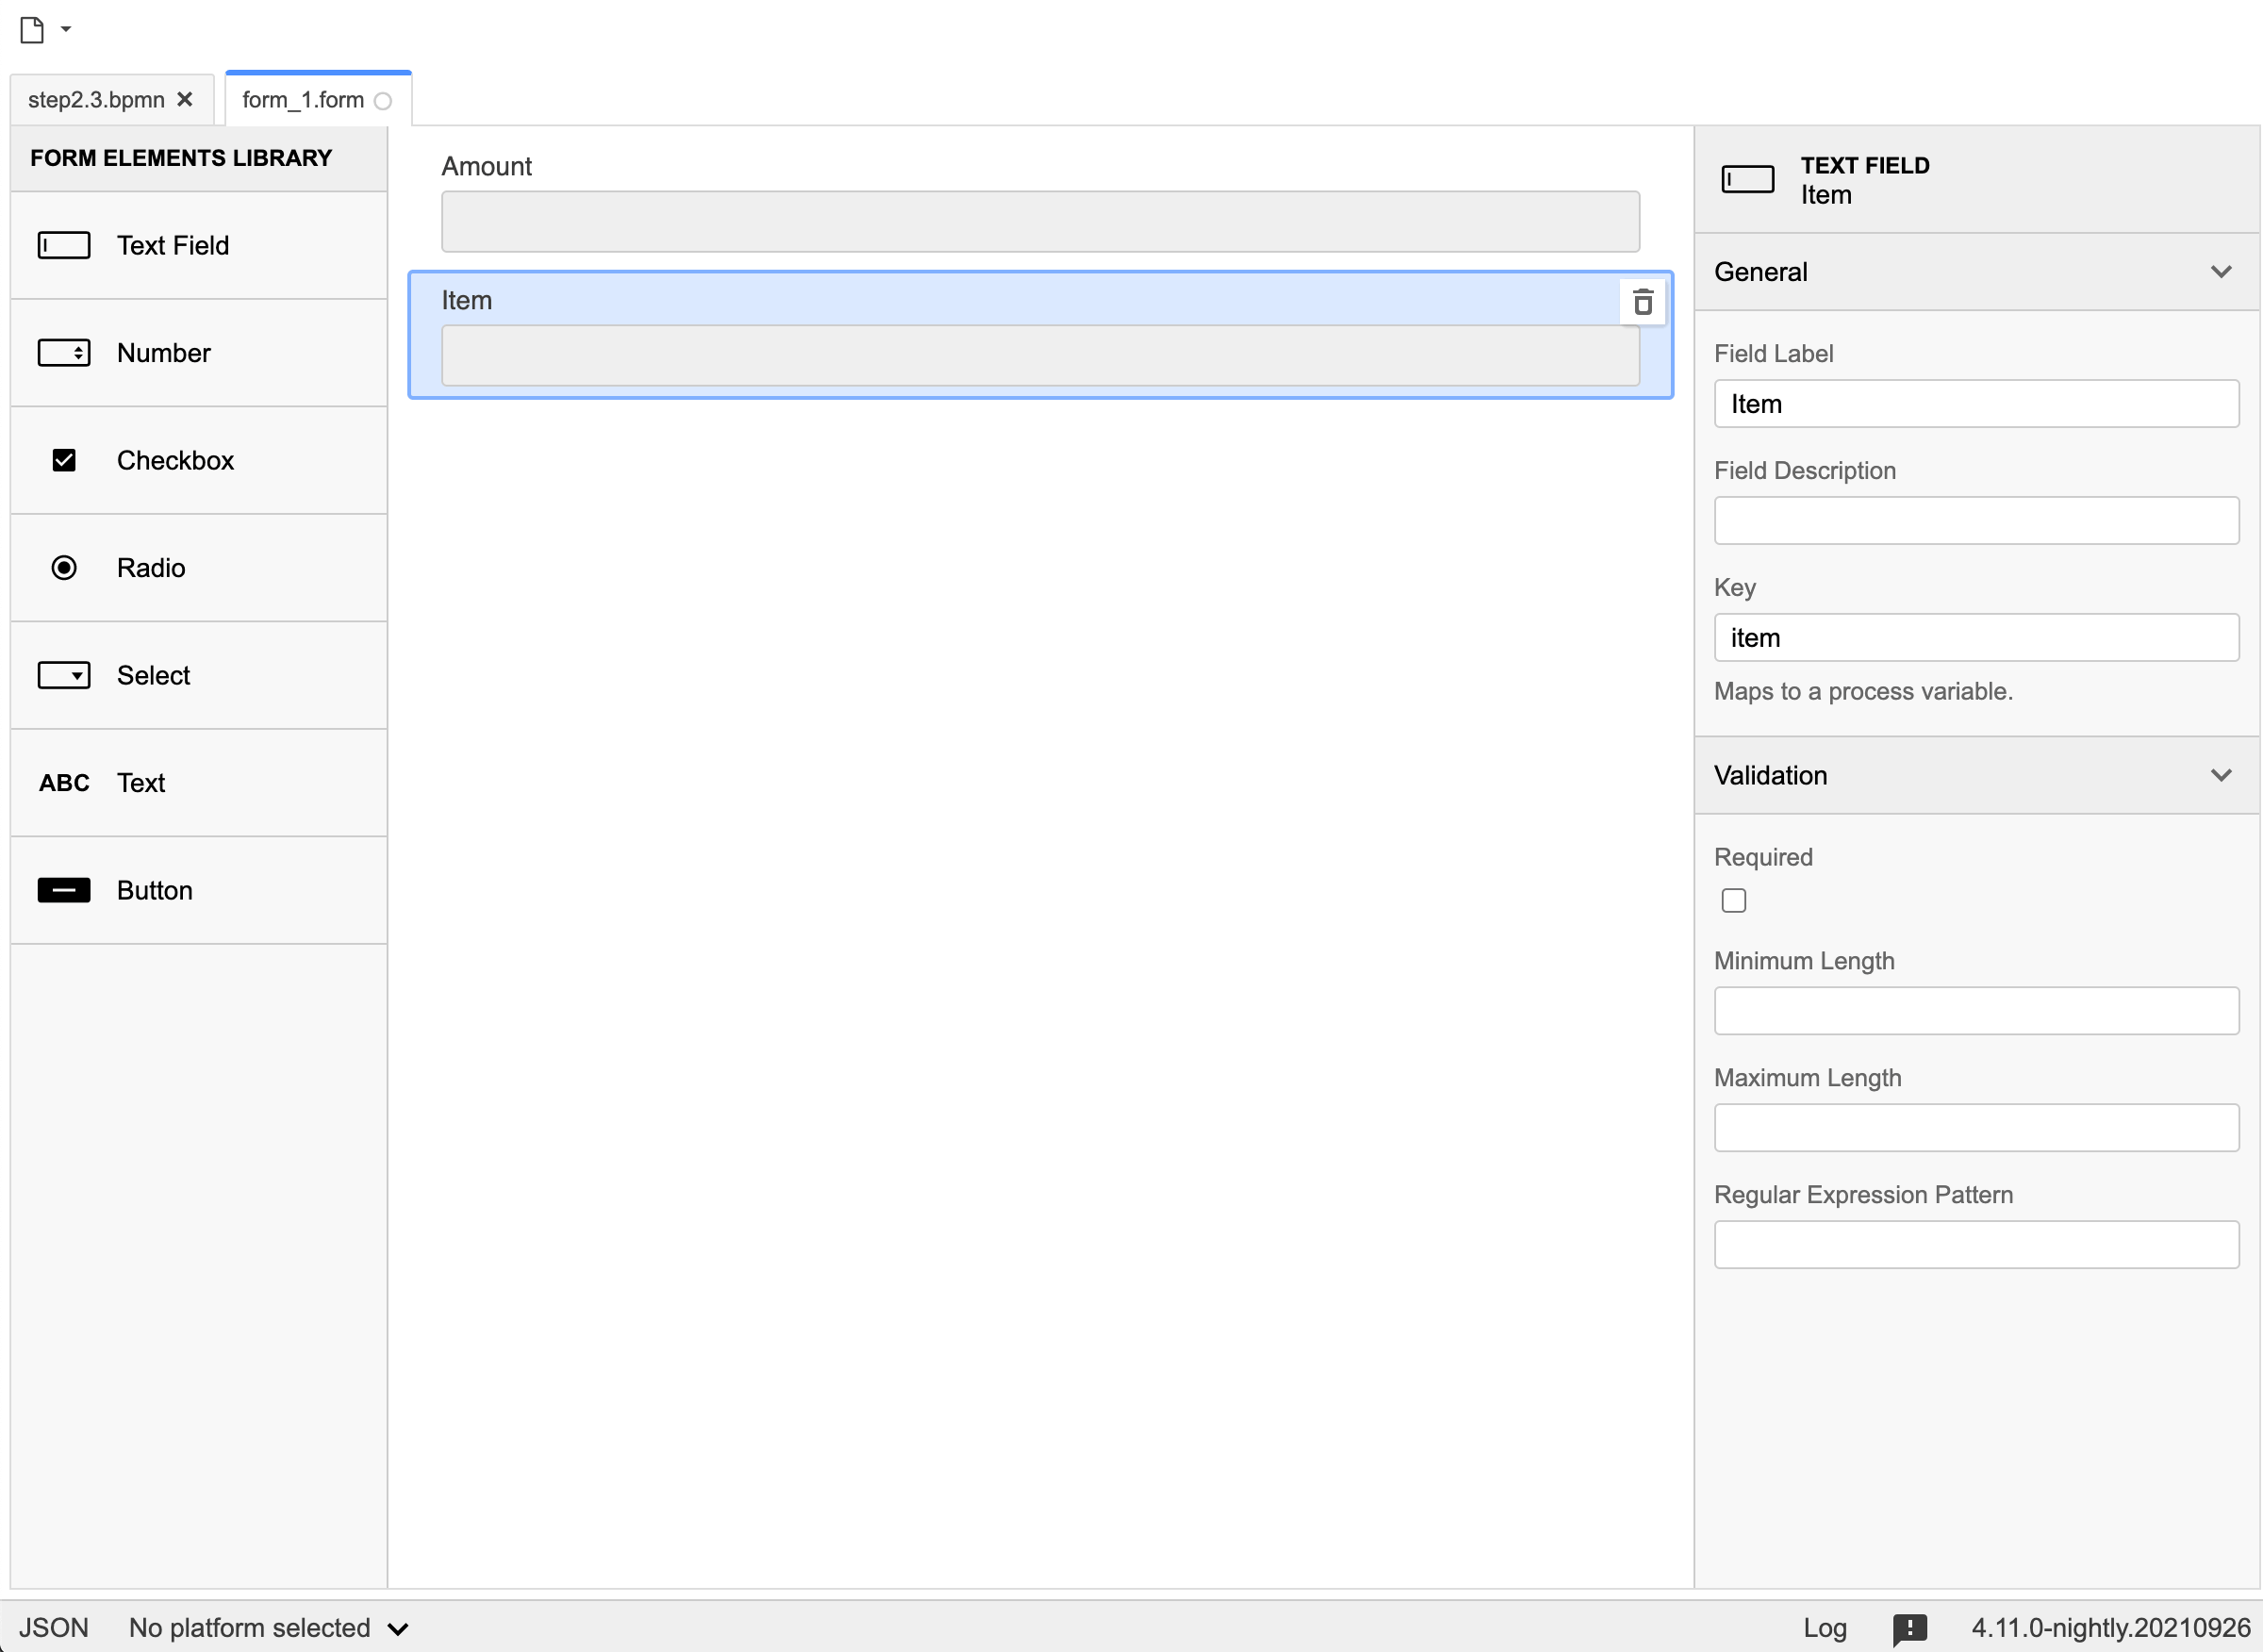
 **Field 2 (Text Field)** — Key: `item`, Label: *Item*
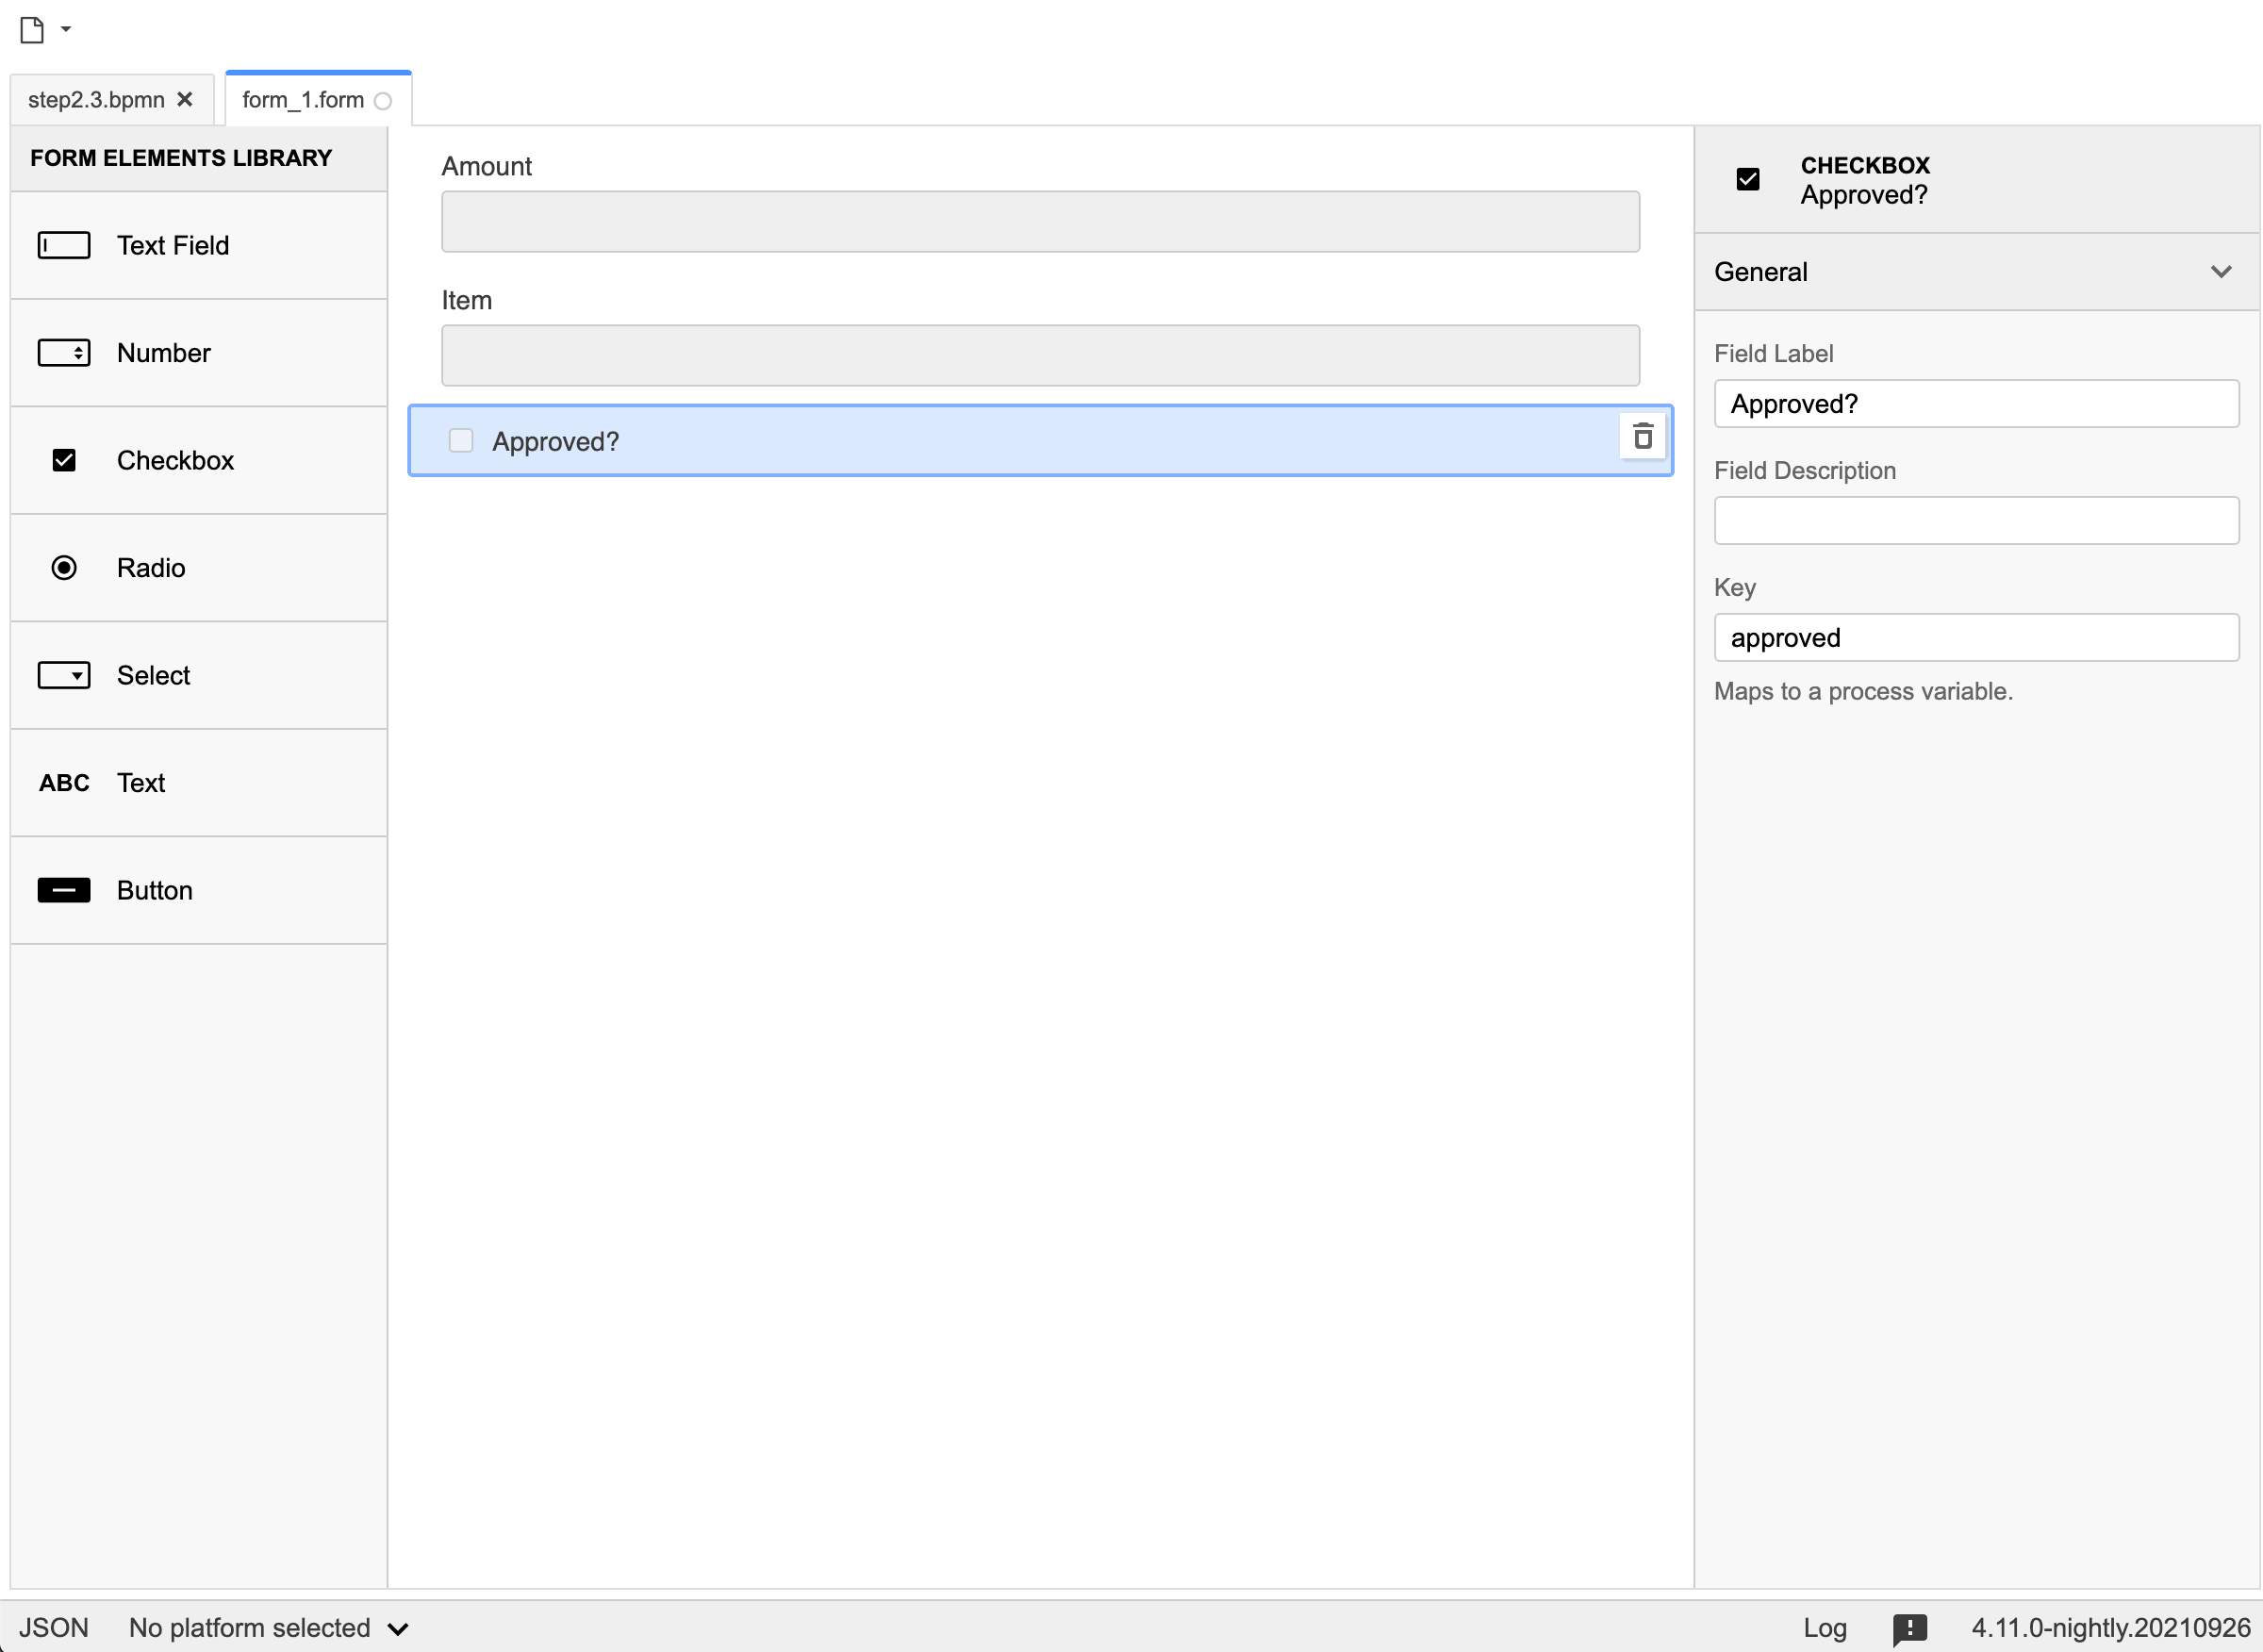
 **Field 3 (Checkbox)** — Key: `approved`, Label: *Approved?*
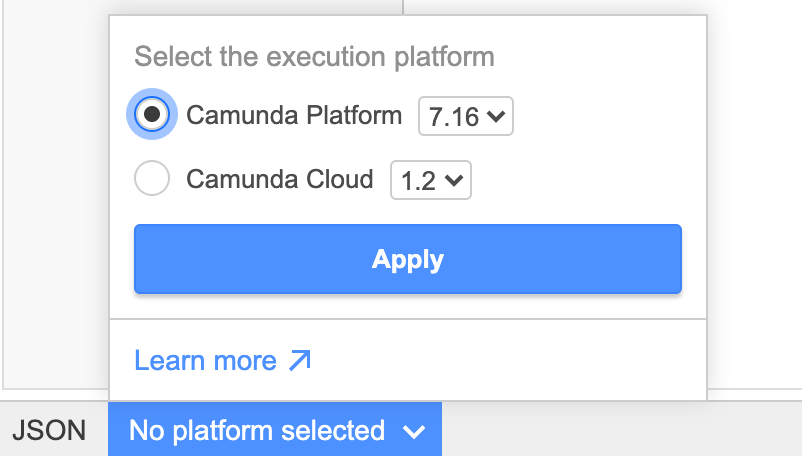
 Select **Camunda Platform** as your execution platform in the lower-left corner and click *Apply*.
 Save the form as `payment.form`.
## Deploy the process
1. Switch back to the process diagram.
2. Click the deploy button.
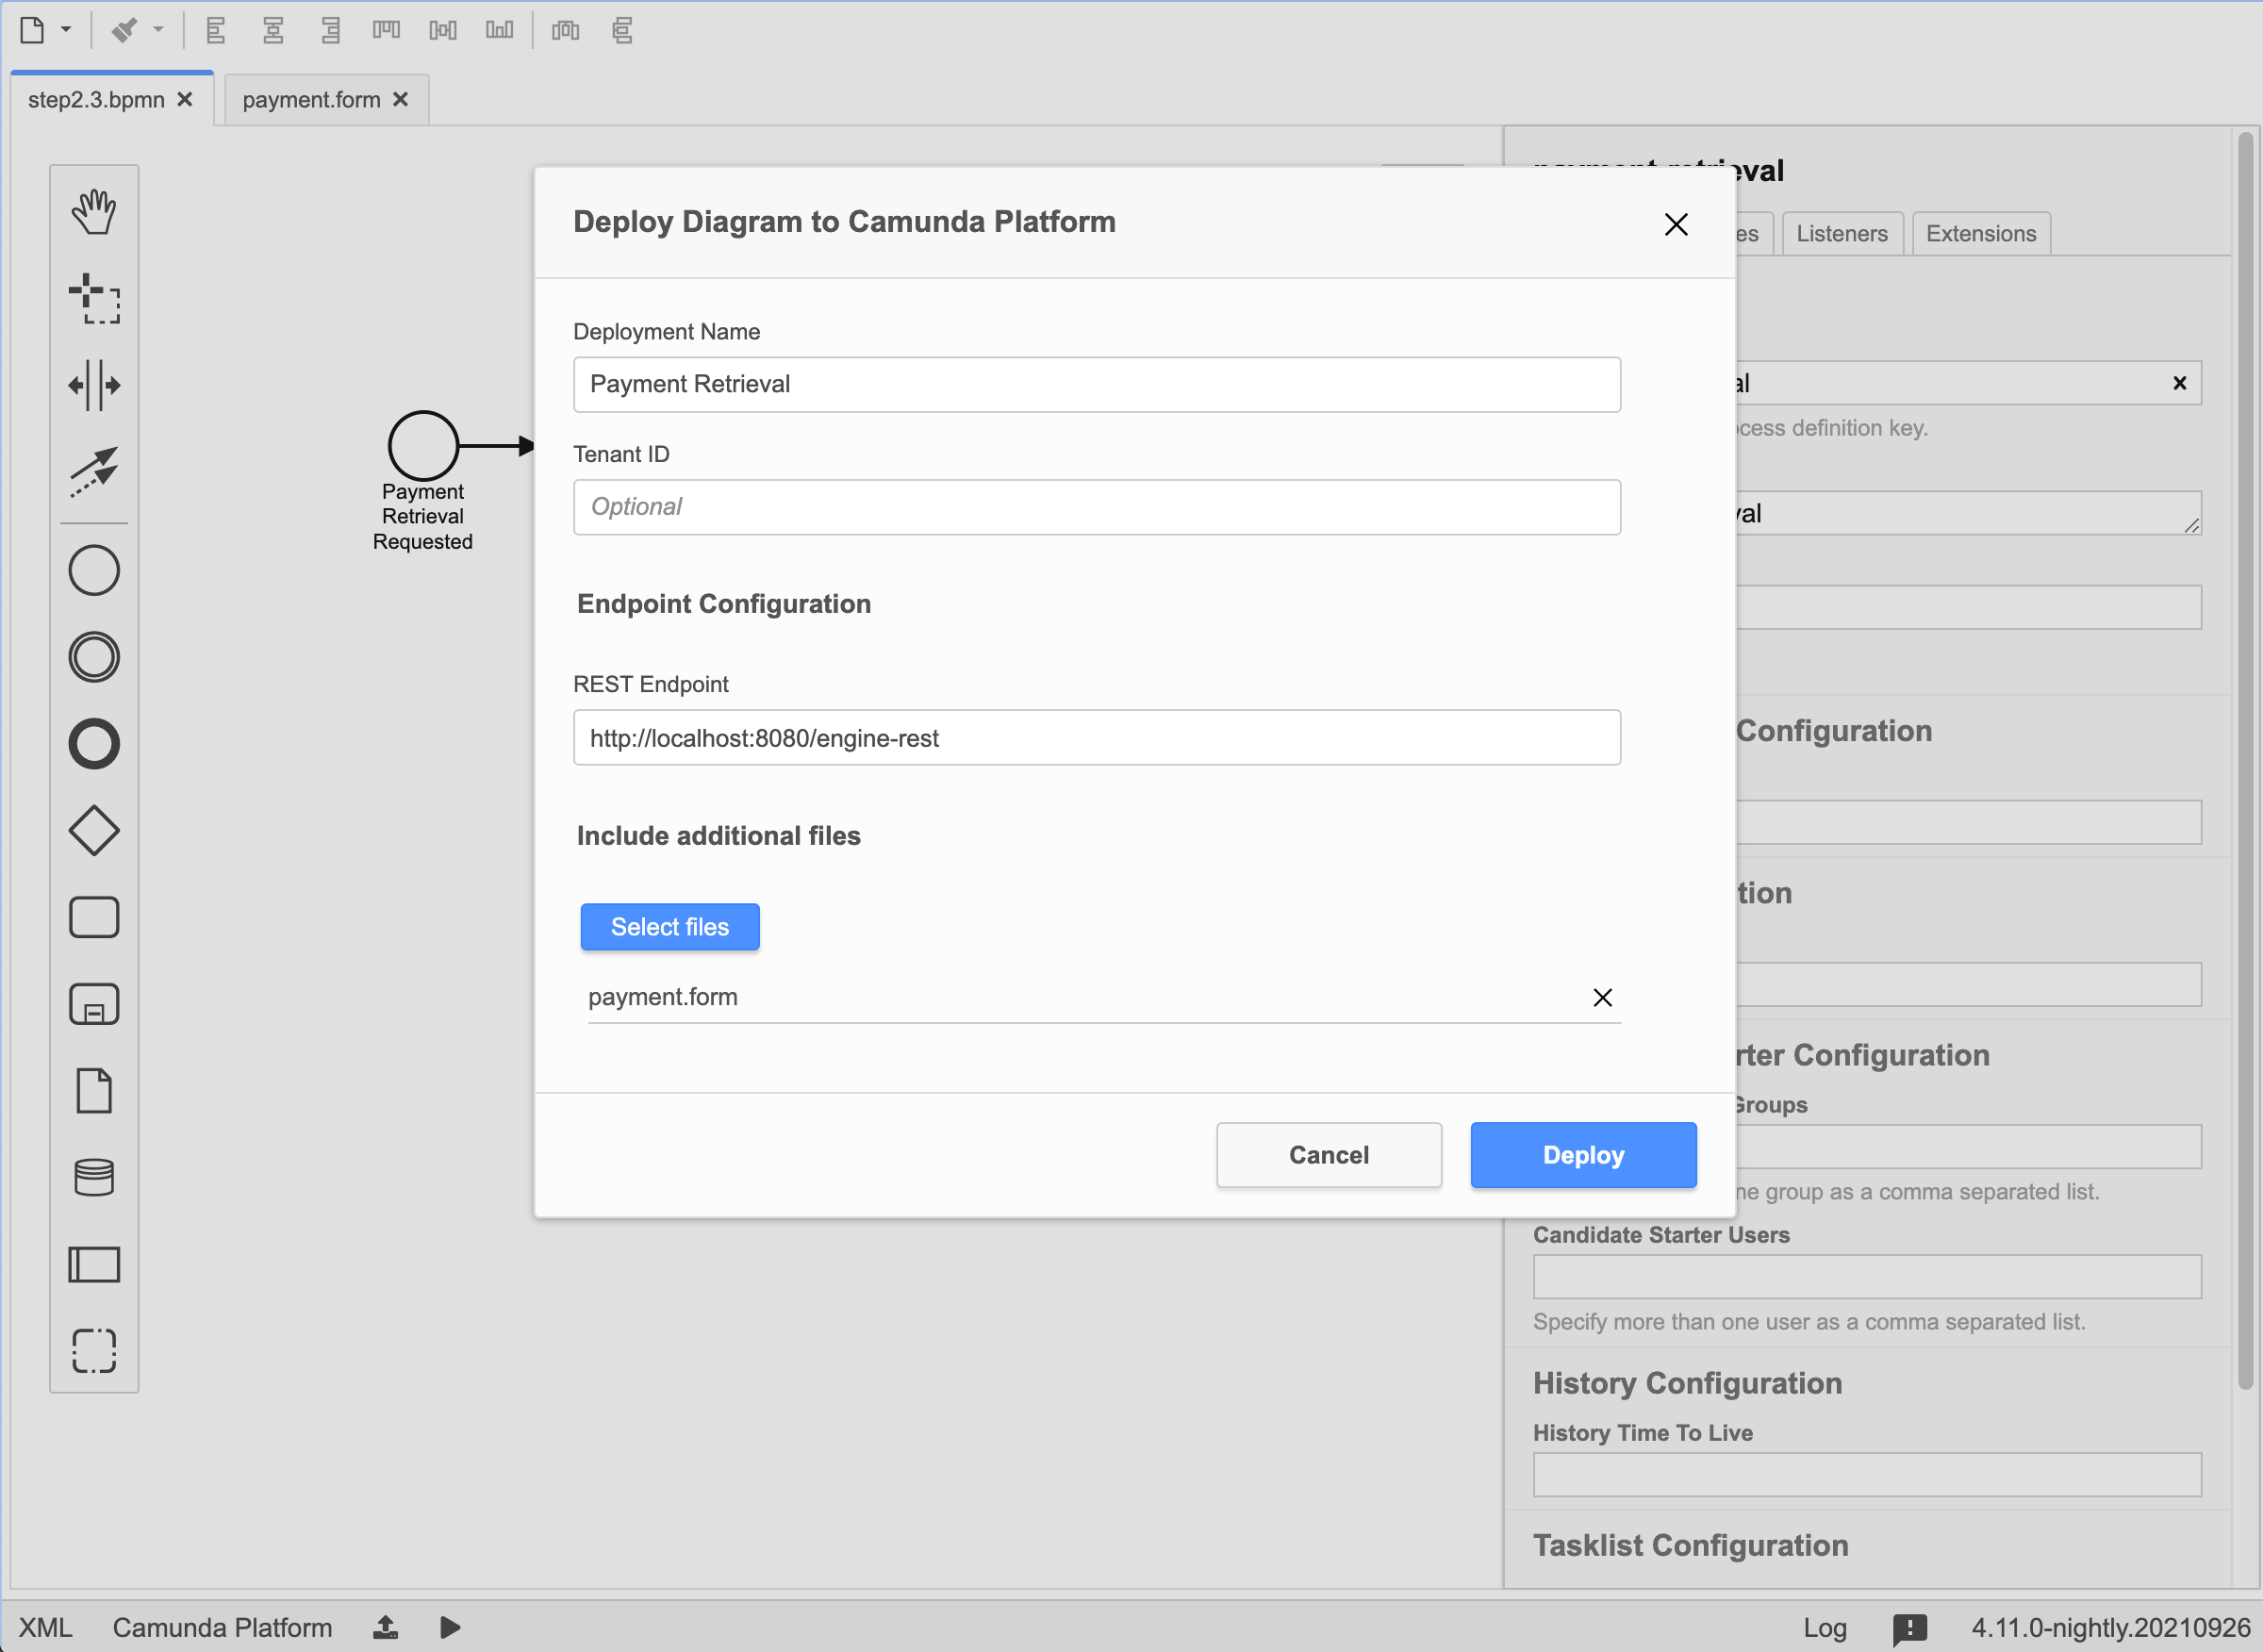
3. In the deployment panel, select `payment.form` under *include additional files*.
4. Click *Deploy*.
Save the form as `payment.form`.
## Deploy the process
1. Switch back to the process diagram.
2. Click the deploy button.
3. In the deployment panel, select `payment.form` under *include additional files*.
4. Click *Deploy*.
 ## Work on the task
Navigate to Tasklist at [http://localhost:8080/camunda/app/tasklist/](http://localhost:8080/camunda/app/tasklist/) and log in with the credentials `demo` / `demo`.
1. Click *Start process*.
2. Select *Payment Retrieval* from the list.
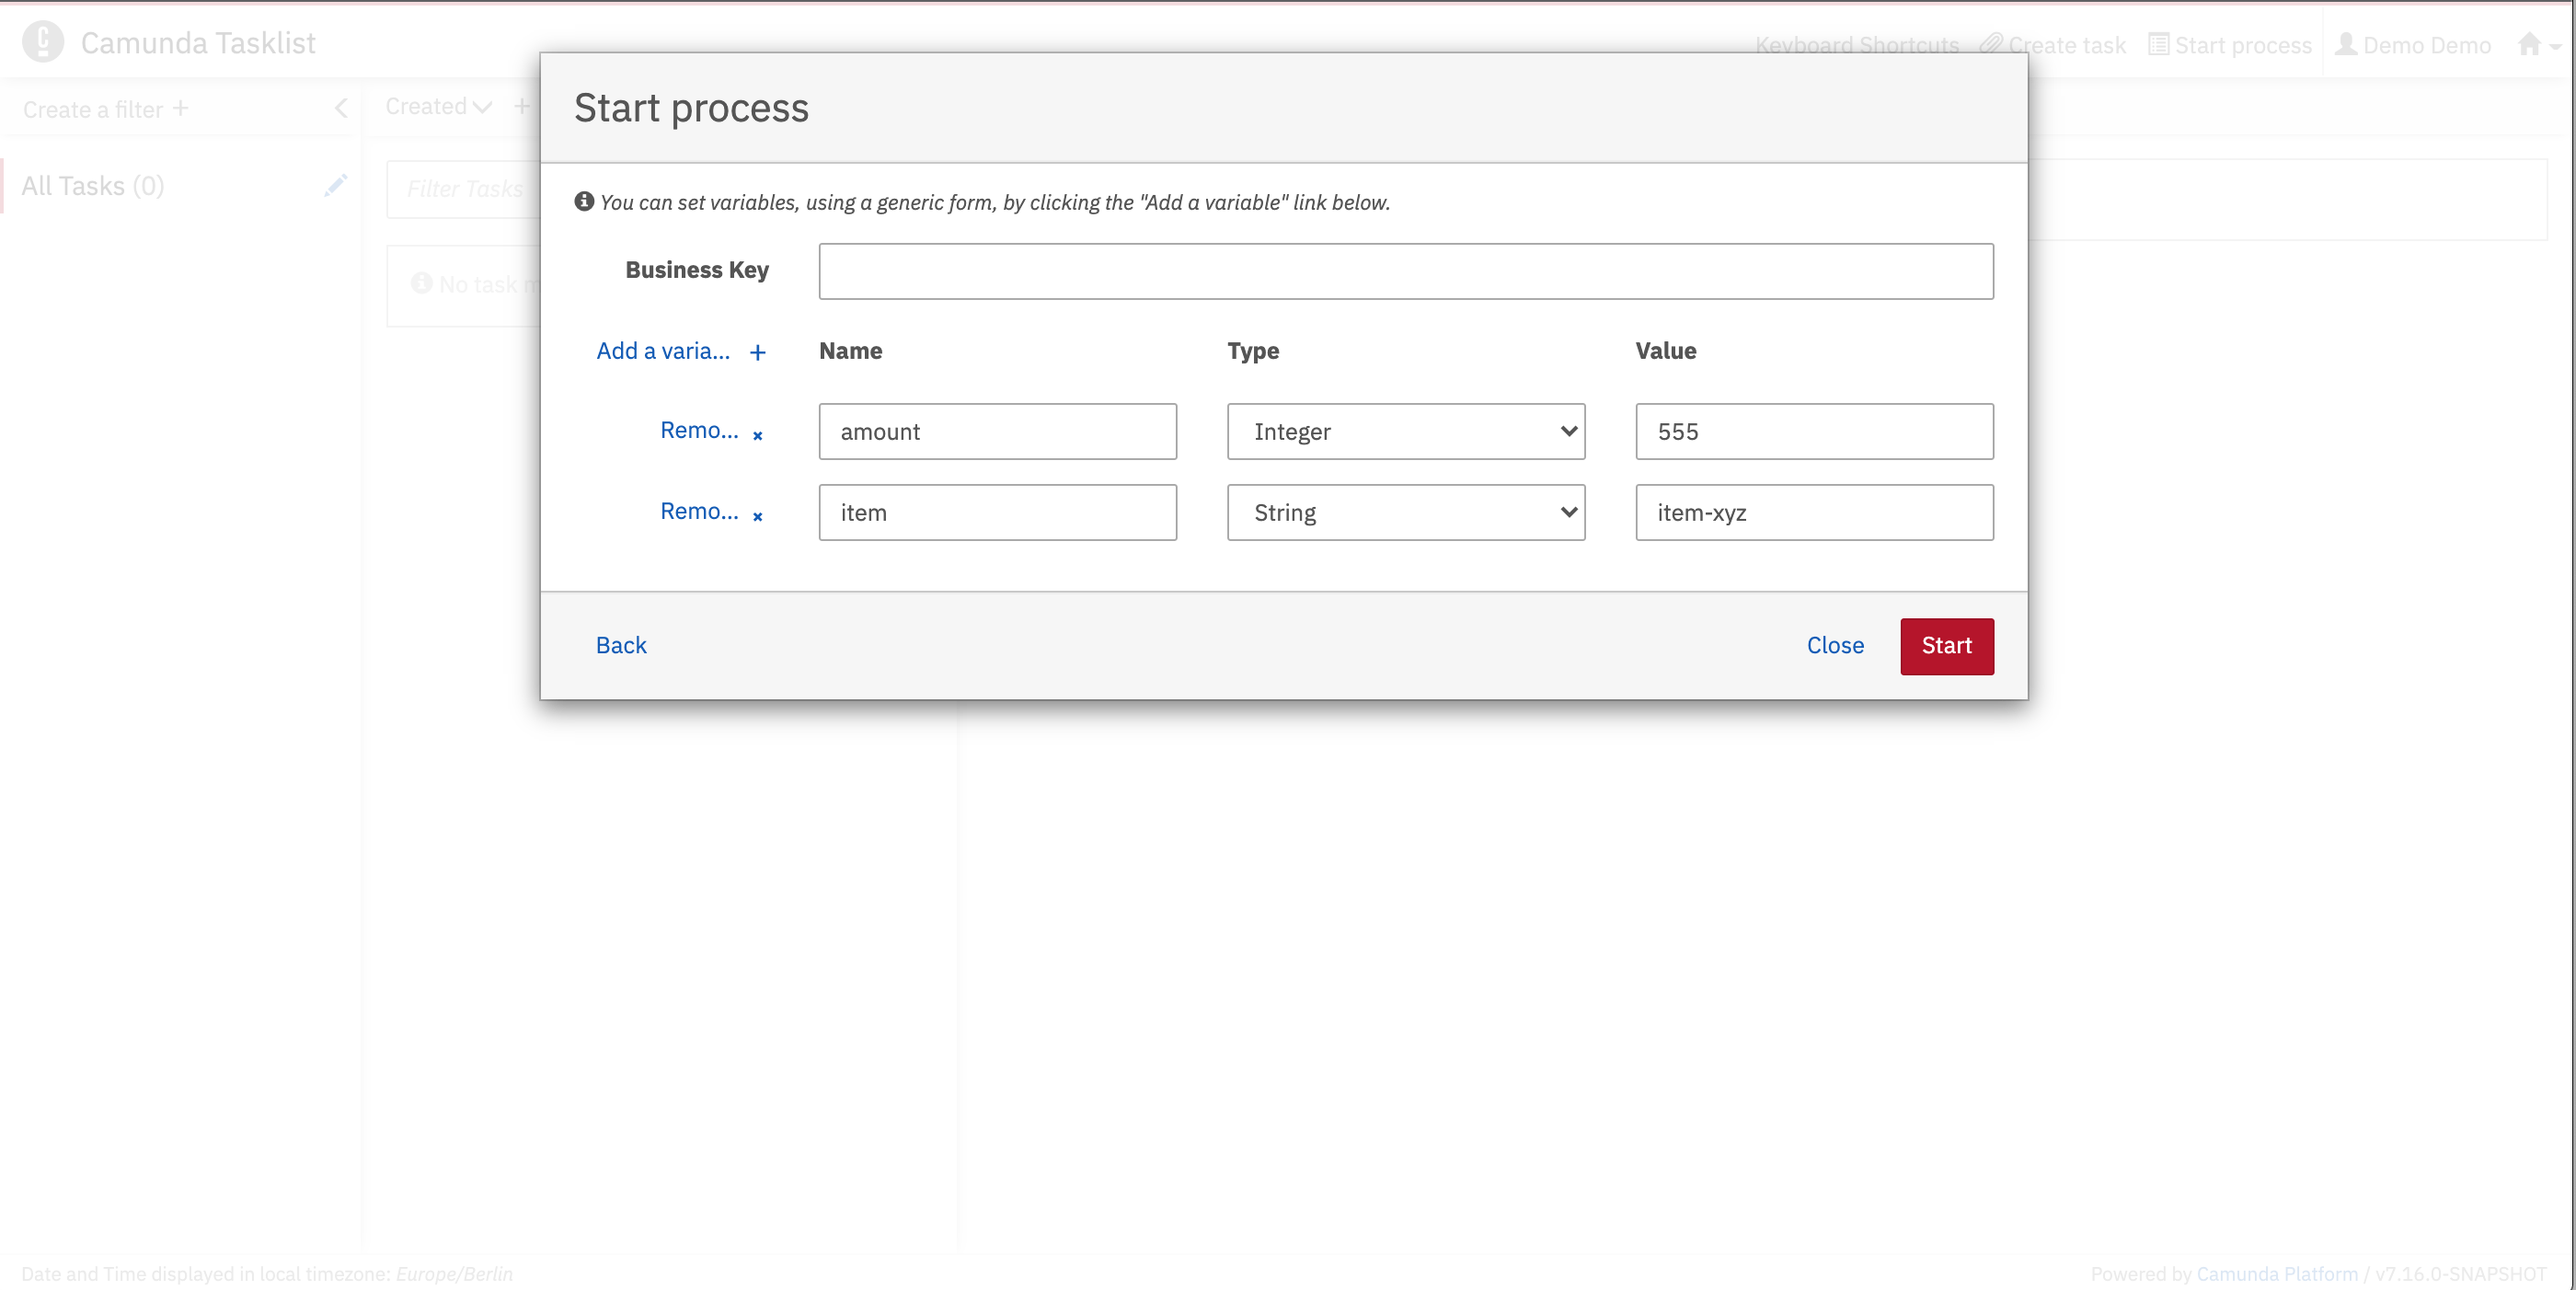
3. Use the generic form to set process variables.
4. Click *Add a variable* to create rows.
5. Click *Start*.
## Work on the task
Navigate to Tasklist at [http://localhost:8080/camunda/app/tasklist/](http://localhost:8080/camunda/app/tasklist/) and log in with the credentials `demo` / `demo`.
1. Click *Start process*.
2. Select *Payment Retrieval* from the list.
3. Use the generic form to set process variables.
4. Click *Add a variable* to create rows.
5. Click *Start*.
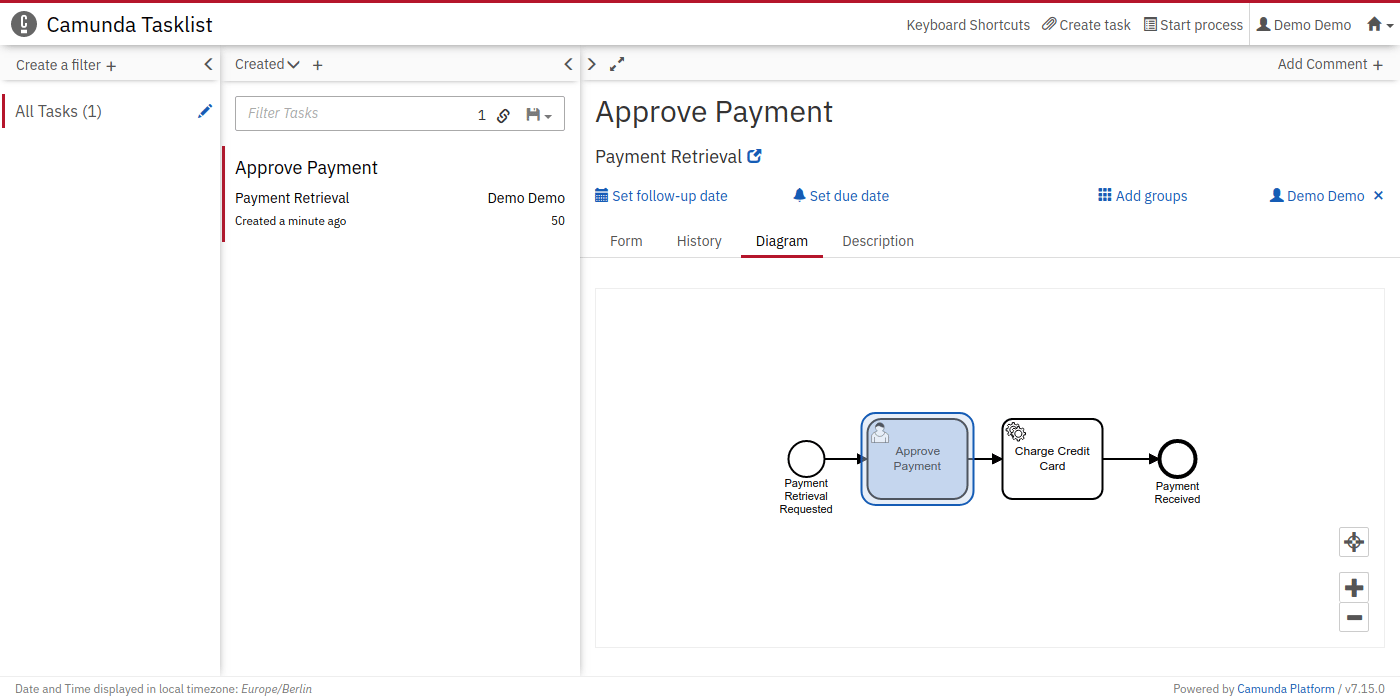
 You should see the *Approve Payment* task in your Tasklist. Select it and view the *Diagram* tab to see the highlighted user task.
 Click the *Form* tab to work on the task using the auto-generated form fields.
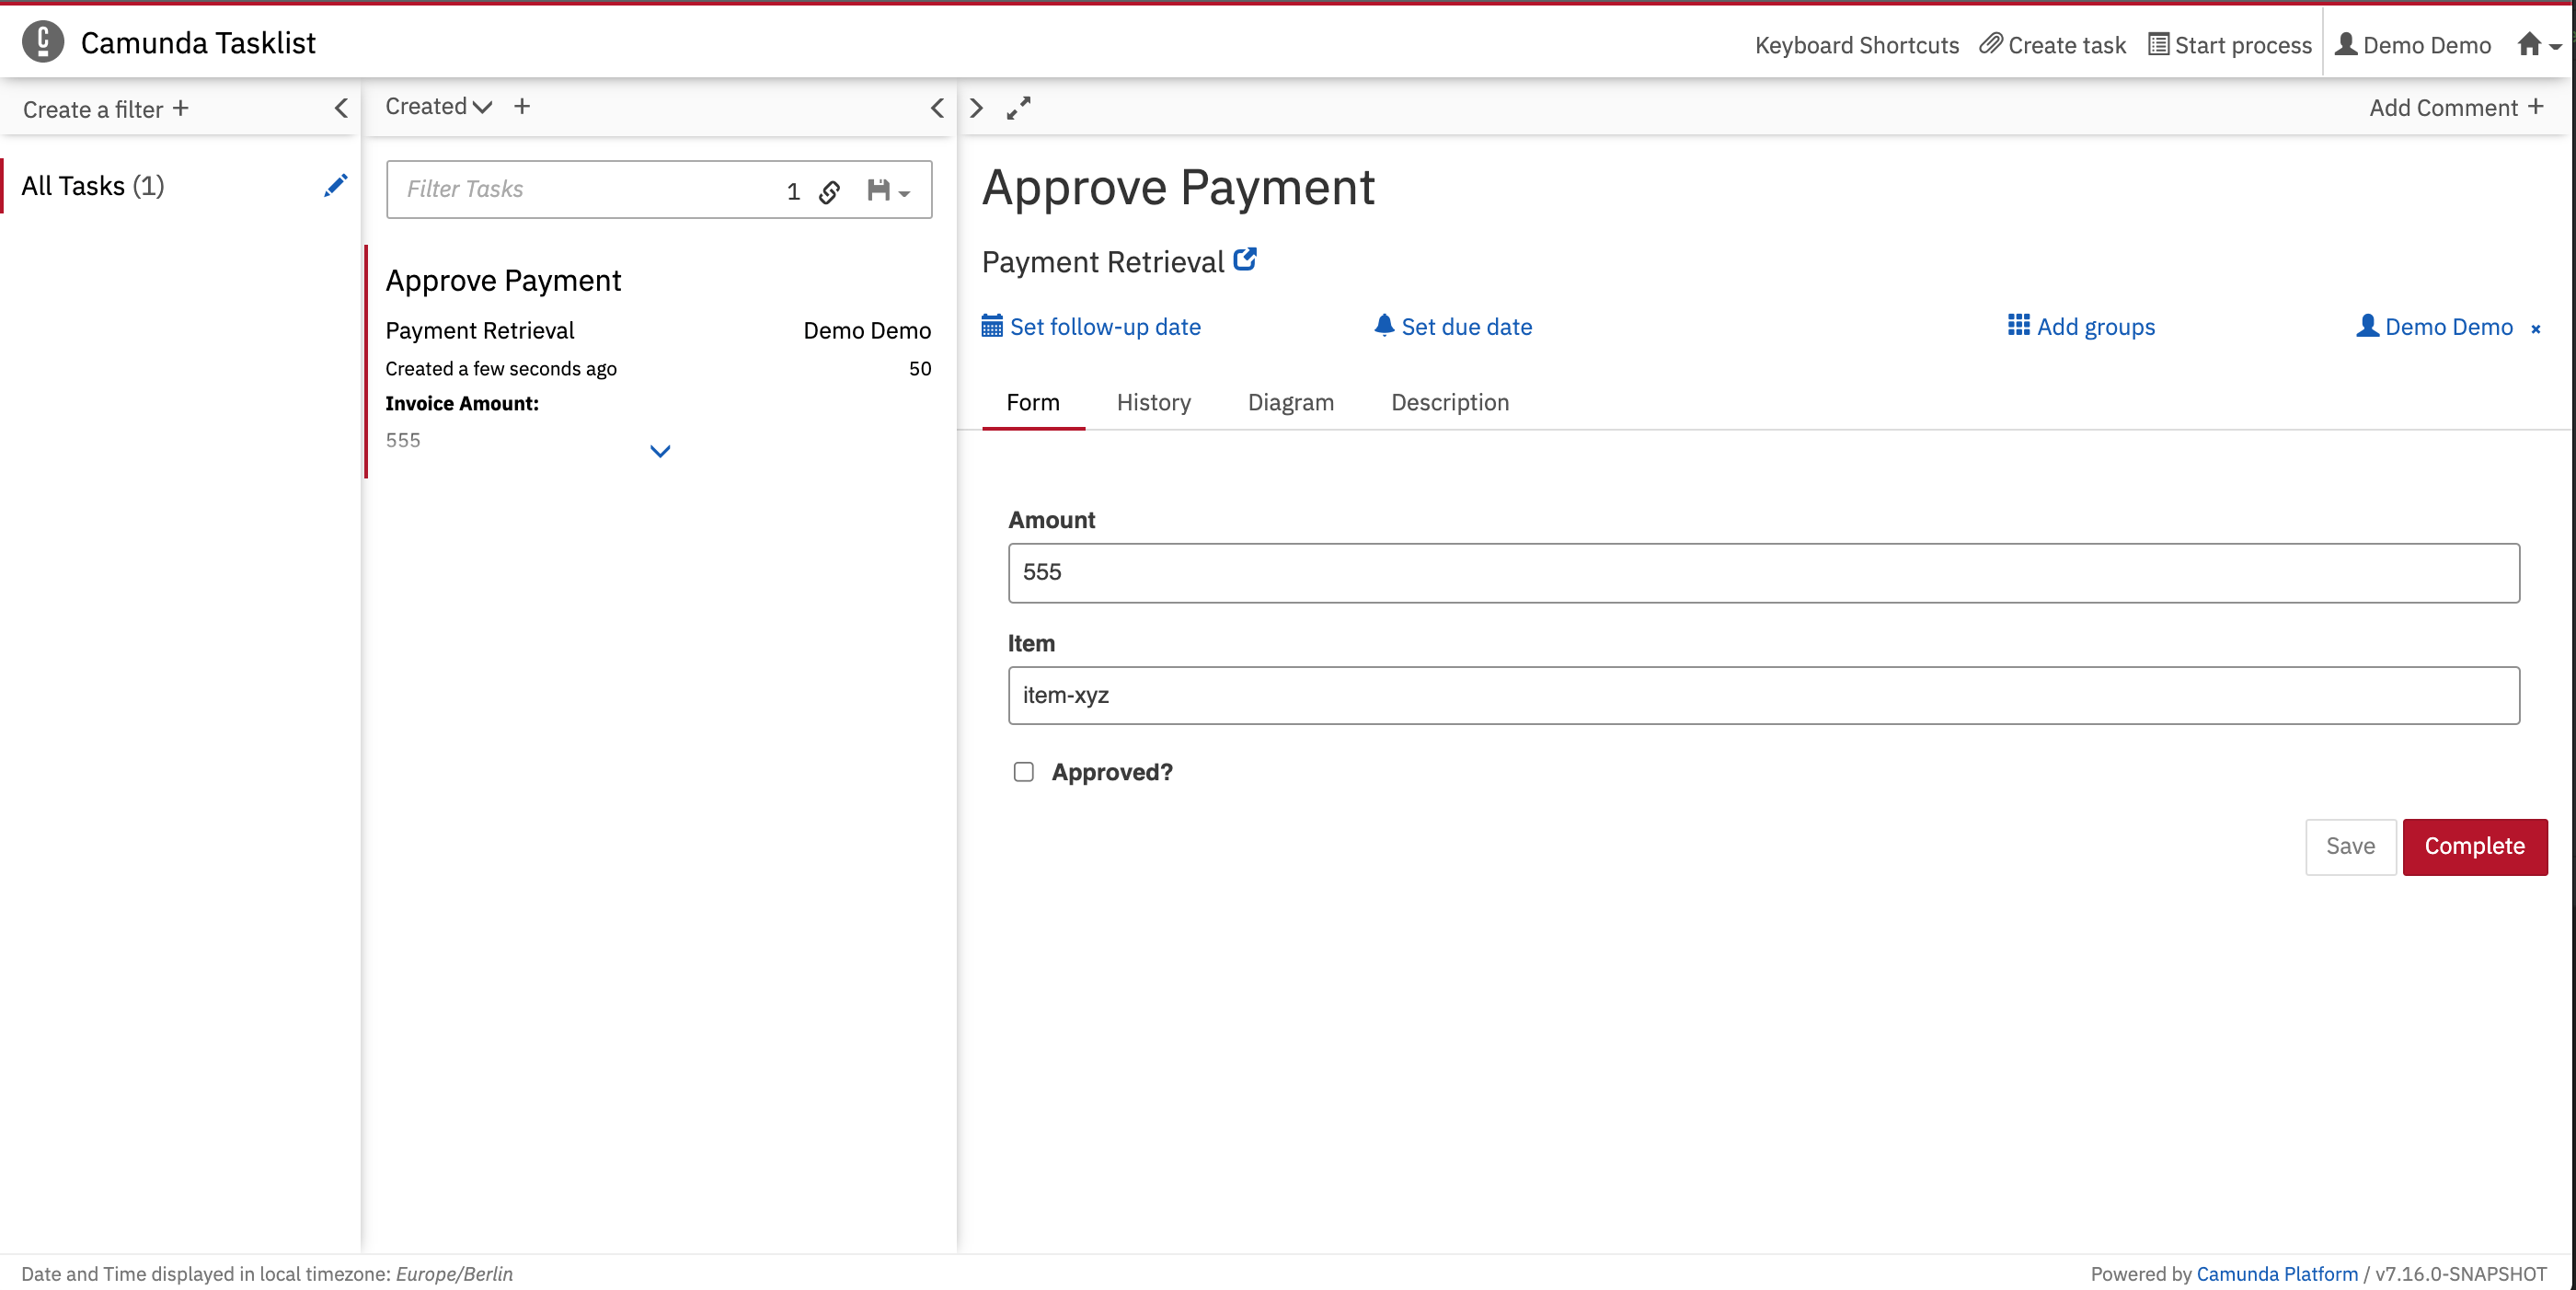 If you don't see any tasks in your Tasklist, you might need a filter. Add one by clicking *Add a simple filter* on the left.
## Next step
Learn how to make your process more dynamic by [adding gateways](/get-started/quick-start/gateway).
**Catch up: get the sources of Step-3**
```bash theme={null}
git clone https://github.com/aseeflow/aseeflow-get-started-quickstart.git
git checkout -f Step-3
```
Or [download as a `.zip`](https://github.com/aseeflow/aseeflow-get-started-quickstart/archive/Step-3.zip).
If you don't see any tasks in your Tasklist, you might need a filter. Add one by clicking *Add a simple filter* on the left.
## Next step
Learn how to make your process more dynamic by [adding gateways](/get-started/quick-start/gateway).
**Catch up: get the sources of Step-3**
```bash theme={null}
git clone https://github.com/aseeflow/aseeflow-get-started-quickstart.git
git checkout -f Step-3
```
Or [download as a `.zip`](https://github.com/aseeflow/aseeflow-get-started-quickstart/archive/Step-3.zip).