

/webadmin and form-based login.
Prerequisites
- JDK 17 or 21 (see supported environments)
- Maven 3.9+ (or the Maven wrapper,
mvnw)
1. Create a new Spring Boot application
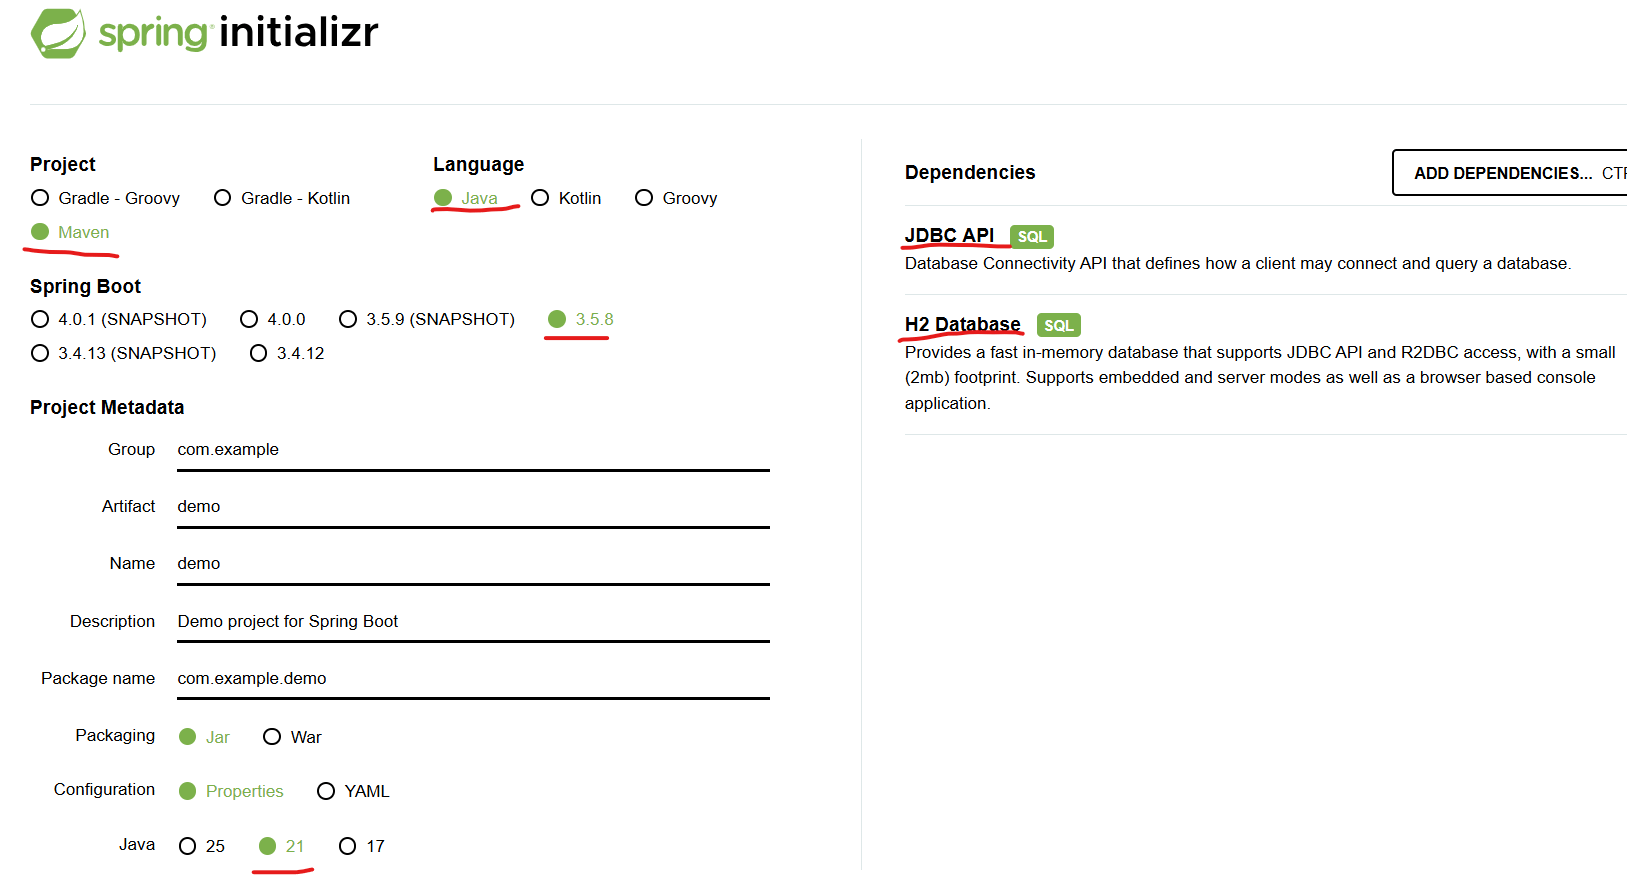
Generate a fresh project at start.spring.io with these settings:- Project: Maven
- Spring Boot: the version start.spring.io offers — you switch it to 3.5.16 in step 2
- Language / Java: 17 or 21
- Packaging: Jar
2. Download, extract, and open the project
- Click Generate to download the project as a ZIP.
- Extract it to a working folder.
- Switch the project to Spring Boot 3.5. WebAdmin 1.0.2 runs on Spring Boot 3.5 and is built on 3.5.16; Spring Boot 4 is planned for ASEE Flow 2.0. start.spring.io offers only Spring Boot 4, so make three changes in
pom.xml:- Set the parent’s
<version>to3.5.16. - Remove the
spring-boot-h2consoledependency. In Spring Boot 3.5 the H2 console is part of Spring Boot itself. - Replace
spring-boot-starter-jdbc-testwithspring-boot-starter-test.
- Set the parent’s
- Open the extracted folder — the one containing
pom.xml— in your IDE (for example IntelliJ IDEA, Eclipse, or VS Code). Trust the project when prompted; the IDE imports Maven and downloads the dependencies.
3. Add the ASEE Flow repositories
Customer access required. ASEE Flow artifacts — Maven dependencies, Docker images, and pre-packaged distribution downloads — are hosted in a private repository available to ASEE Flow customers. To obtain the repository location and access credentials, contact ASEE Software Solutions. See Accessing artifacts for setup steps.
pom.xml, using the URLs you received from ASEE, and put your credentials in matching <server> entries in ~/.m2/settings.xml:
<server> entries (with the same <id> values) and your credentials to ~/.m2/settings.xml, then reload Maven after saving.
4. Add the dependencies
Define the versions in<properties> (use the latest available versions). Since 1.0.2, WebAdmin has the same version number as the platform:
<dependencies>:
spring-boot-starter-security is declared as provided inside the WebAdmin starter, so you must include it explicitly. WebAdmin must never be left without a security layer.aseeflow-bpm-spring-boot-starter-webapp— the ASEE Flow engine and web apps.aseeflow-webadmin-spring-boot-starter— the WebAdmin React UI and backend, served at/webadmin.aseeflow-bpm-spring-boot-starter-rest— the engine REST API that WebAdmin consumes.spring-boot-starter-security— required for a production-ready security layer.
5. Configure the datasource and admin user
Createsrc/main/resources/application.yaml:
This is example configuration for local development — an embedded H2 file database and a
demo / demo admin user. Do not use it in production: use a production-grade database and create real users. See Security.6. Run and verify
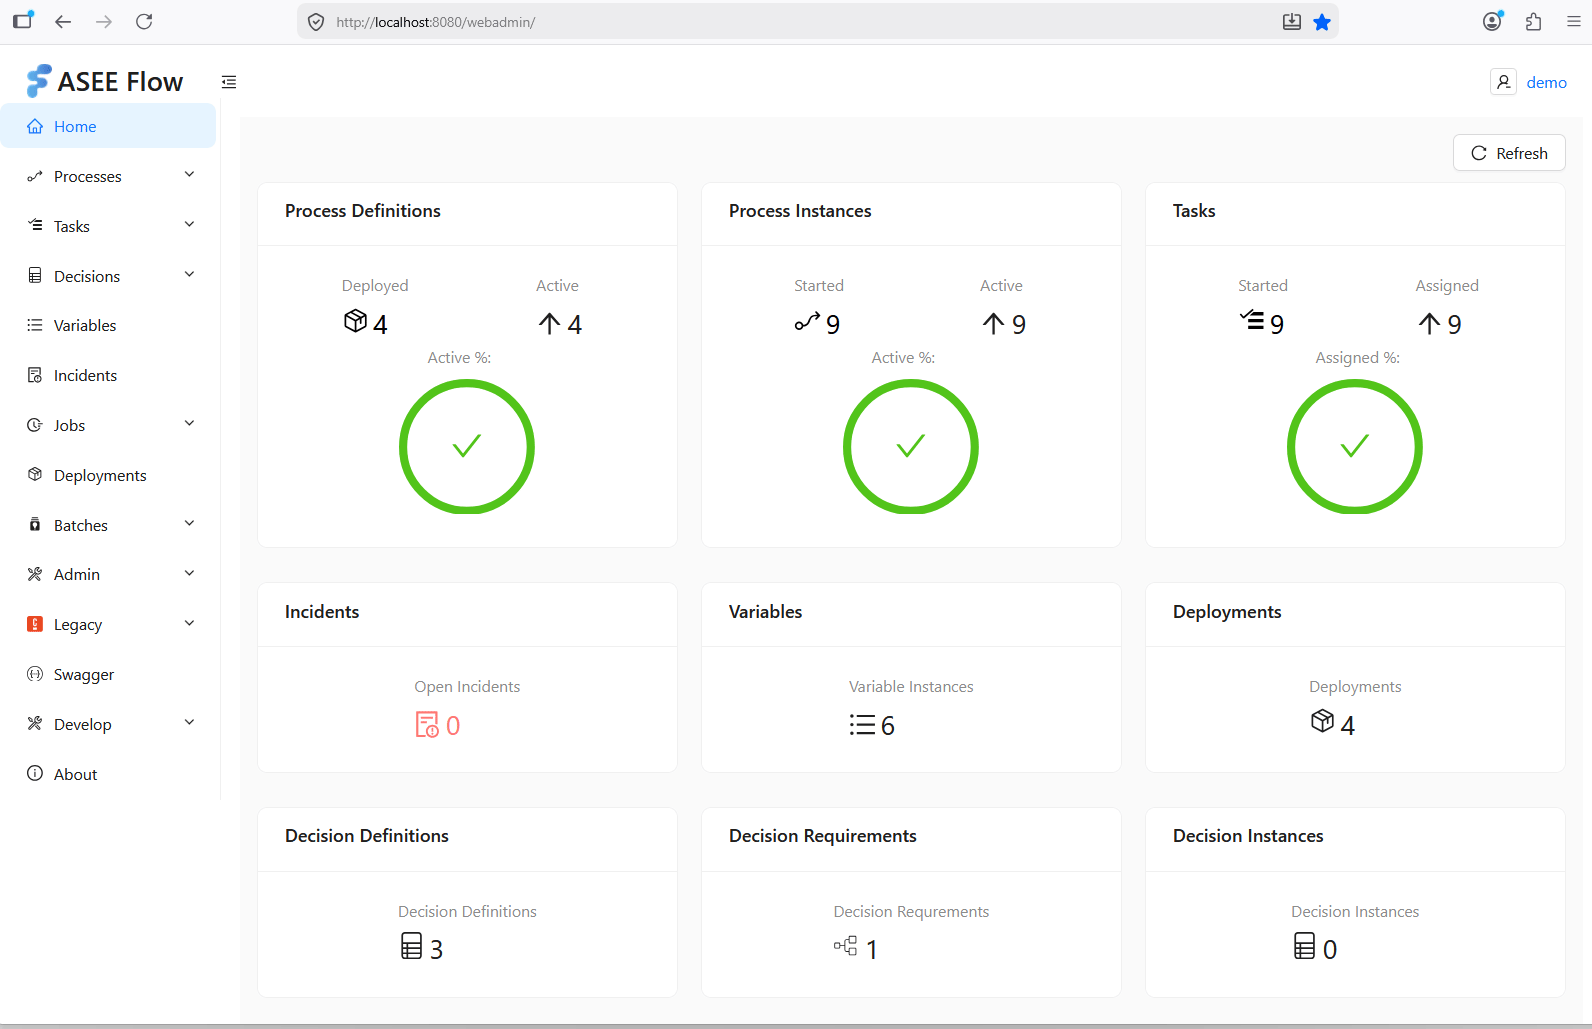
- WebAdmin UI —
http://localhost:8080/webadmin(log in withdemo/demo)
Engine REST
Check that the ASEE Flow REST API is up by inspecting the engine version athttp://localhost:8080/engine-rest/version
— it returns the engine version as JSON.
In form mode the REST API is protected, so open it in the same browser after logging into WebAdmin (the session authorizes the request); an unauthenticated request returns 401.
Connecting the H2 console
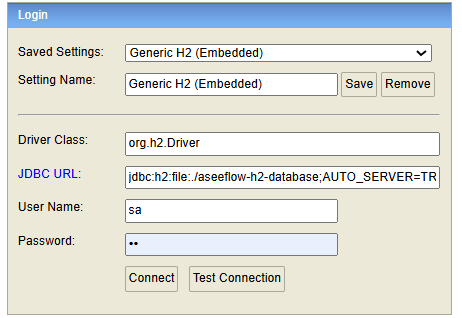
Openhttp://localhost:8080/h2-console and enter the same values as the application’s datasource, then click Connect:
- Driver Class —
org.h2.Driver - JDBC URL —
jdbc:h2:file:./aseeflow-h2-database;AUTO_SERVER=TRUE - User Name —
sa - Password —
sa
spring.datasource.url you set in step 5.
Next steps
- Build a process — model and run a BPMN process or DMN decision in the Get Started tutorials.
- Secure it — pick an authentication mode and harden for production in Authentication and Security.
- Configure — see the full configuration reference.