Create a new decision diagram
Create a new DMN diagram by clicking File > New File > DMN Diagram.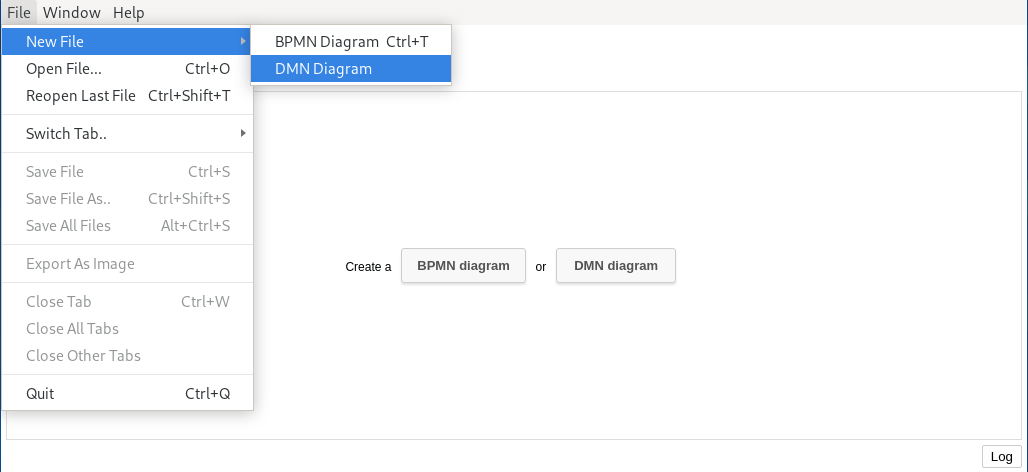
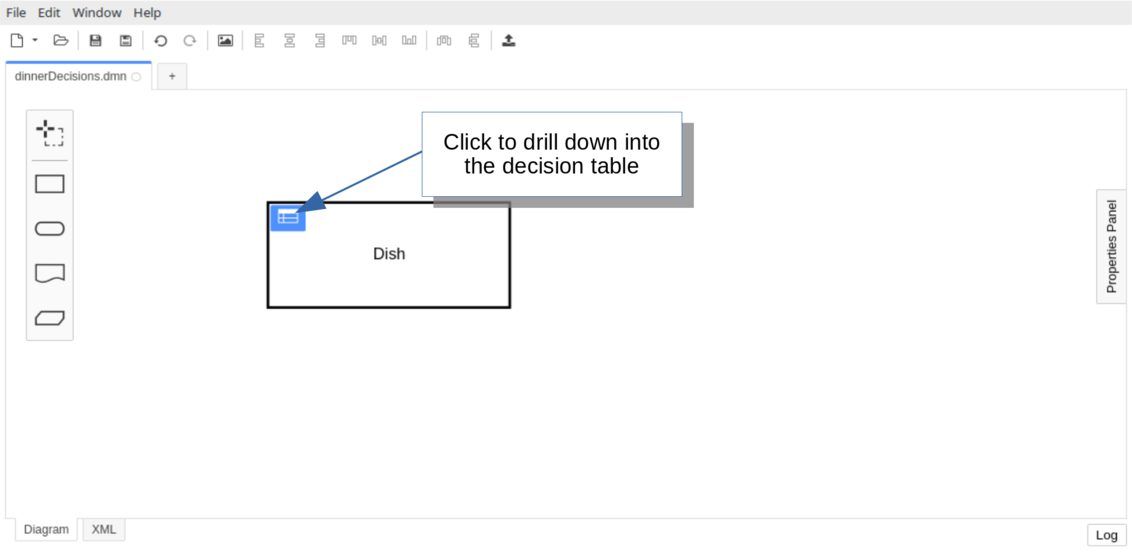
Start with the table header
Select the decision and open the properties panel on the right side. Change the text todish as the technical ID of the decision, which is used to reference the decision inside the process application.

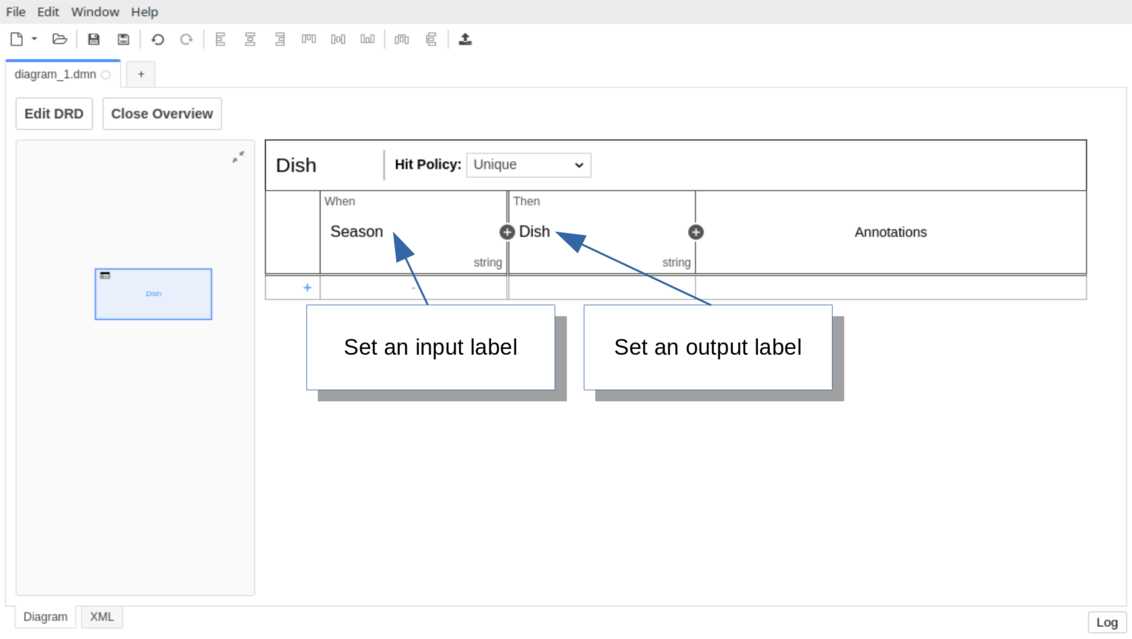
Configure the input expression and the output name
Assuming the input value for Season comes from a variable namedseason, set the input expression to season.
Double-click the Season field and enter season as the expression in the modal menu.
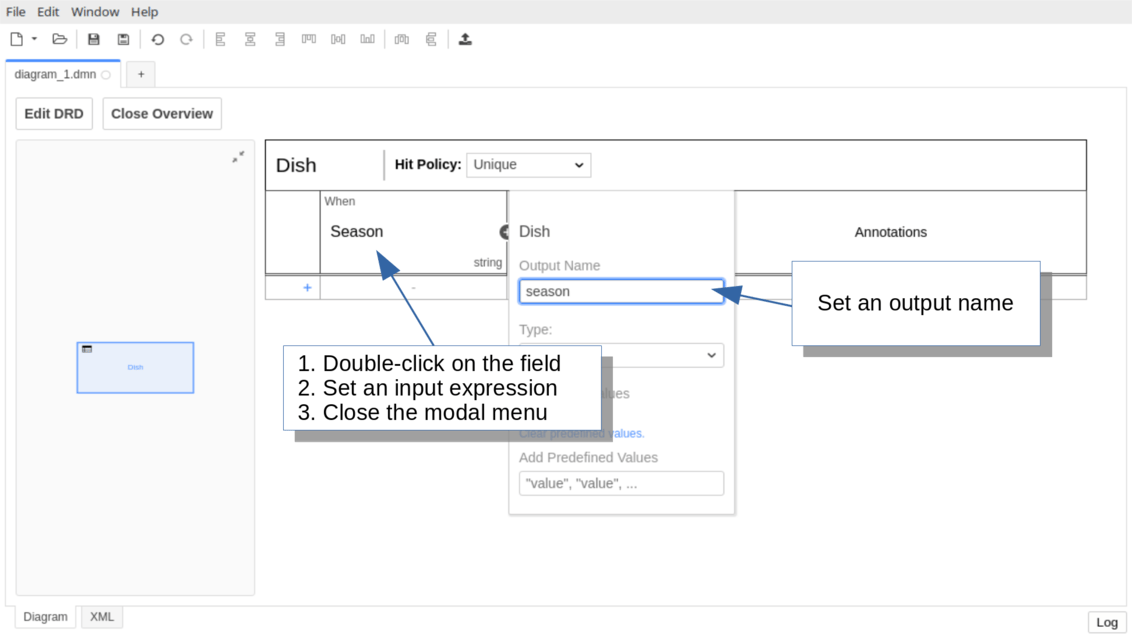
desiredDish as the output name.
Configure the type of the input and output
If the input value for Season is provided as a string, set the input type tostring.
Double-click the Season column header. Open the Type dropdown and select string.
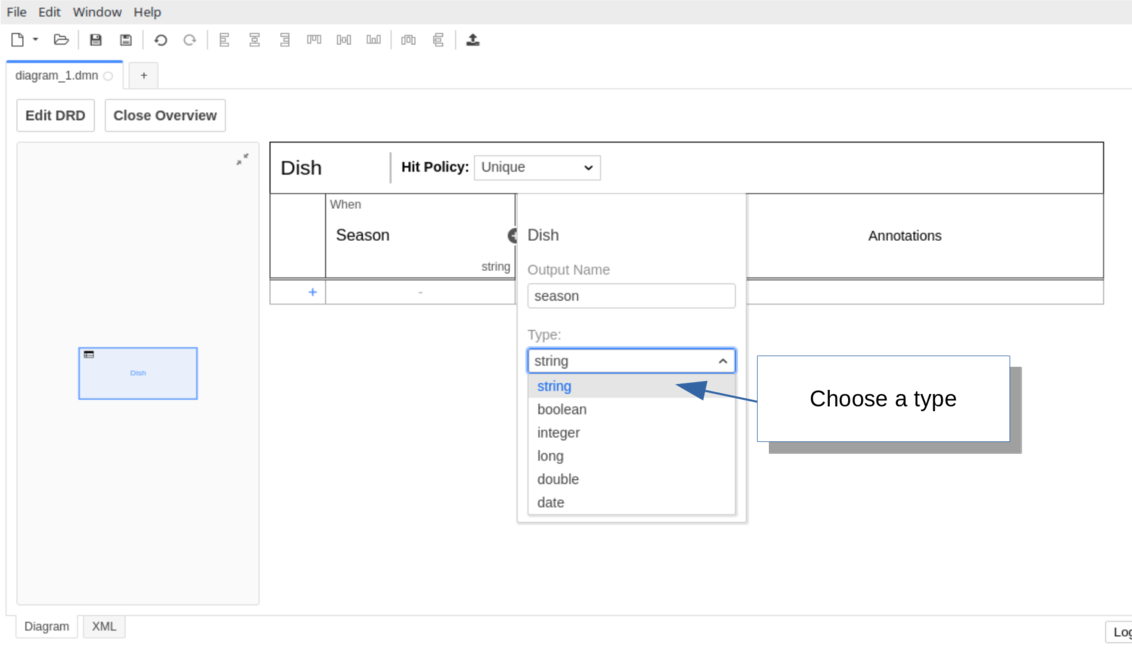
string as the output type.
Add rules
Add the first rule by clicking the + button at the bottom of the table. In the new row, typeFall in the input column and Spareribs in the output column.
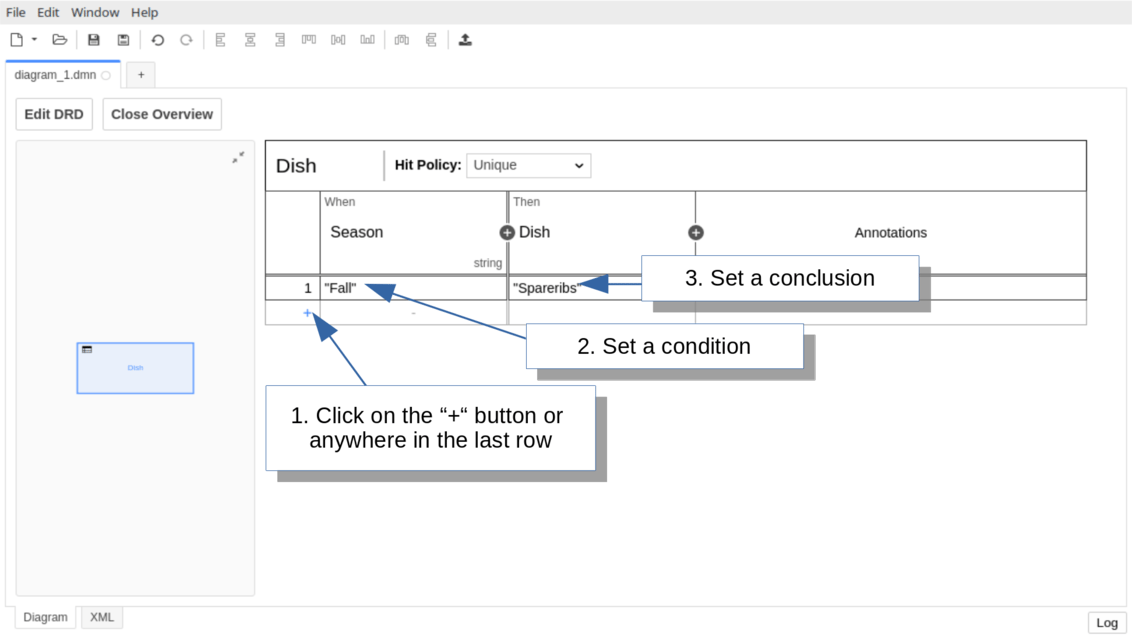
Fall is the condition (input entry) of the rule, expressed in FEEL. It checks whether the input value (the season variable) equals Fall.
Spareribs is the conclusion (output entry) of the rule and returns the string Spareribs.
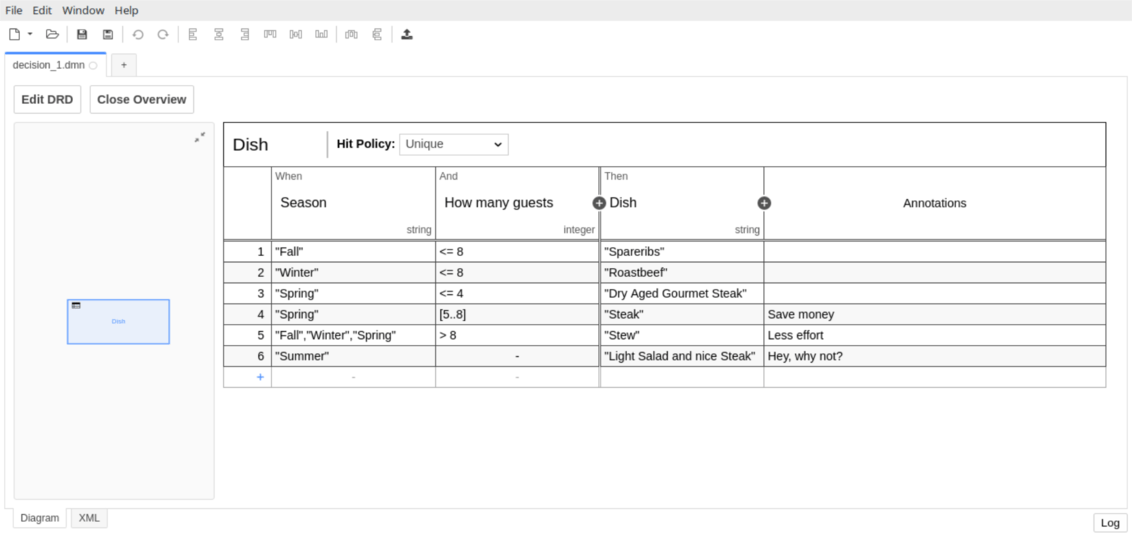
Next, add a second input How many guests with the input expression guestCount and type integer. Fill the table with additional rules for the remaining seasons.
Configure the hit policy
Set the hit policy to UNIQUE, which specifies that only one rule can match. Click the Hit Policy dropdown and choose UNIQUE.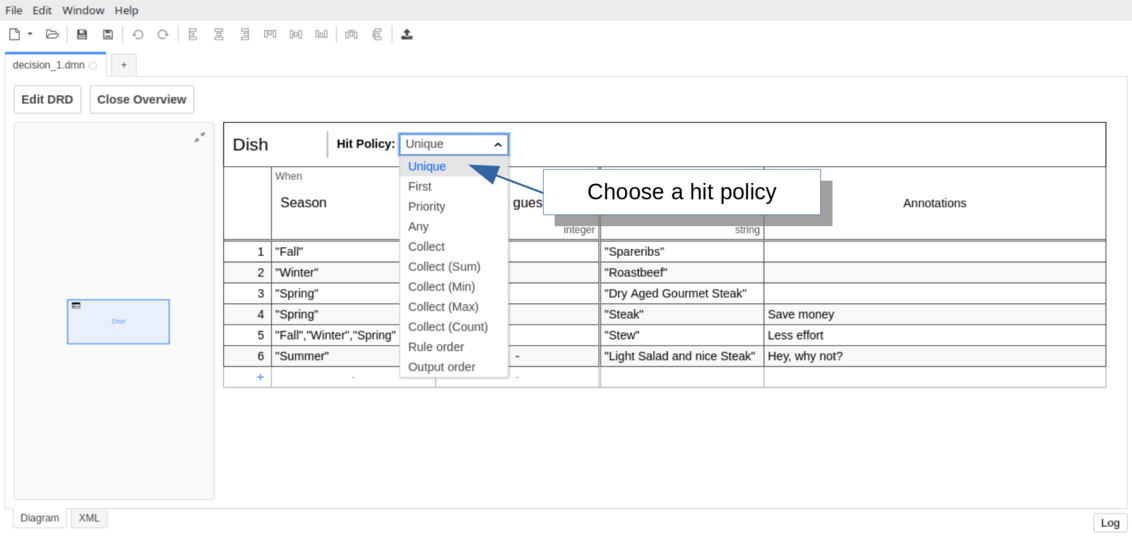
The default hit policy is UNIQUE. If your rules are mutually exclusive, you don’t need to change this setting.
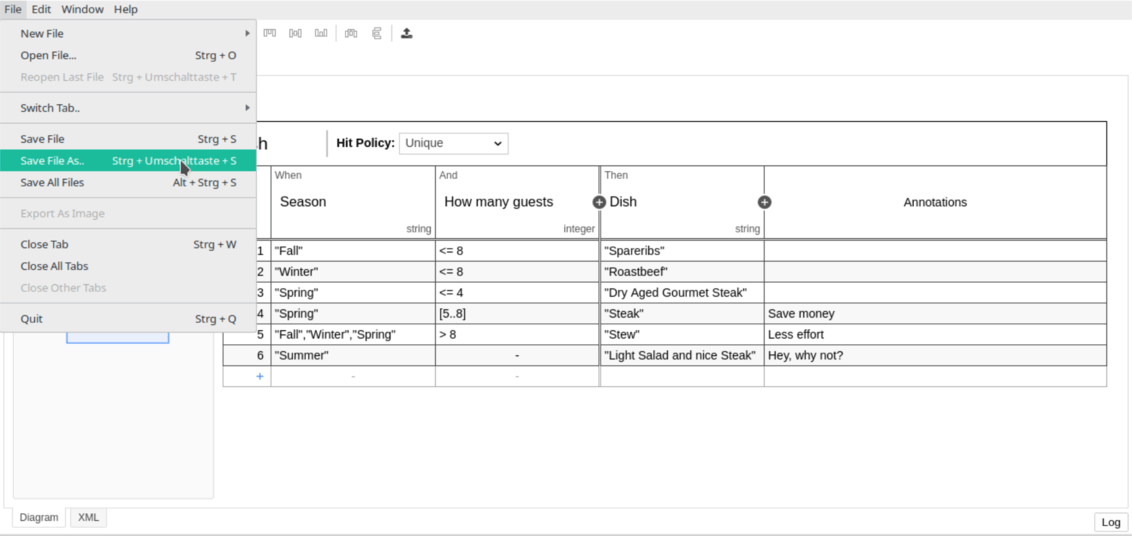
Save the decision table
Save your changes by clicking File > Save File As…. Navigate to your application project directory and place the model in thesrc/main/resources folder.