This section covers deploying a BPMN process and starting a new instance to verify the simple process works.
BPMN diagrams must be created for the process engine they’re deployed on. You cannot run a BPMN diagram modeled for ASEE Flow (Camunda Platform 7) on Camunda 8, or vice versa.

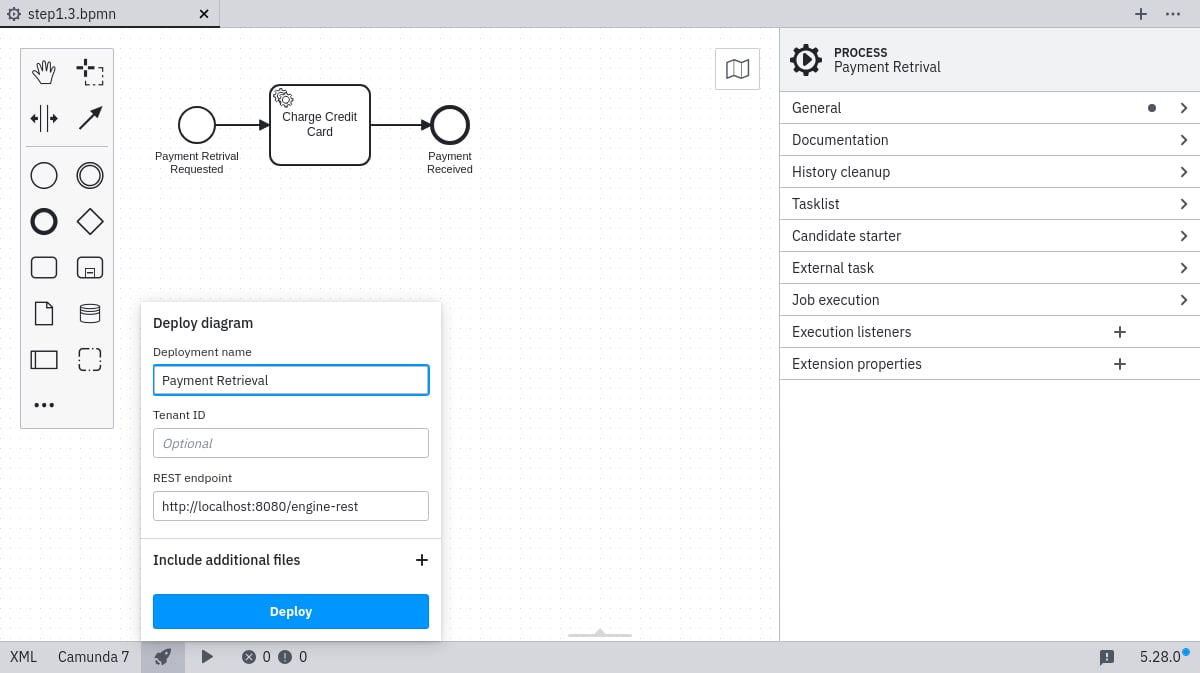
Using the Camunda Modeler to deploy

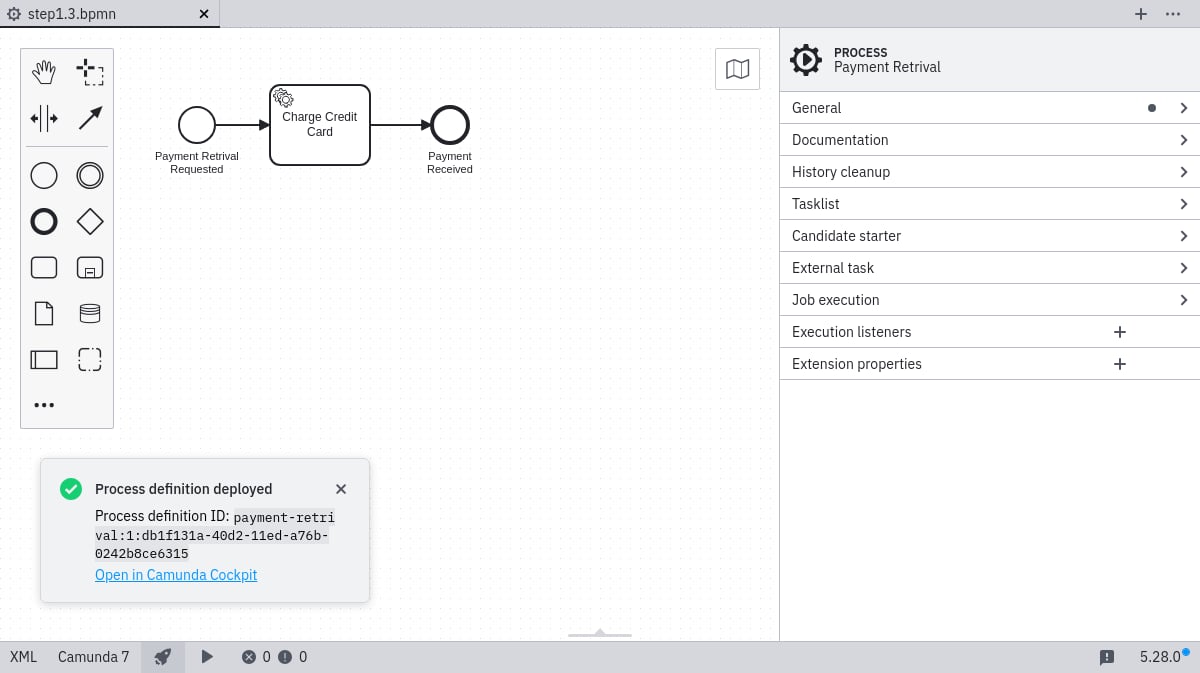
Click the deploy button in the Camunda Modeler and provide the deployment name Payment Retrieval. You must supply a URL for endpoint configuration — either the root REST API endpoint (for example http://localhost:8080/engine-rest) or the exact deployment-creation endpoint (for example http://localhost:8080/engine-rest/deployment/create). Deploy from the Camunda Modeler Configure the deployment endpoint A success message should appear: Deployment success

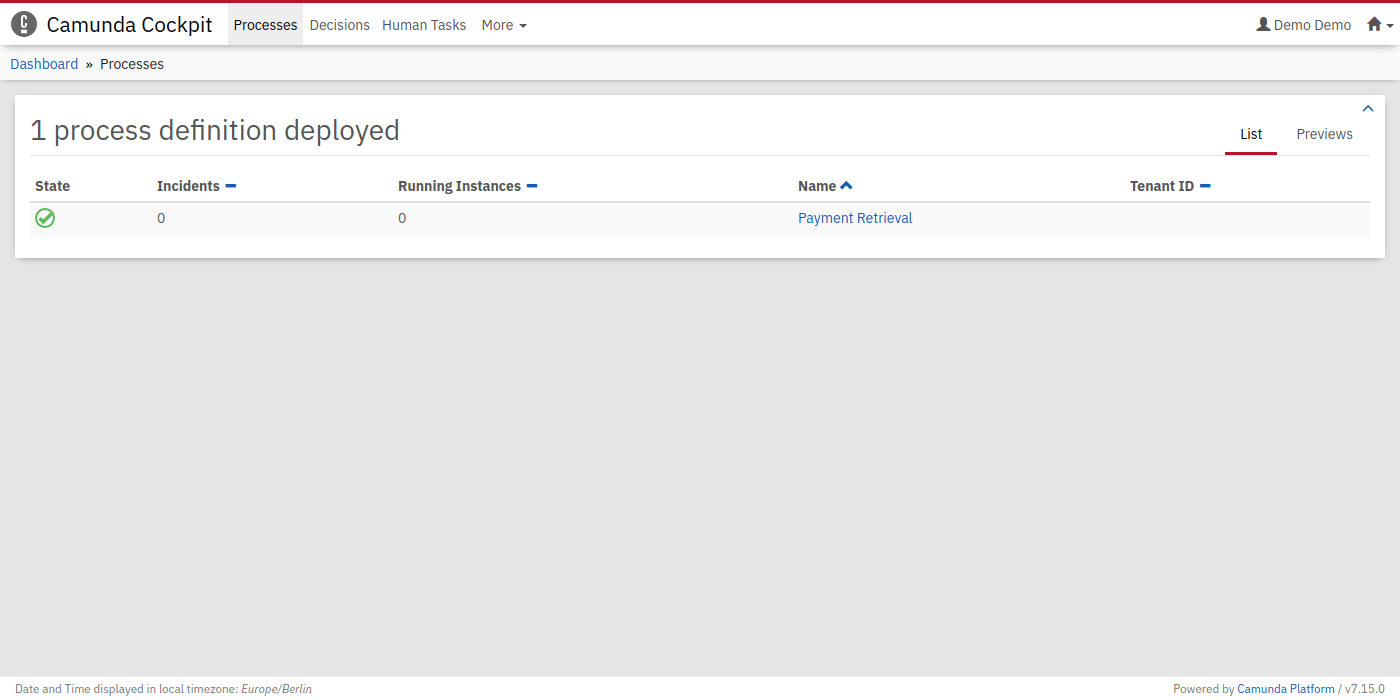
Verify the deployment with Cockpit

Navigate to http://localhost:8080/camunda/app/cockpit/ and log in with the credentials demo / demo. The deployed process appears on the dashboard. The deployed process in Cockpit

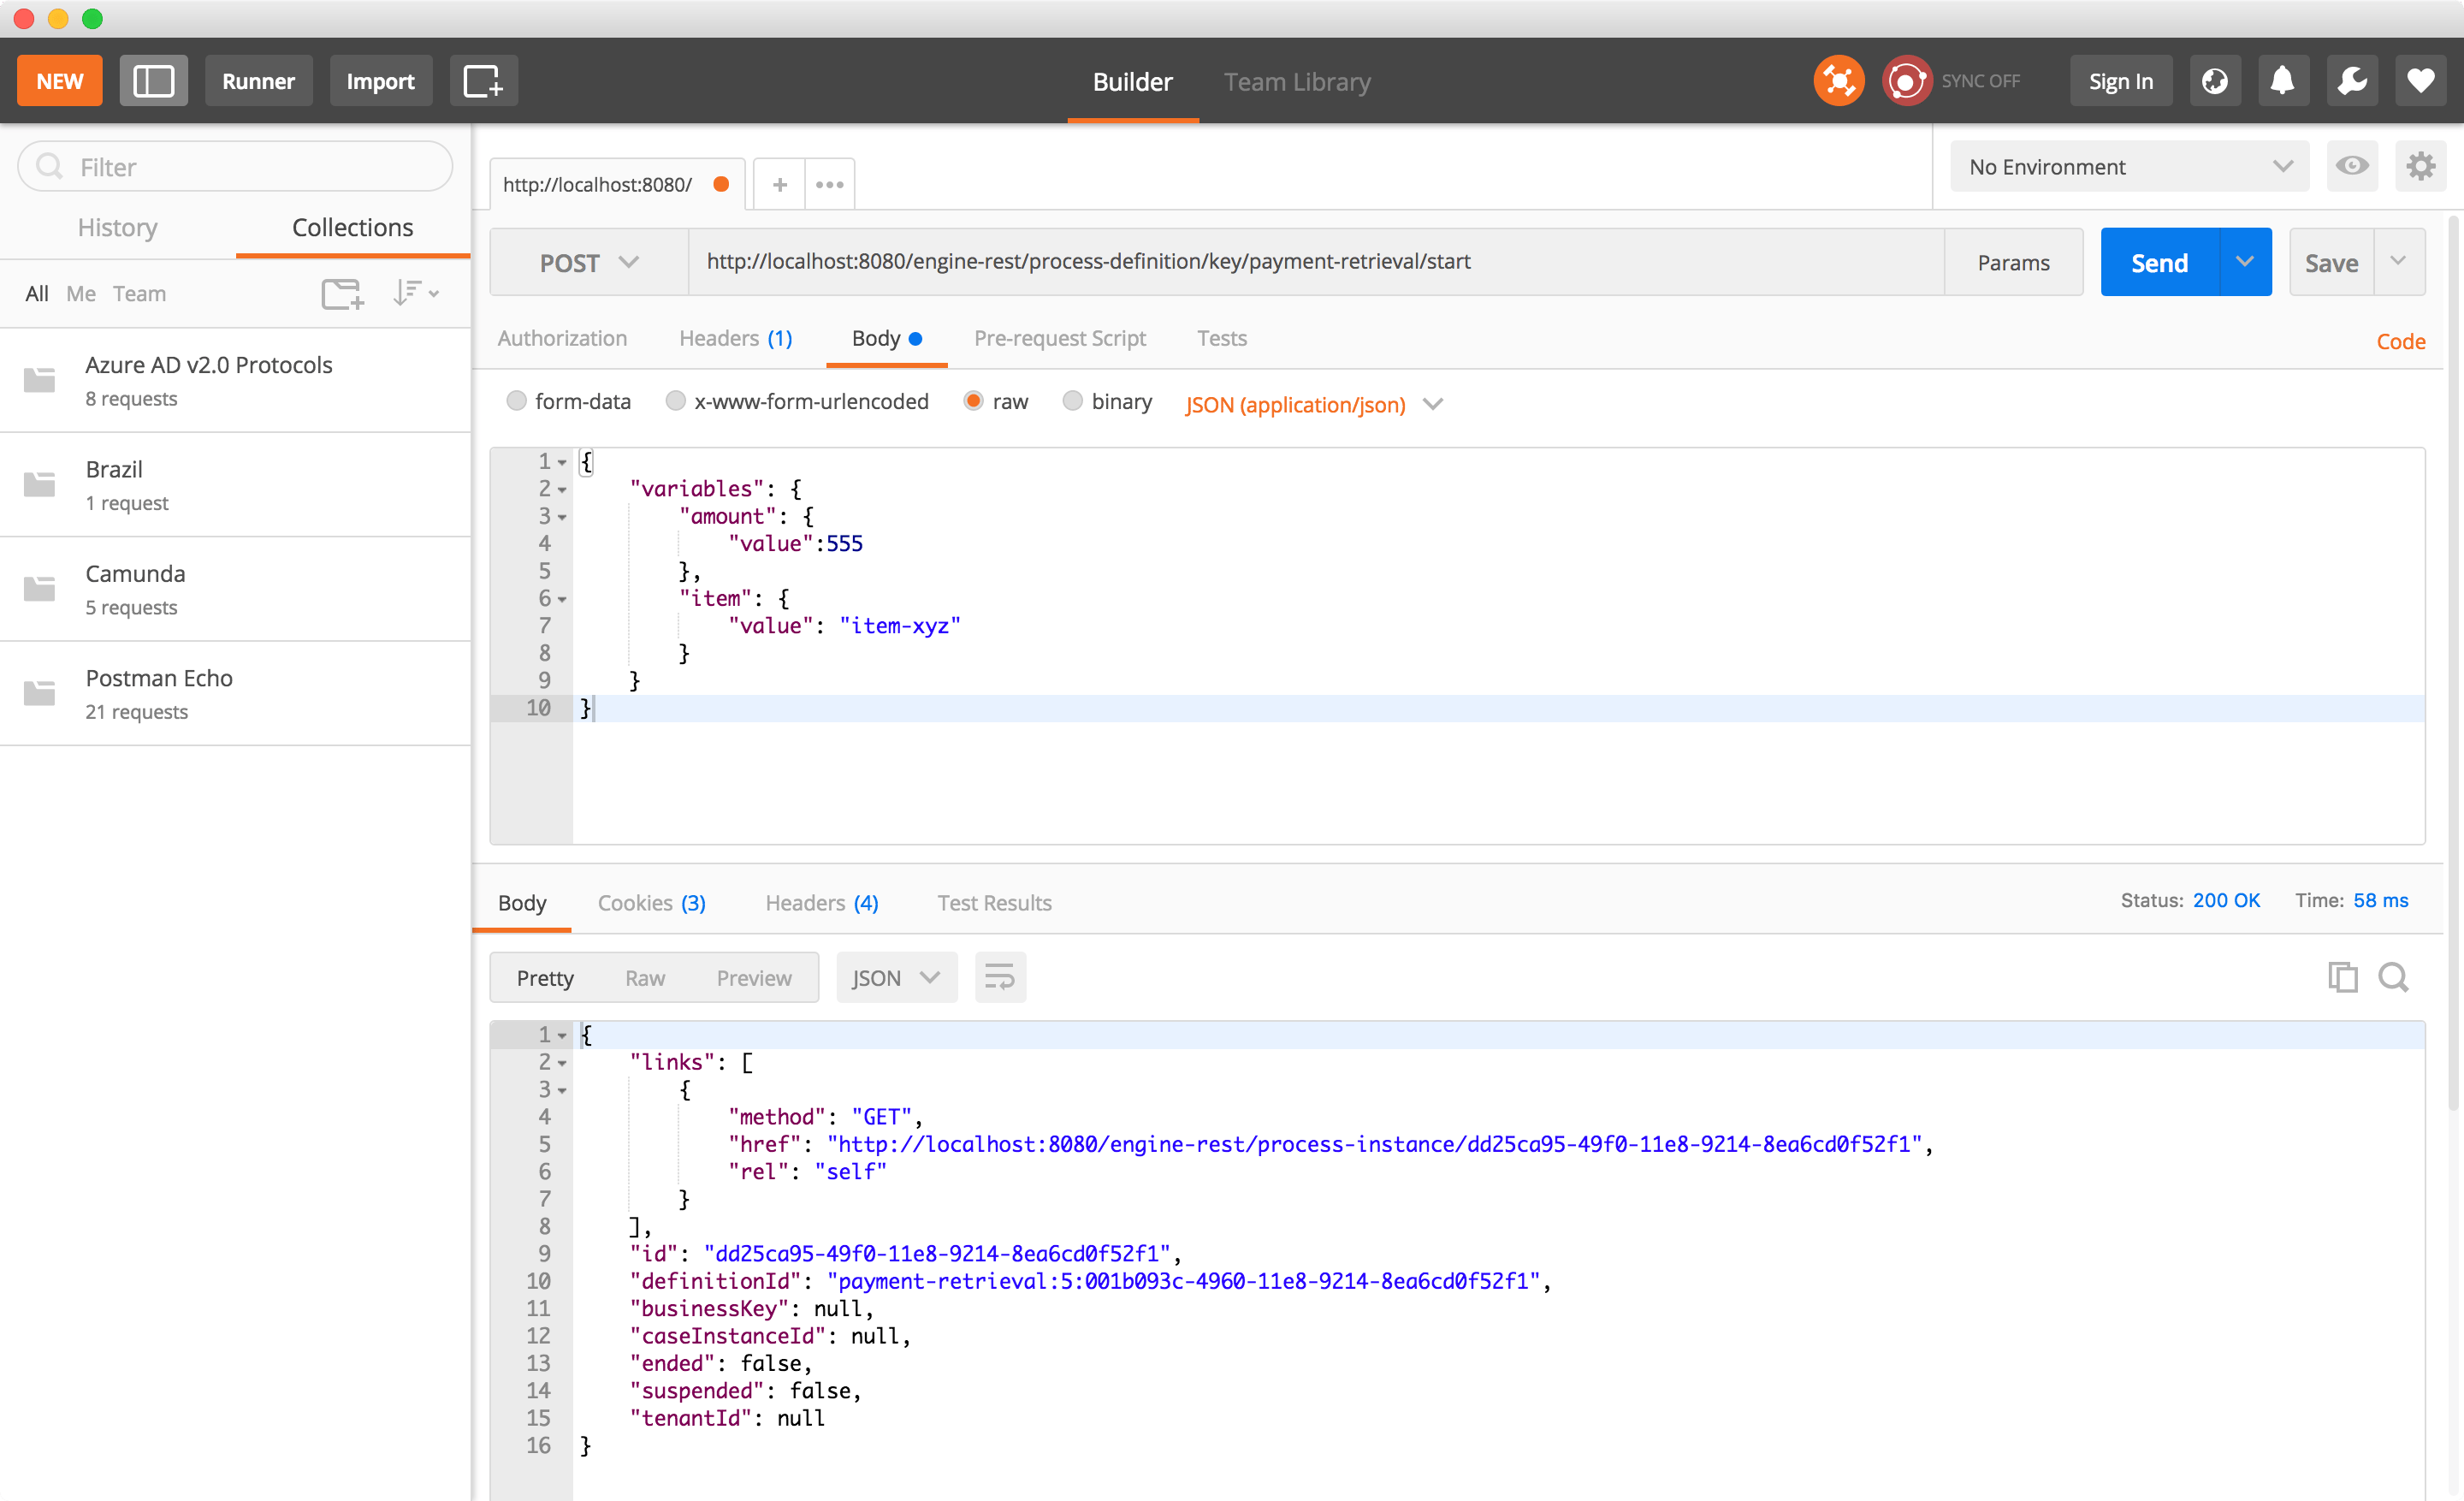
Start a process instance

Option A: using curl

curl -H "Content-Type: application/json" -X POST \
  -d '{"variables": {"amount": {"value":555,"type":"integer"}, "item": {"value":"item-xyz"} } }' \
  http://localhost:8080/engine-rest/process-definition/key/payment-retrieval/start

Option B: using a REST client

Make a POST request to:
http://localhost:8080/engine-rest/process-definition/key/payment-retrieval/start
with the JSON body:
{
  "variables": {
    "amount": { "value": 555, "type": "integer" },
    "item": { "value": "item-xyz" }
  }
}
Make sure the header Content-Type: application/json is set. Start an instance with a REST client On successful execution, output appears in your worker console.

Next step

To involve humans in your process, continue to learn about user tasks.