Add a user task
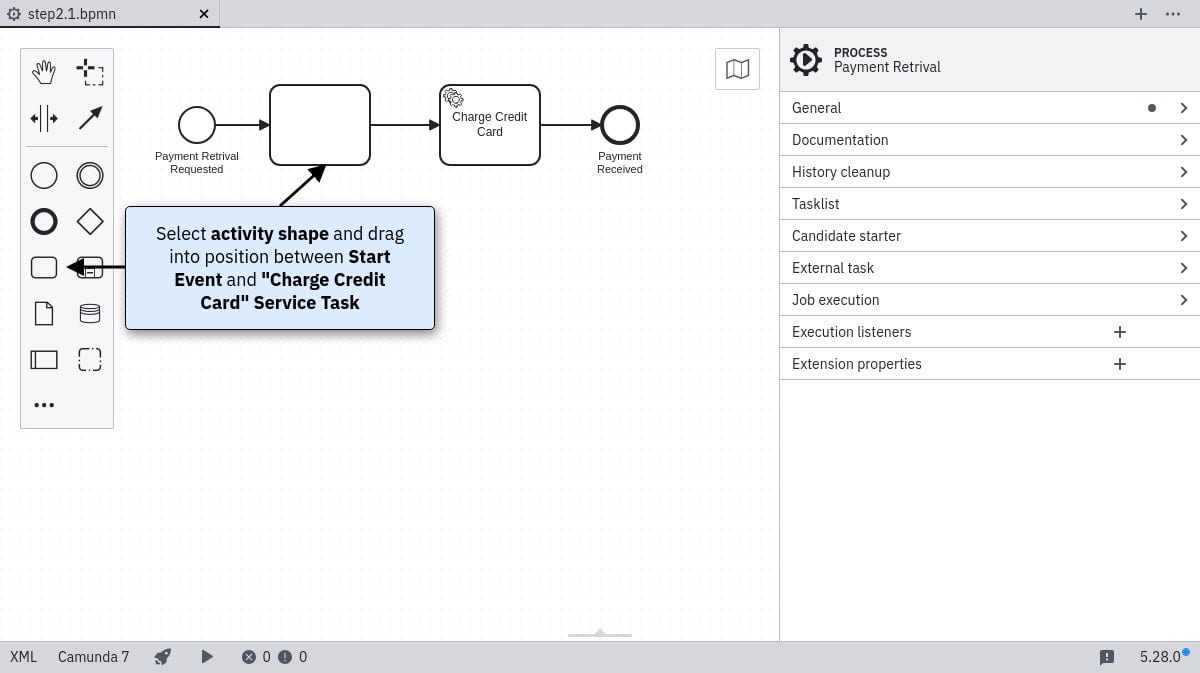
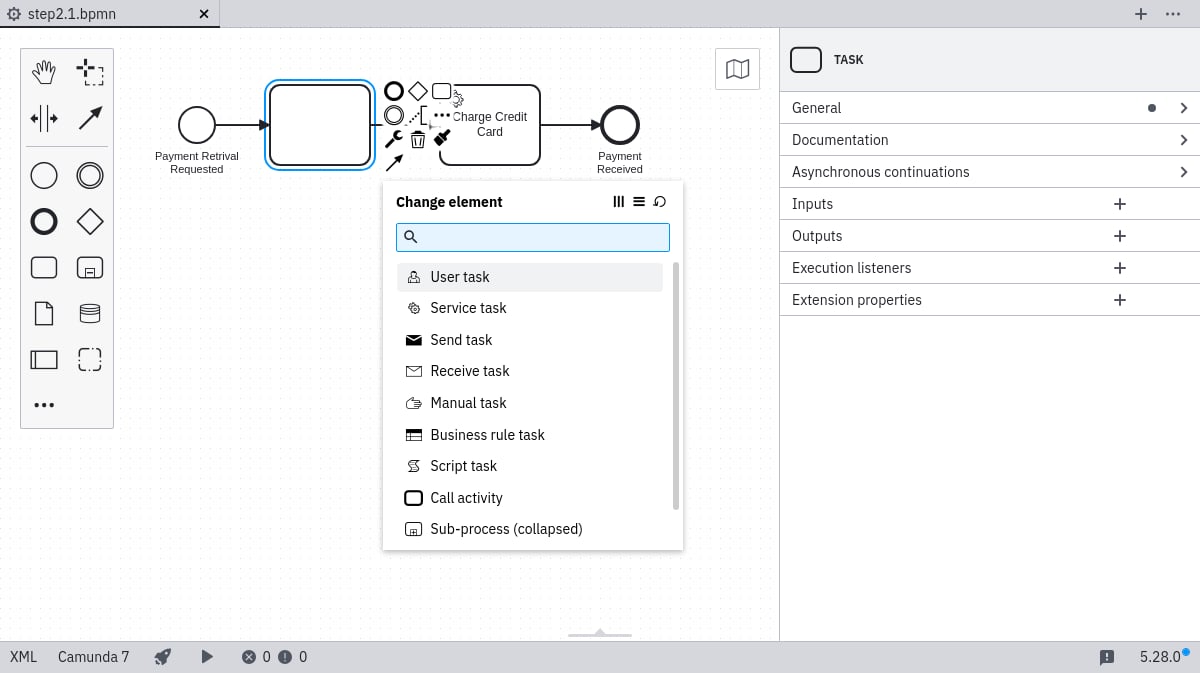
Open your process in the Camunda Modeler and follow these steps:- Use the create/remove space tool to add space between the start event and the Charge Credit Card service task.
- Select the activity shape (rounded rectangle) and drag it between these elements.
- Name the new activity Approve Payment.
- Change its type to User Task using the wrench button.
Configure the user task
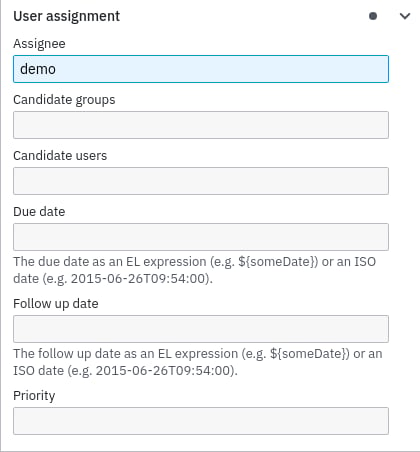
In the properties panel on the right:- Select your user task.
- Scroll to the
Assigneeproperty. - Enter demo to automatically assign the task to the demo user.
Configure a basic form
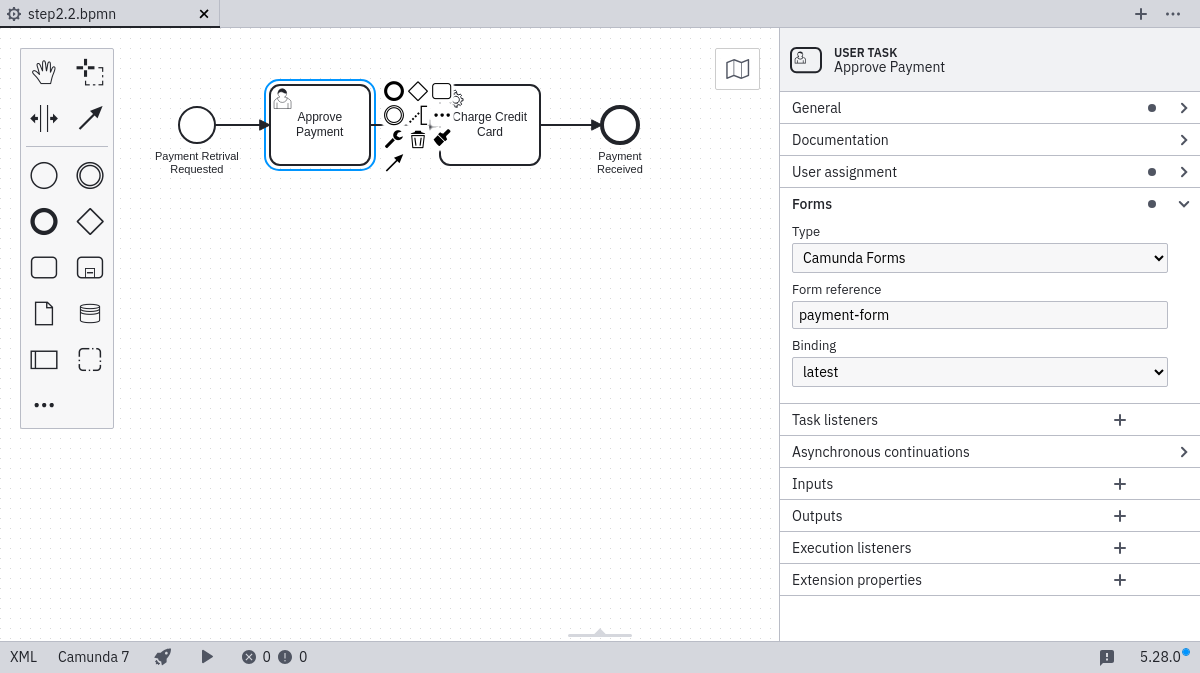
Still in the properties panel:- Select the user task.
- Click the Forms tab.
- Set the following properties:
- Type: Camunda Forms
- Form Ref: payment-form
- Binding: deployment
Id to payment-form.
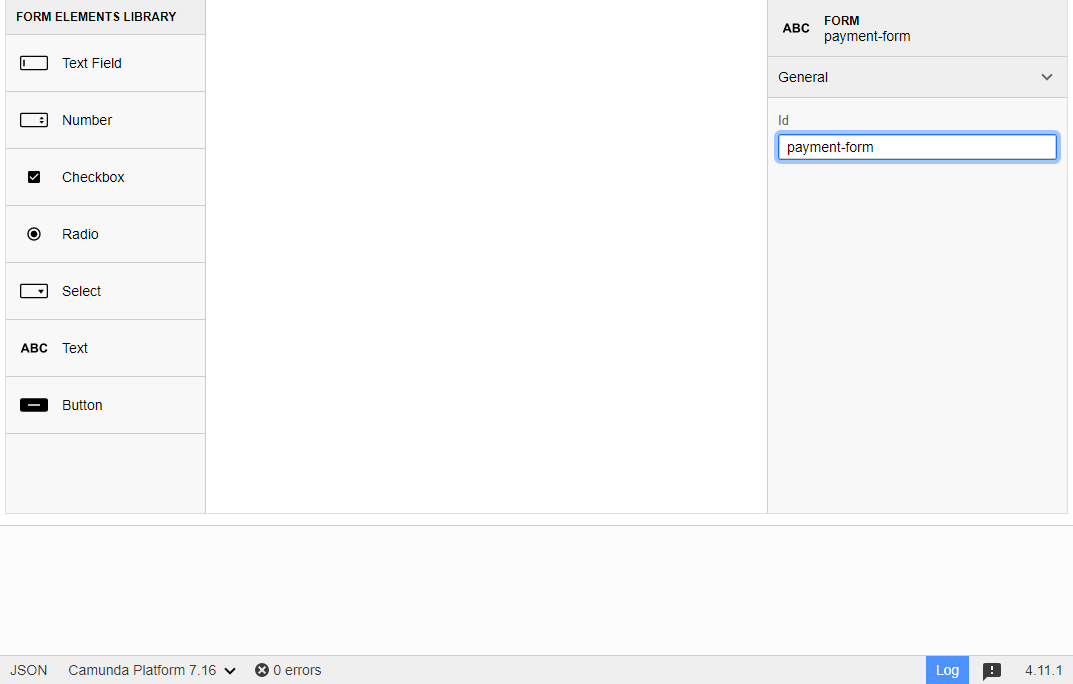
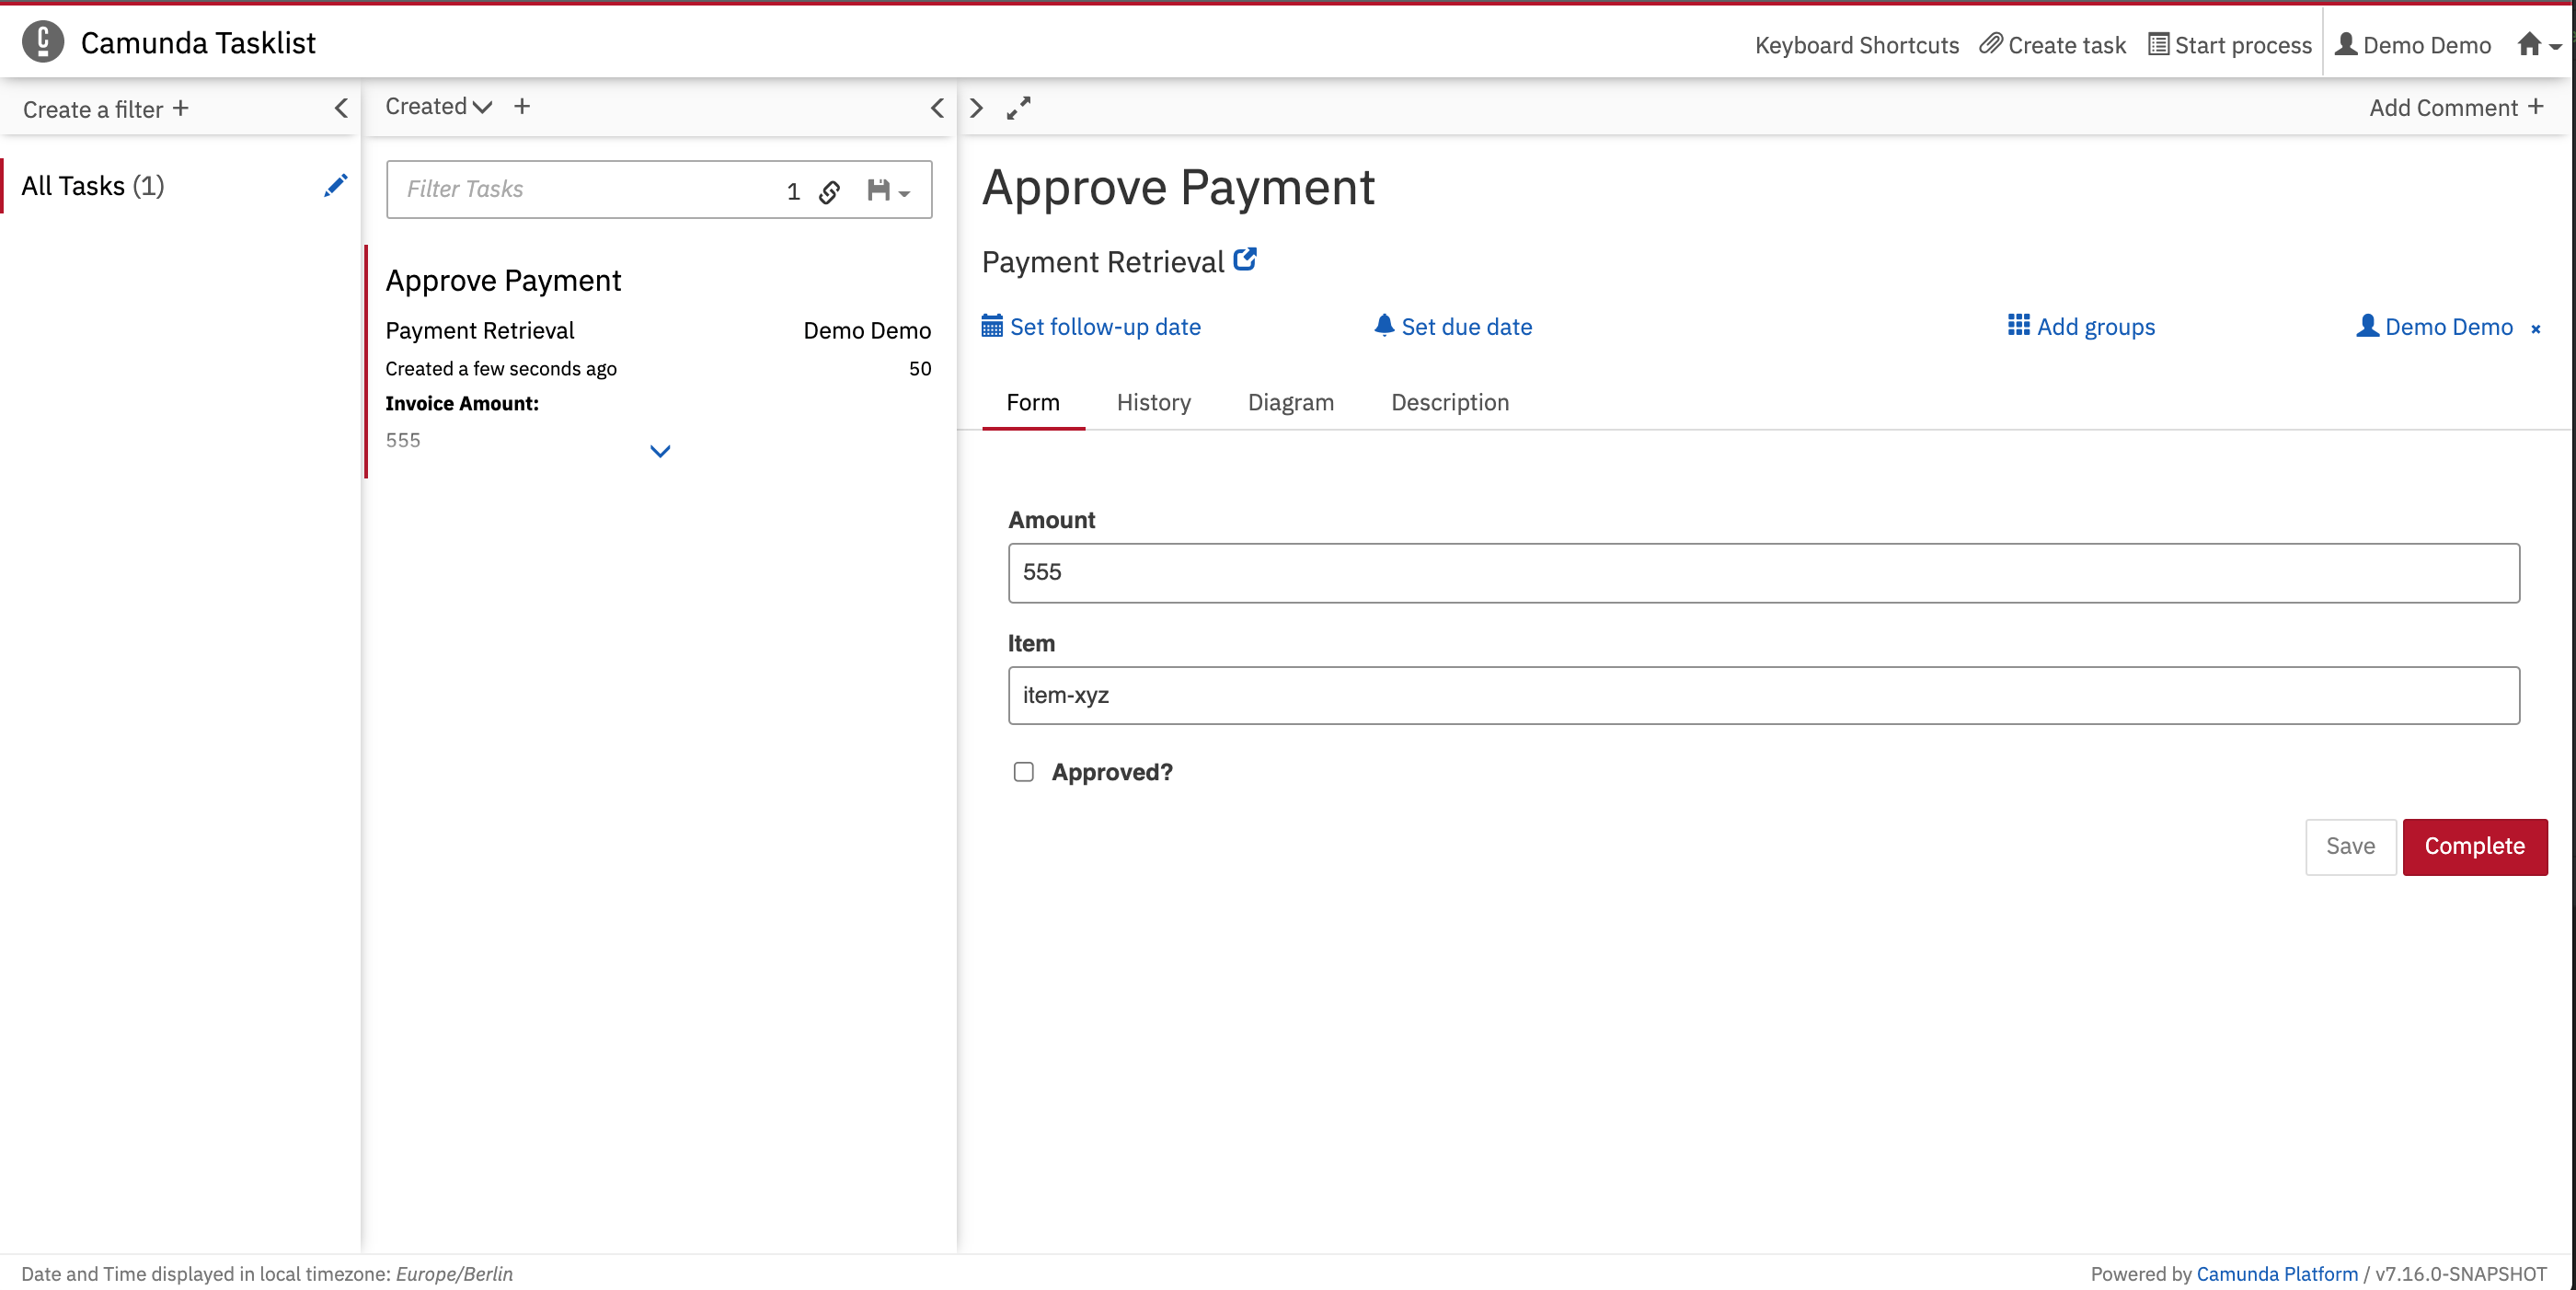
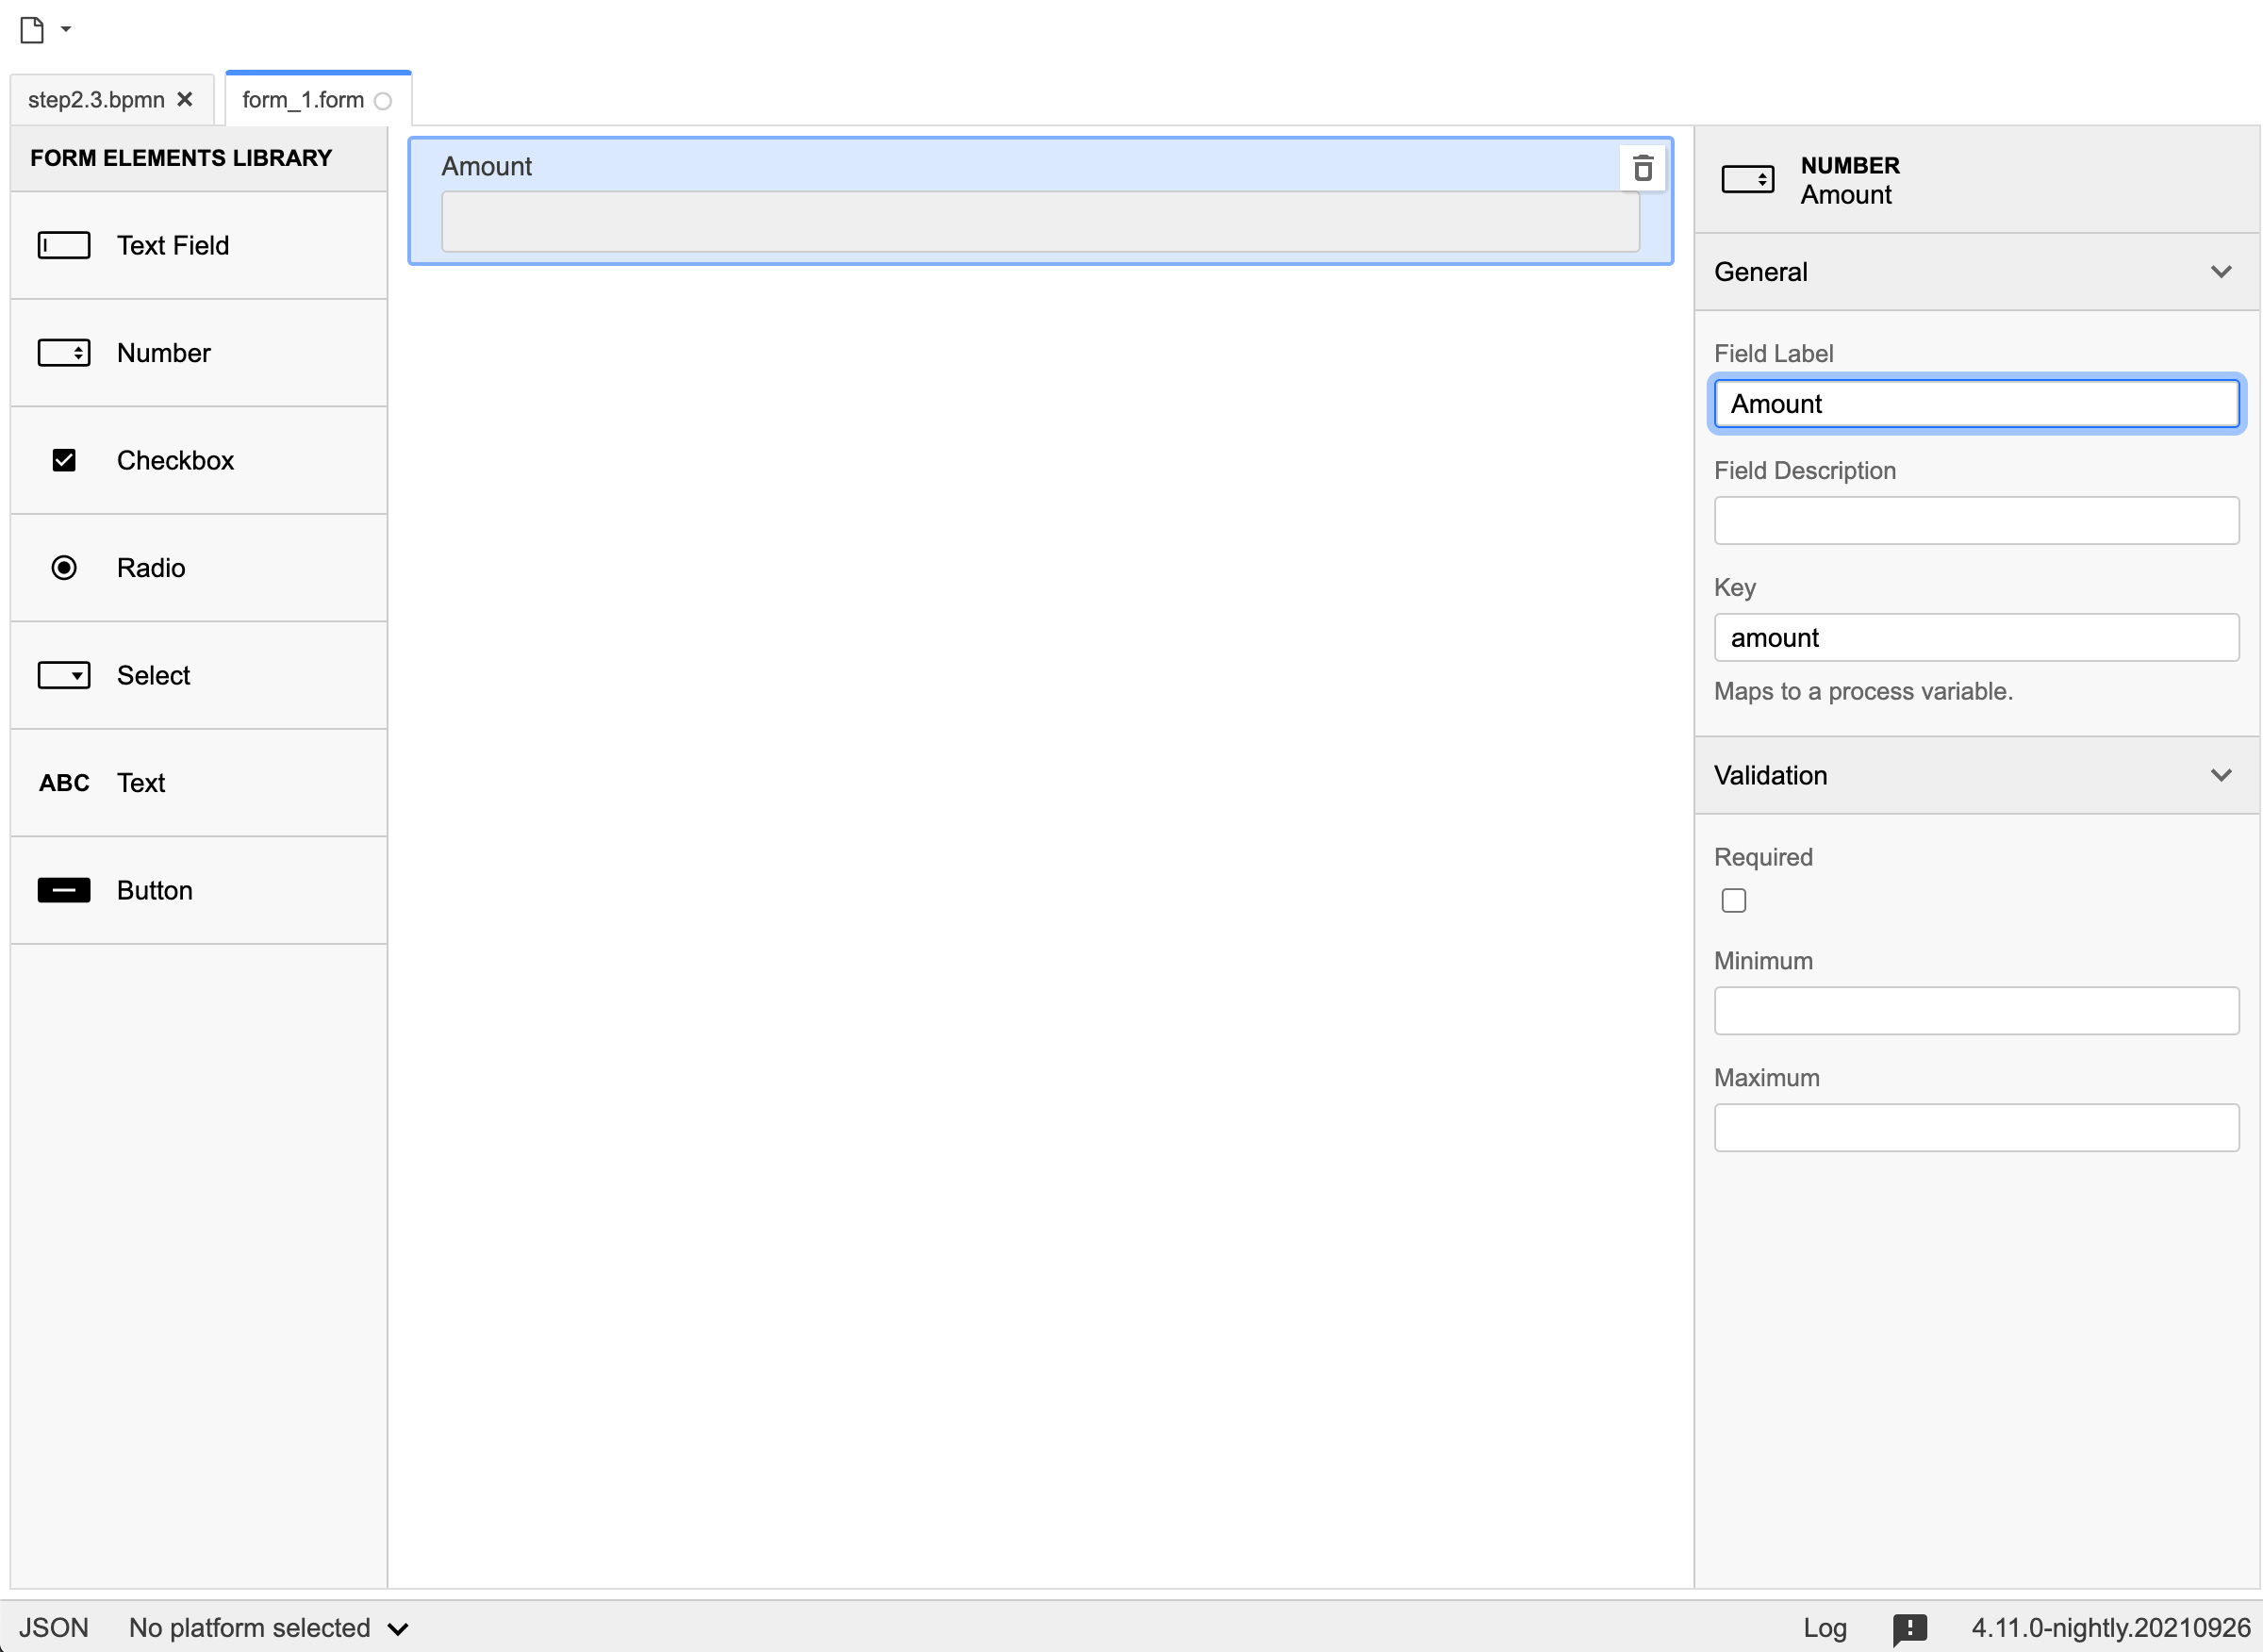
Add form fields
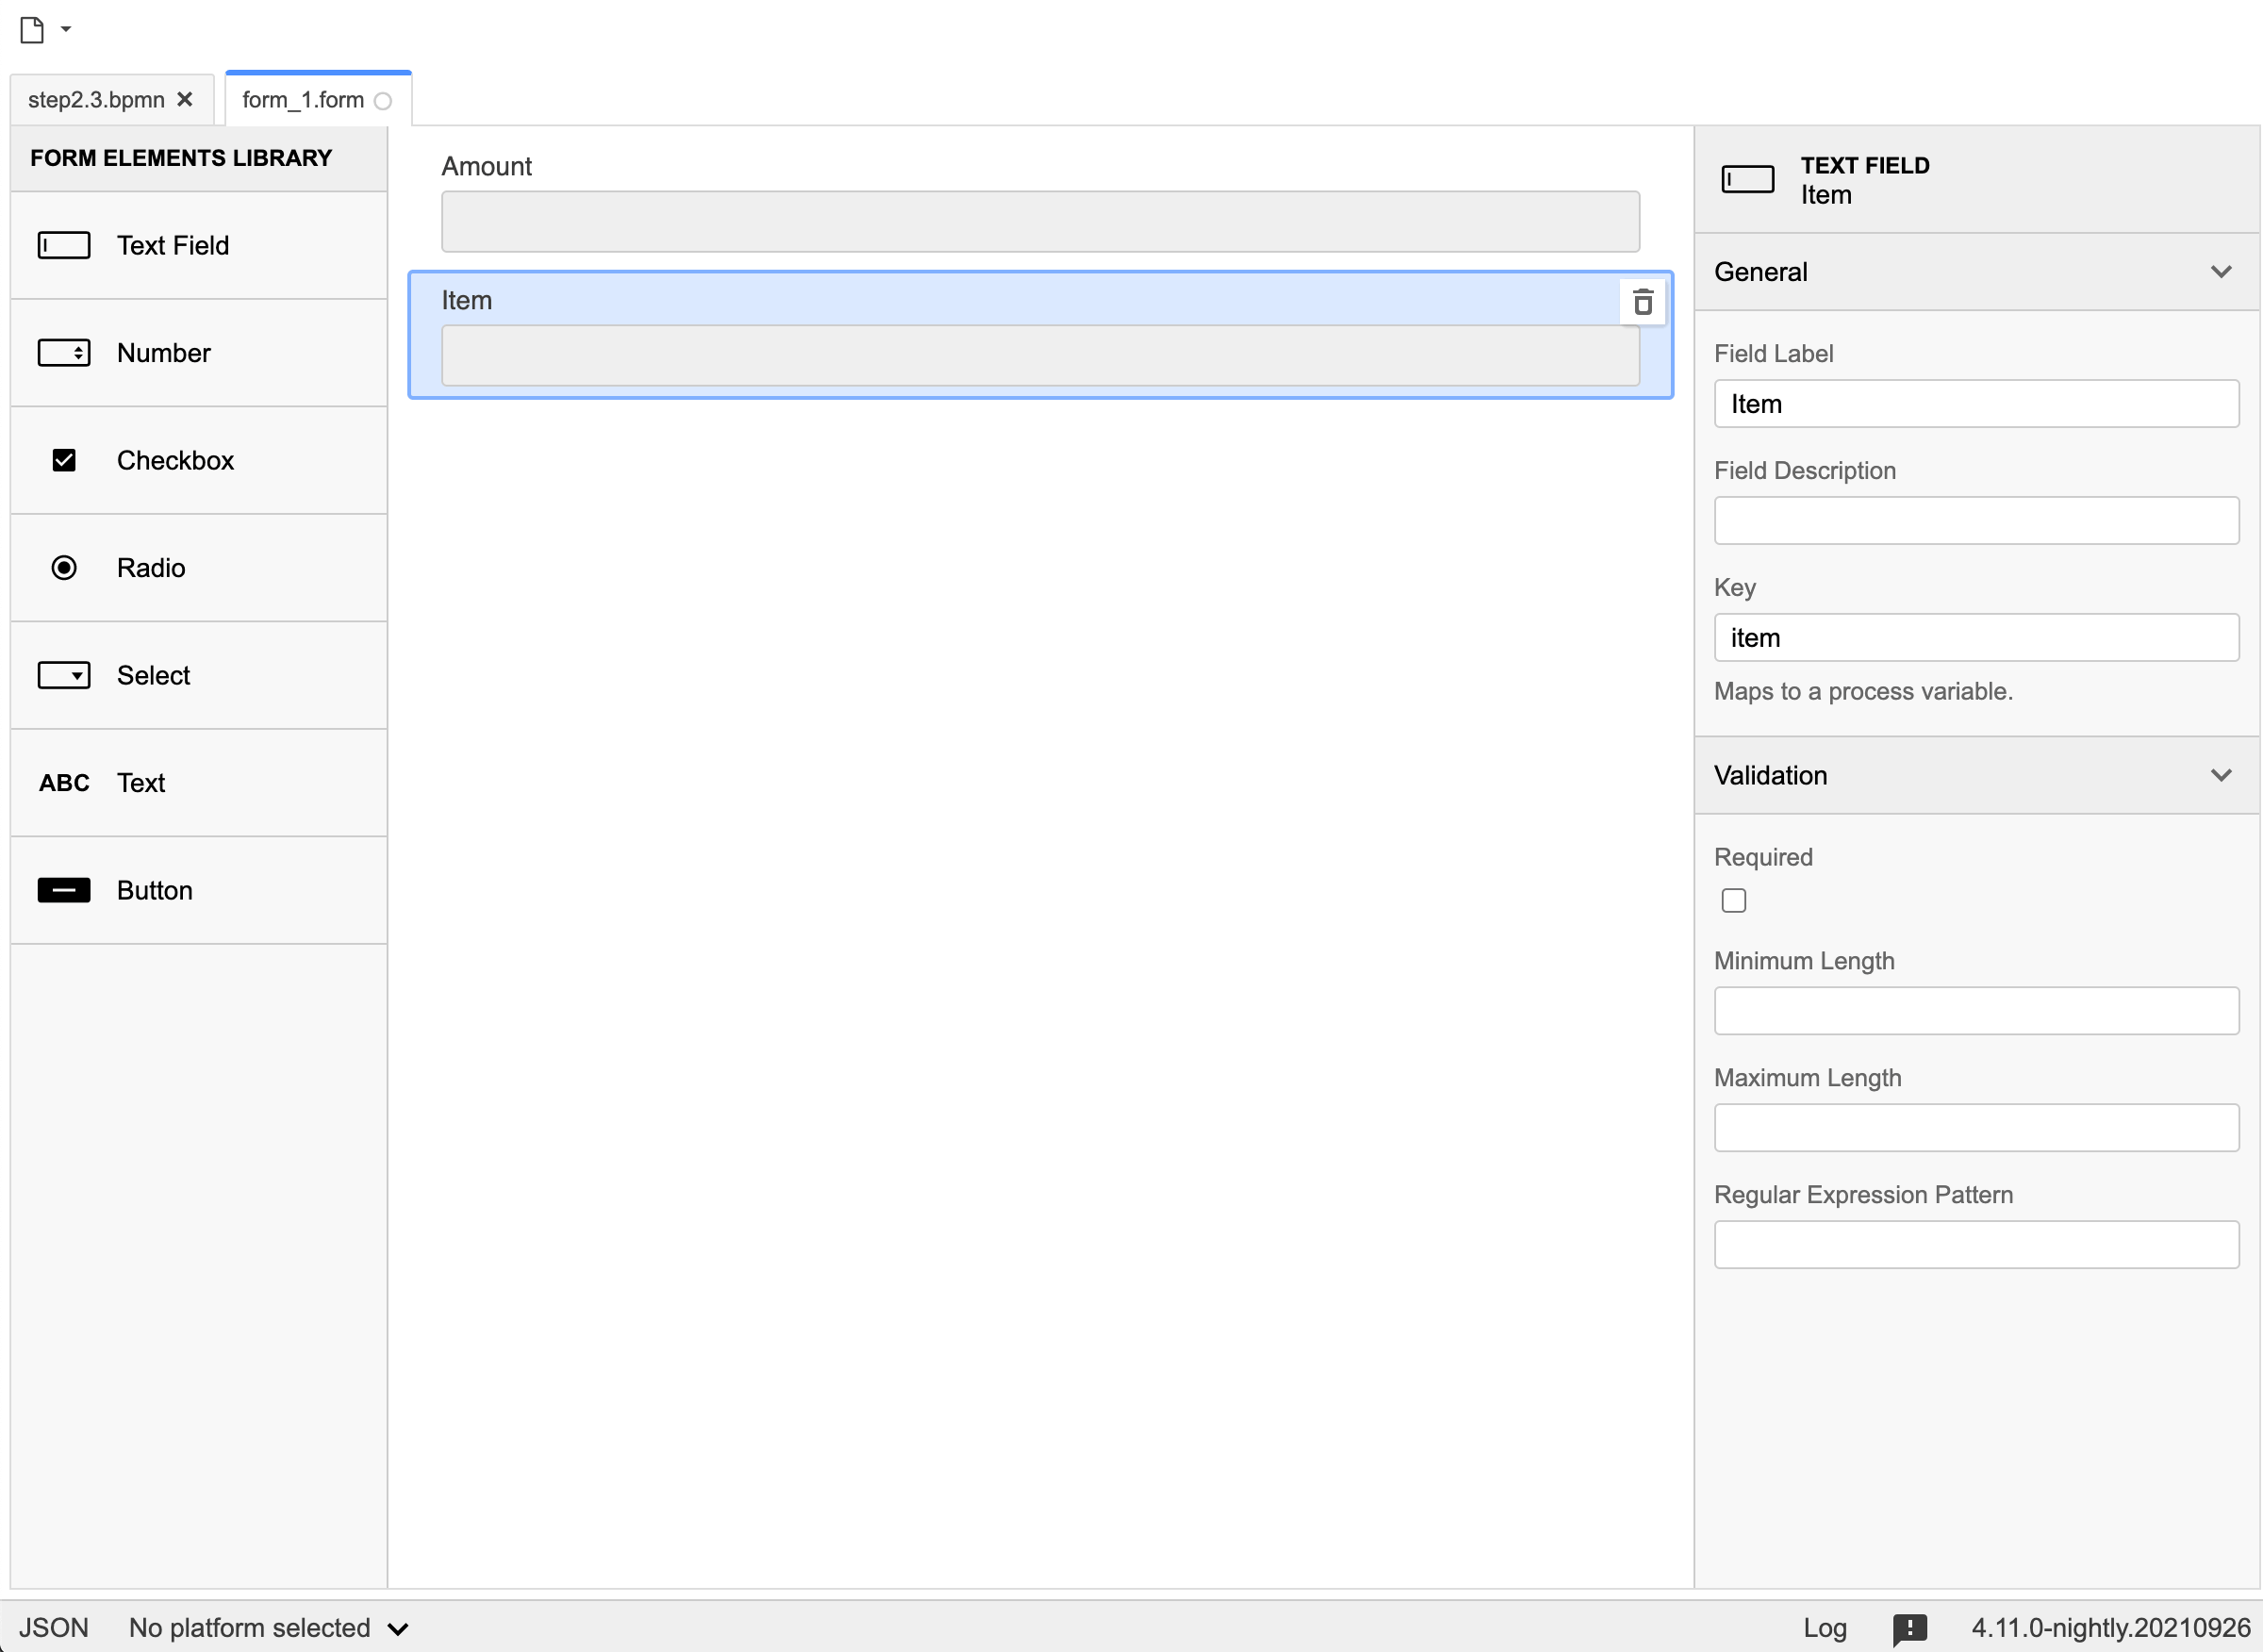
Drag elements from the form elements library to create three fields: Field 1 (Number) — Key:amount, Label: Amount
item, Label: Item
approved, Label: Approved?
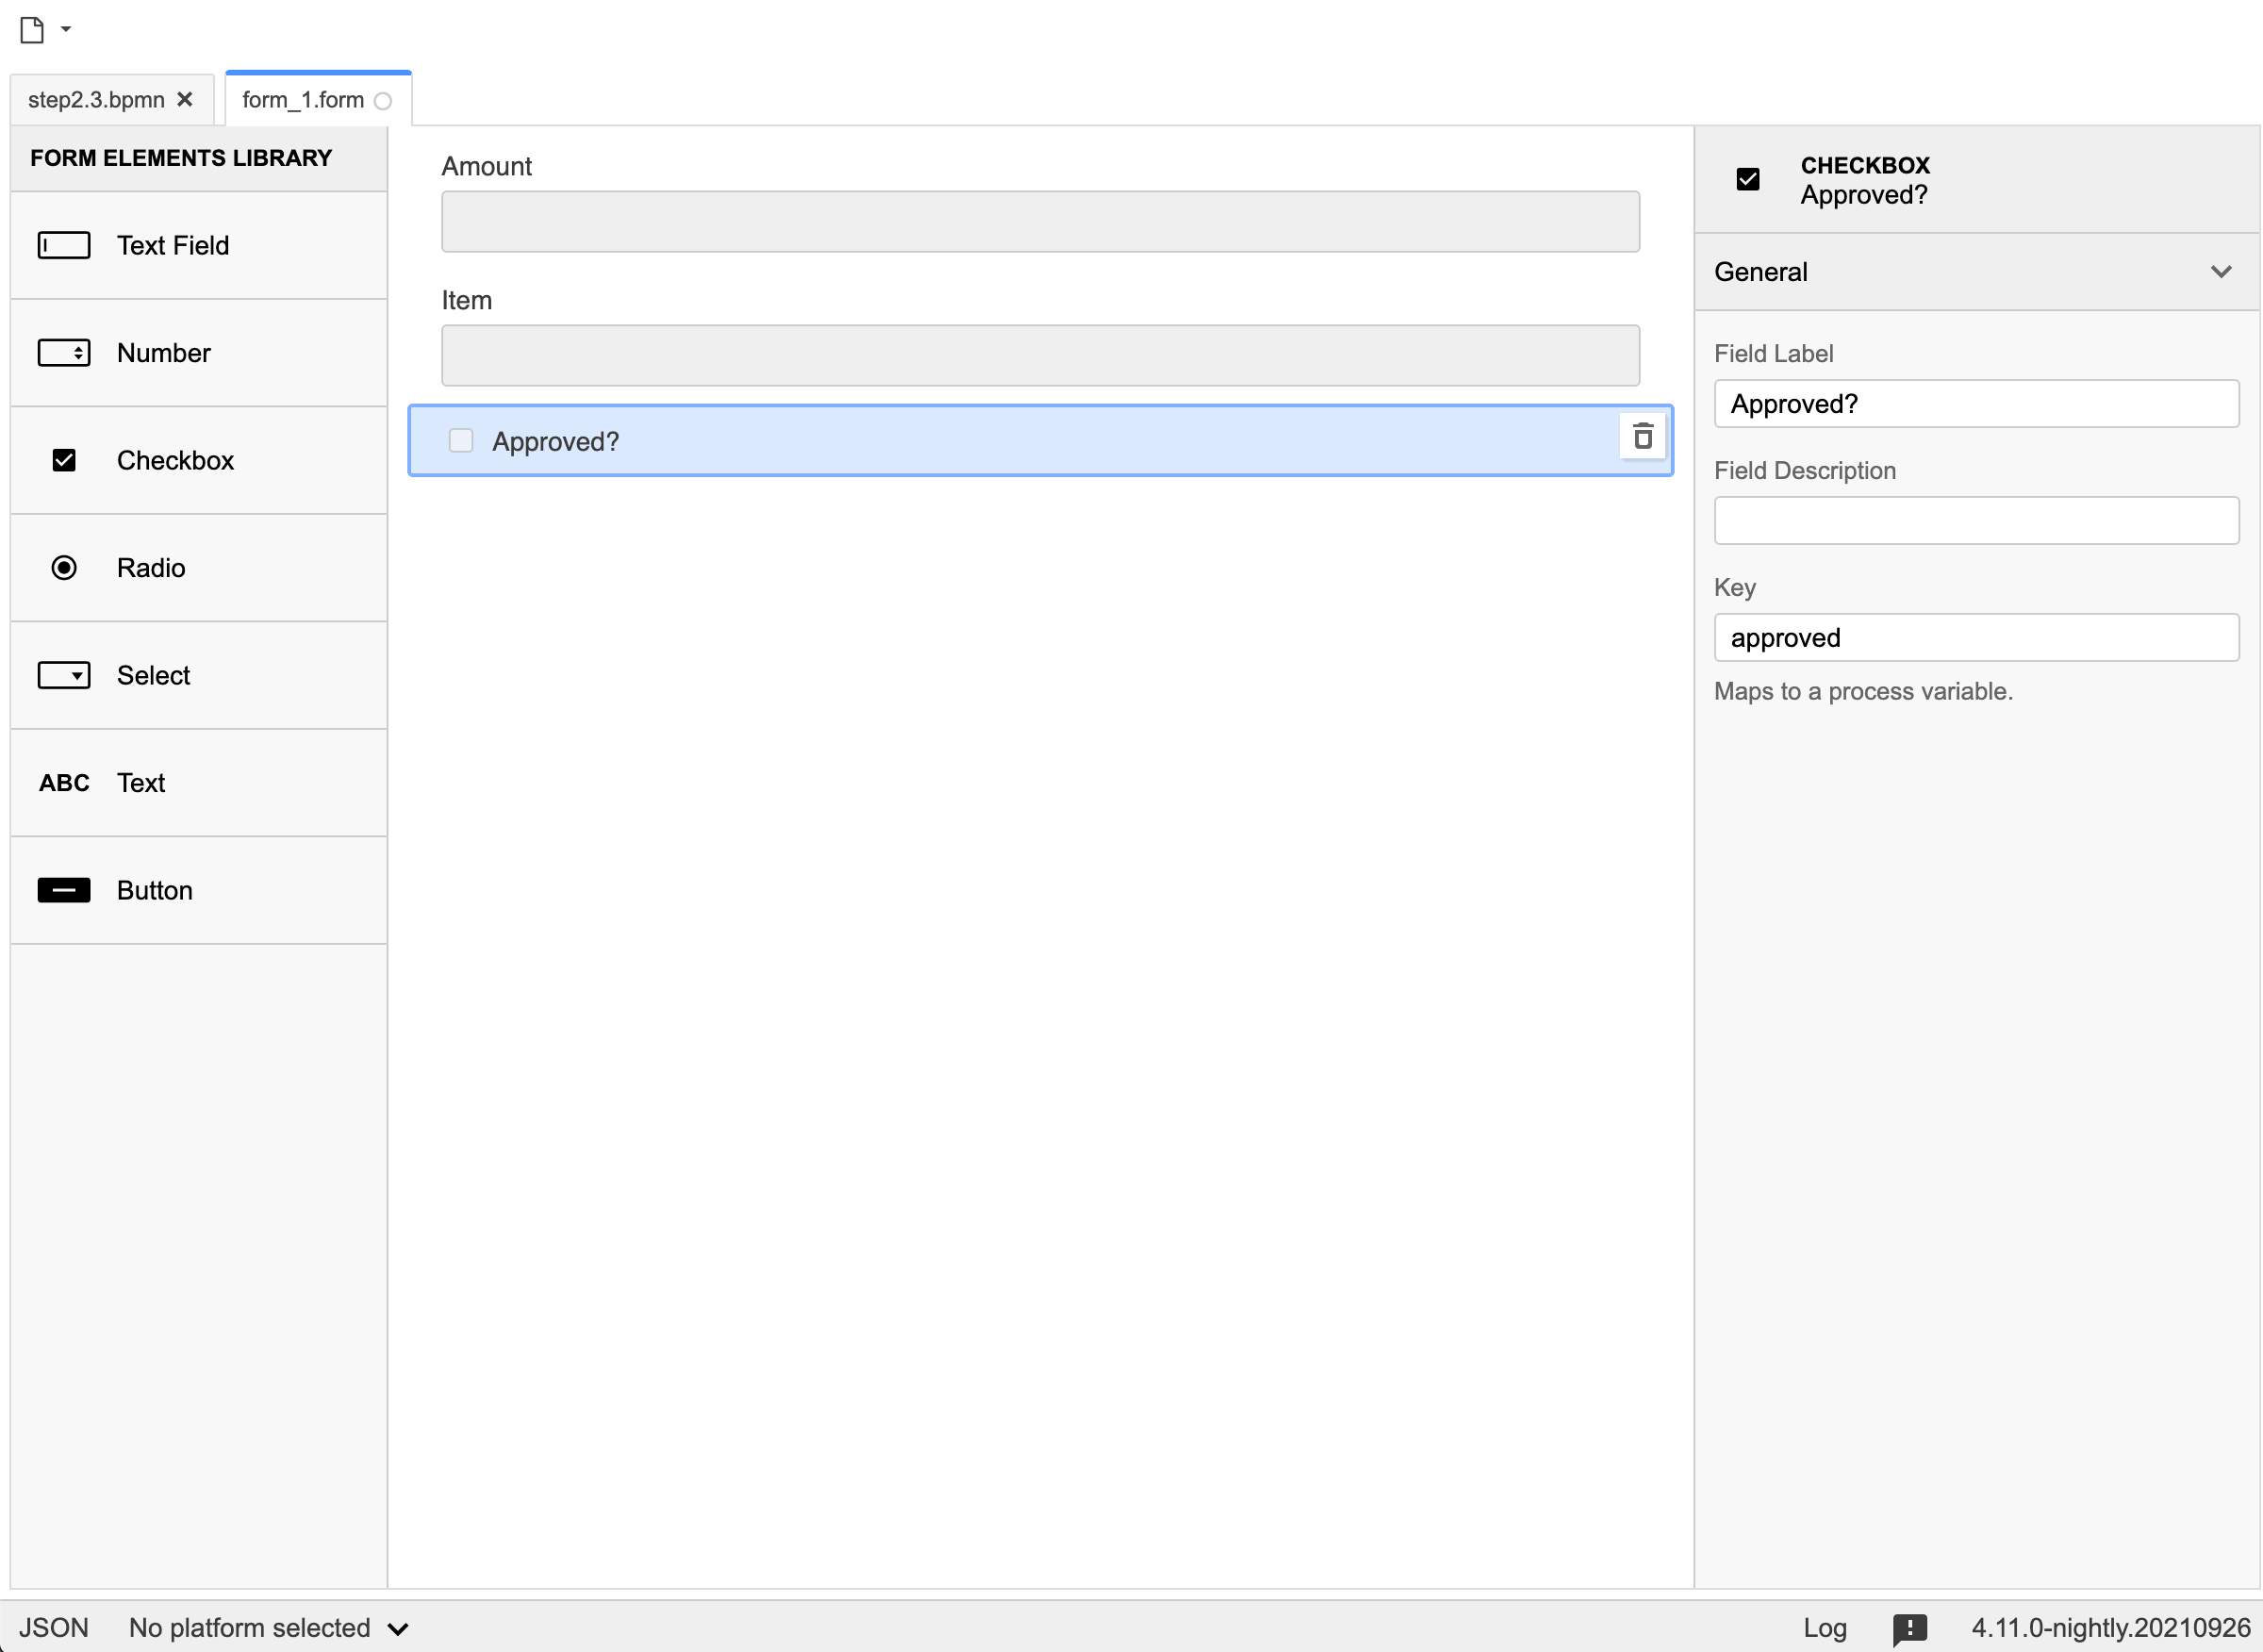
payment.form.
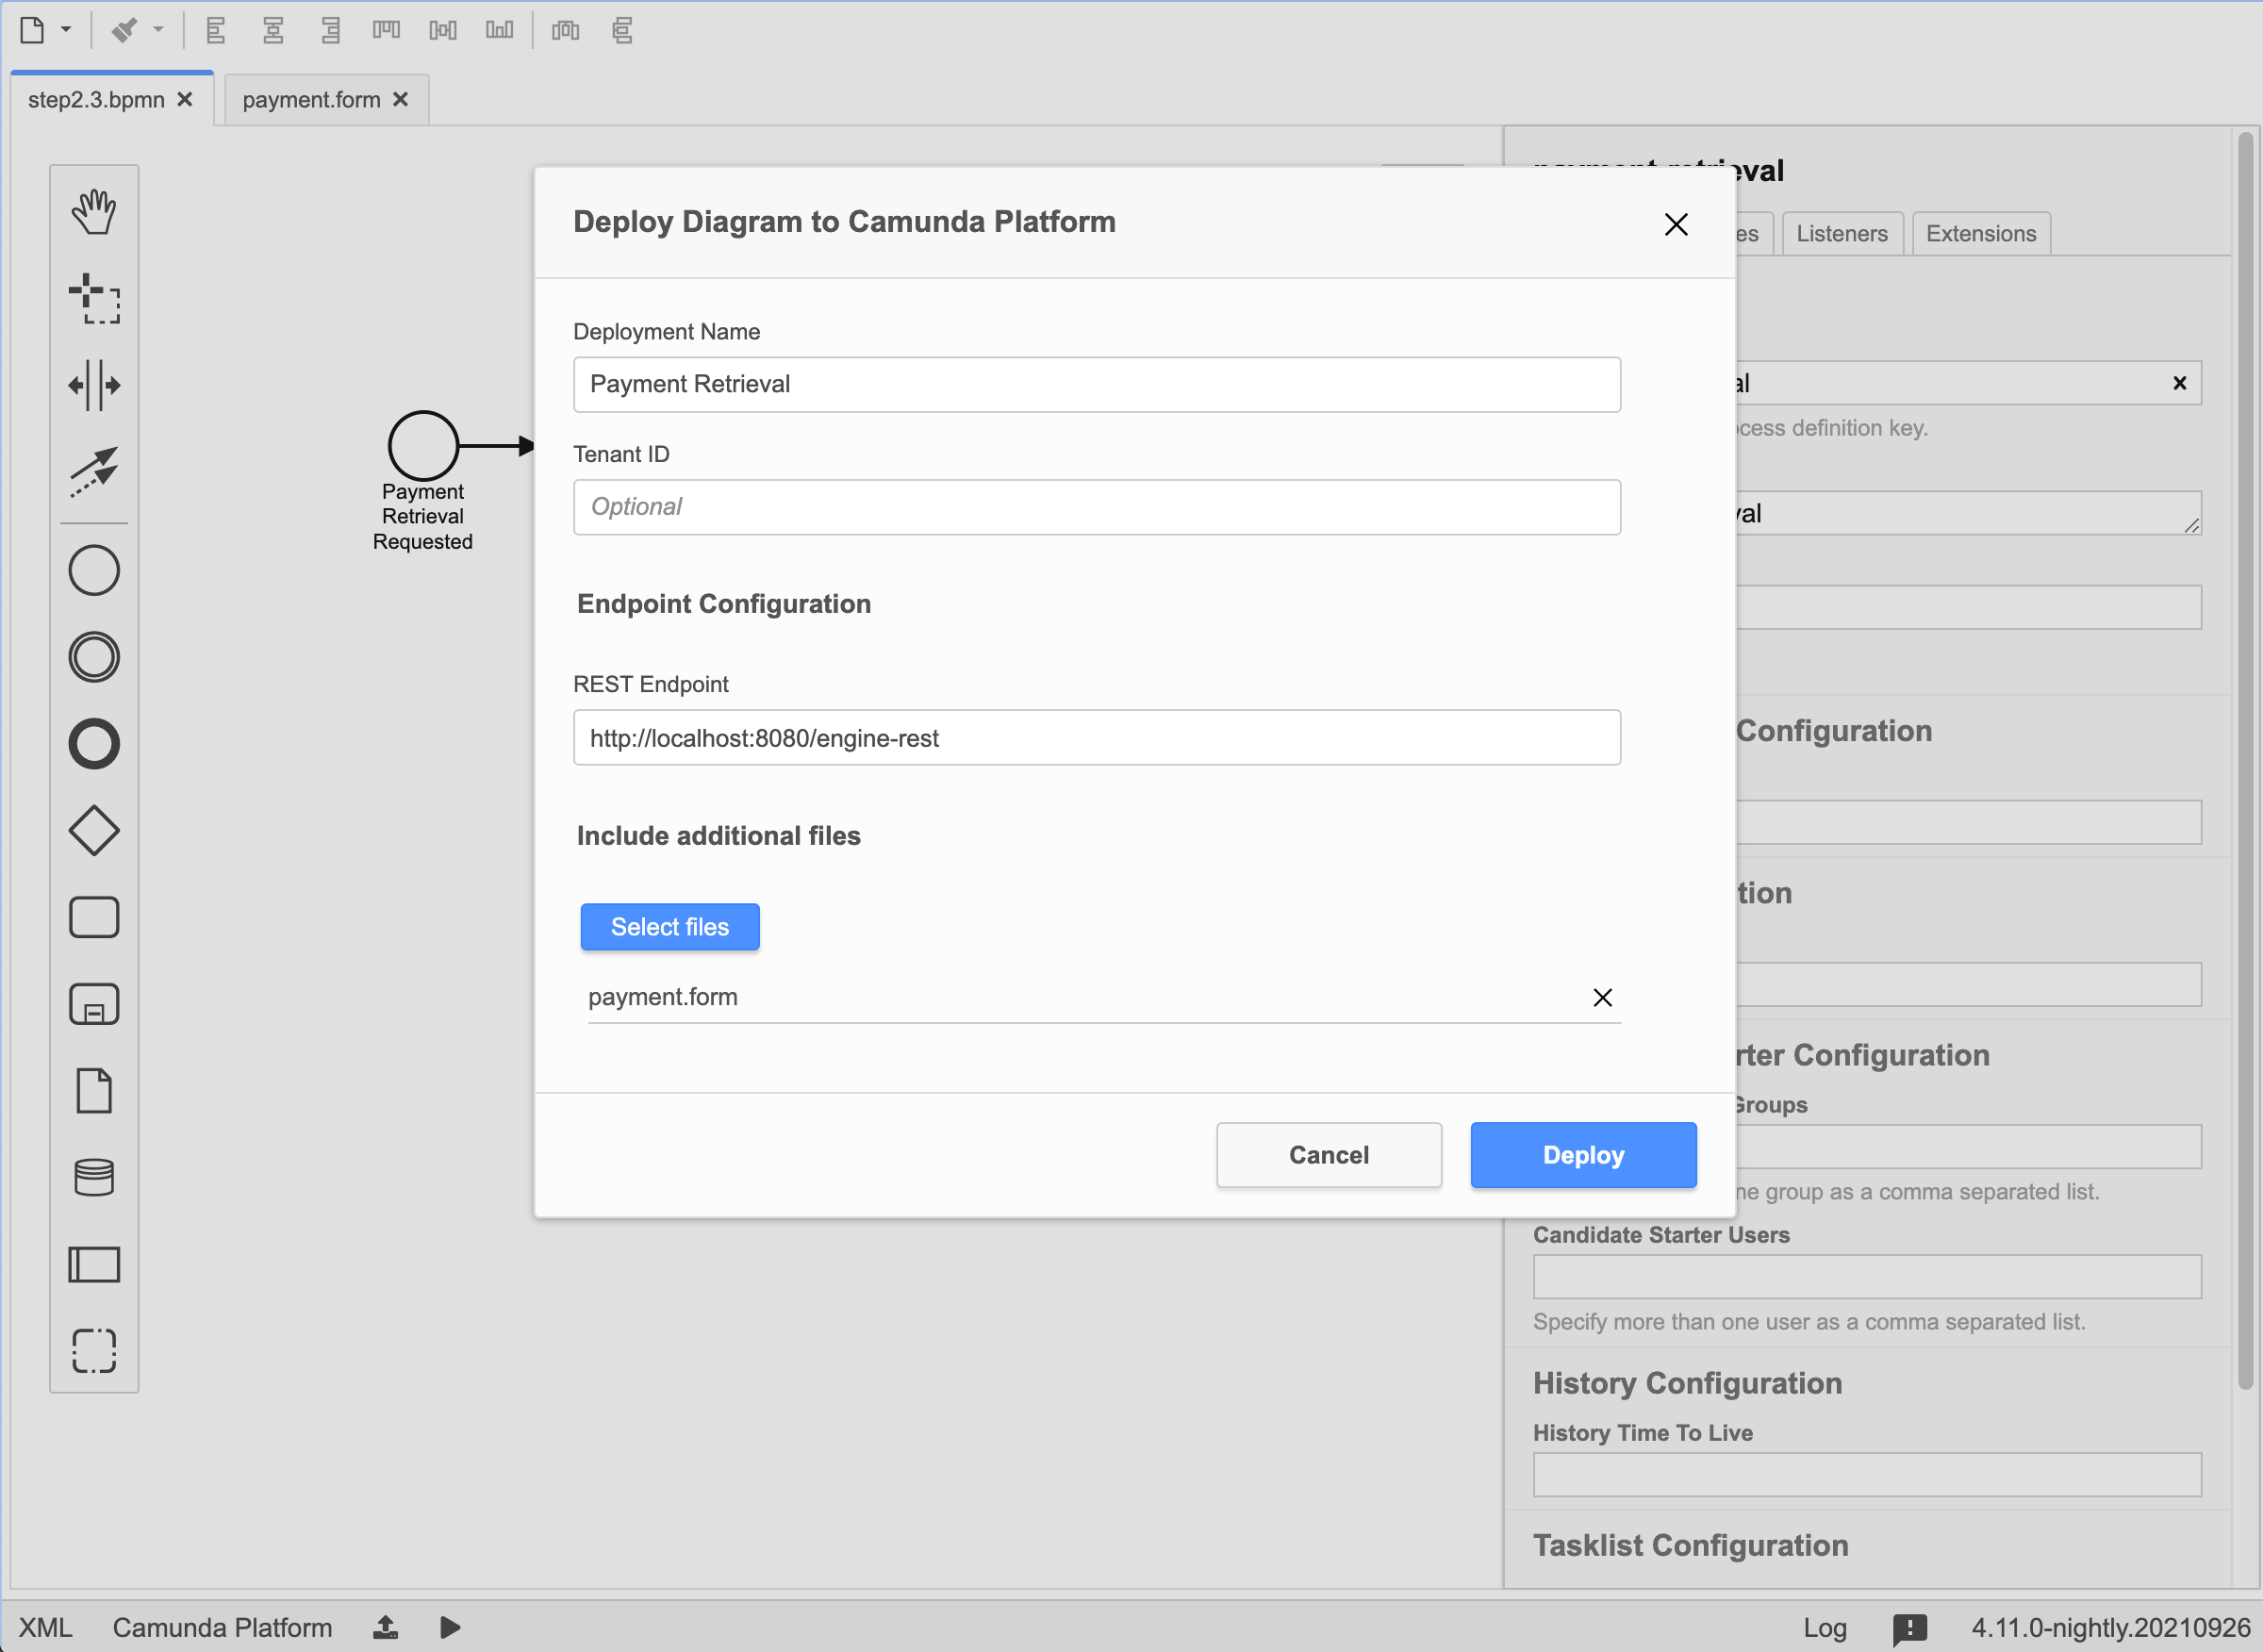
Deploy the process
- Switch back to the process diagram.
- Click the deploy button.
- In the deployment panel, select
payment.formunder include additional files. - Click Deploy.
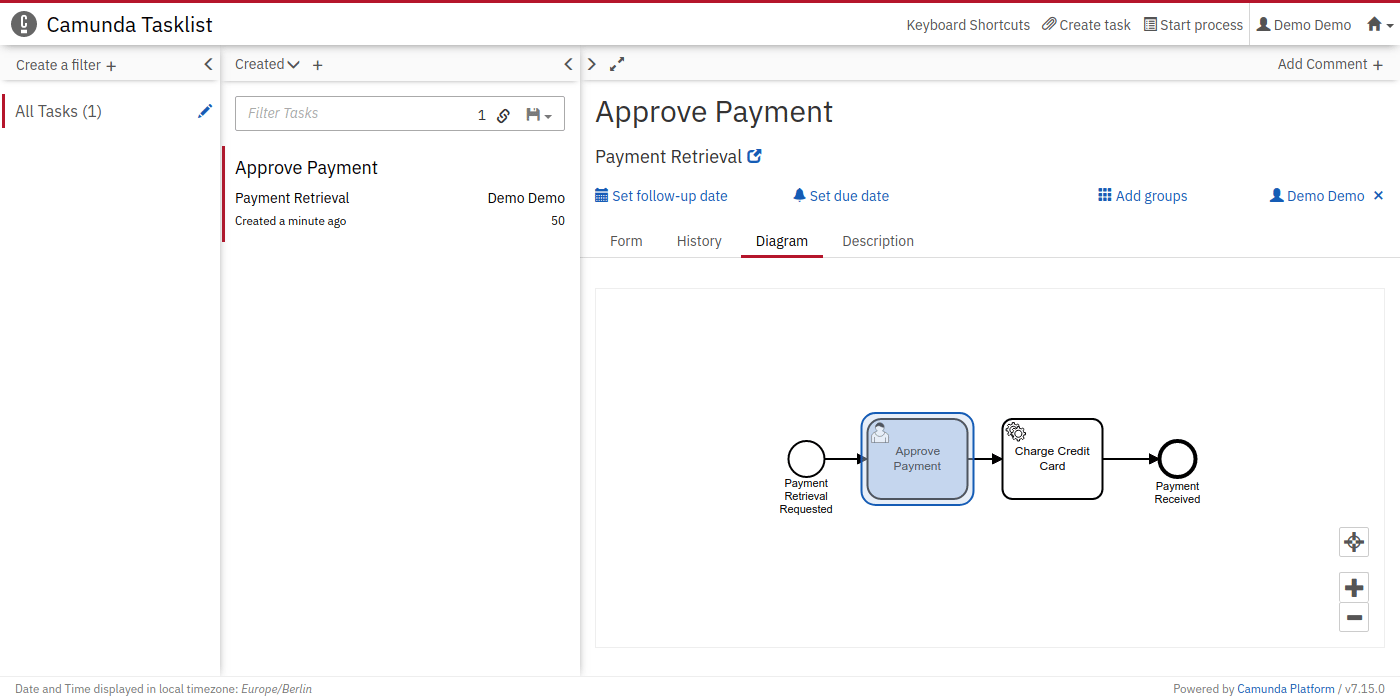
Work on the task
Navigate to Tasklist at http://localhost:8080/camunda/app/tasklist/ and log in with the credentialsdemo / demo.
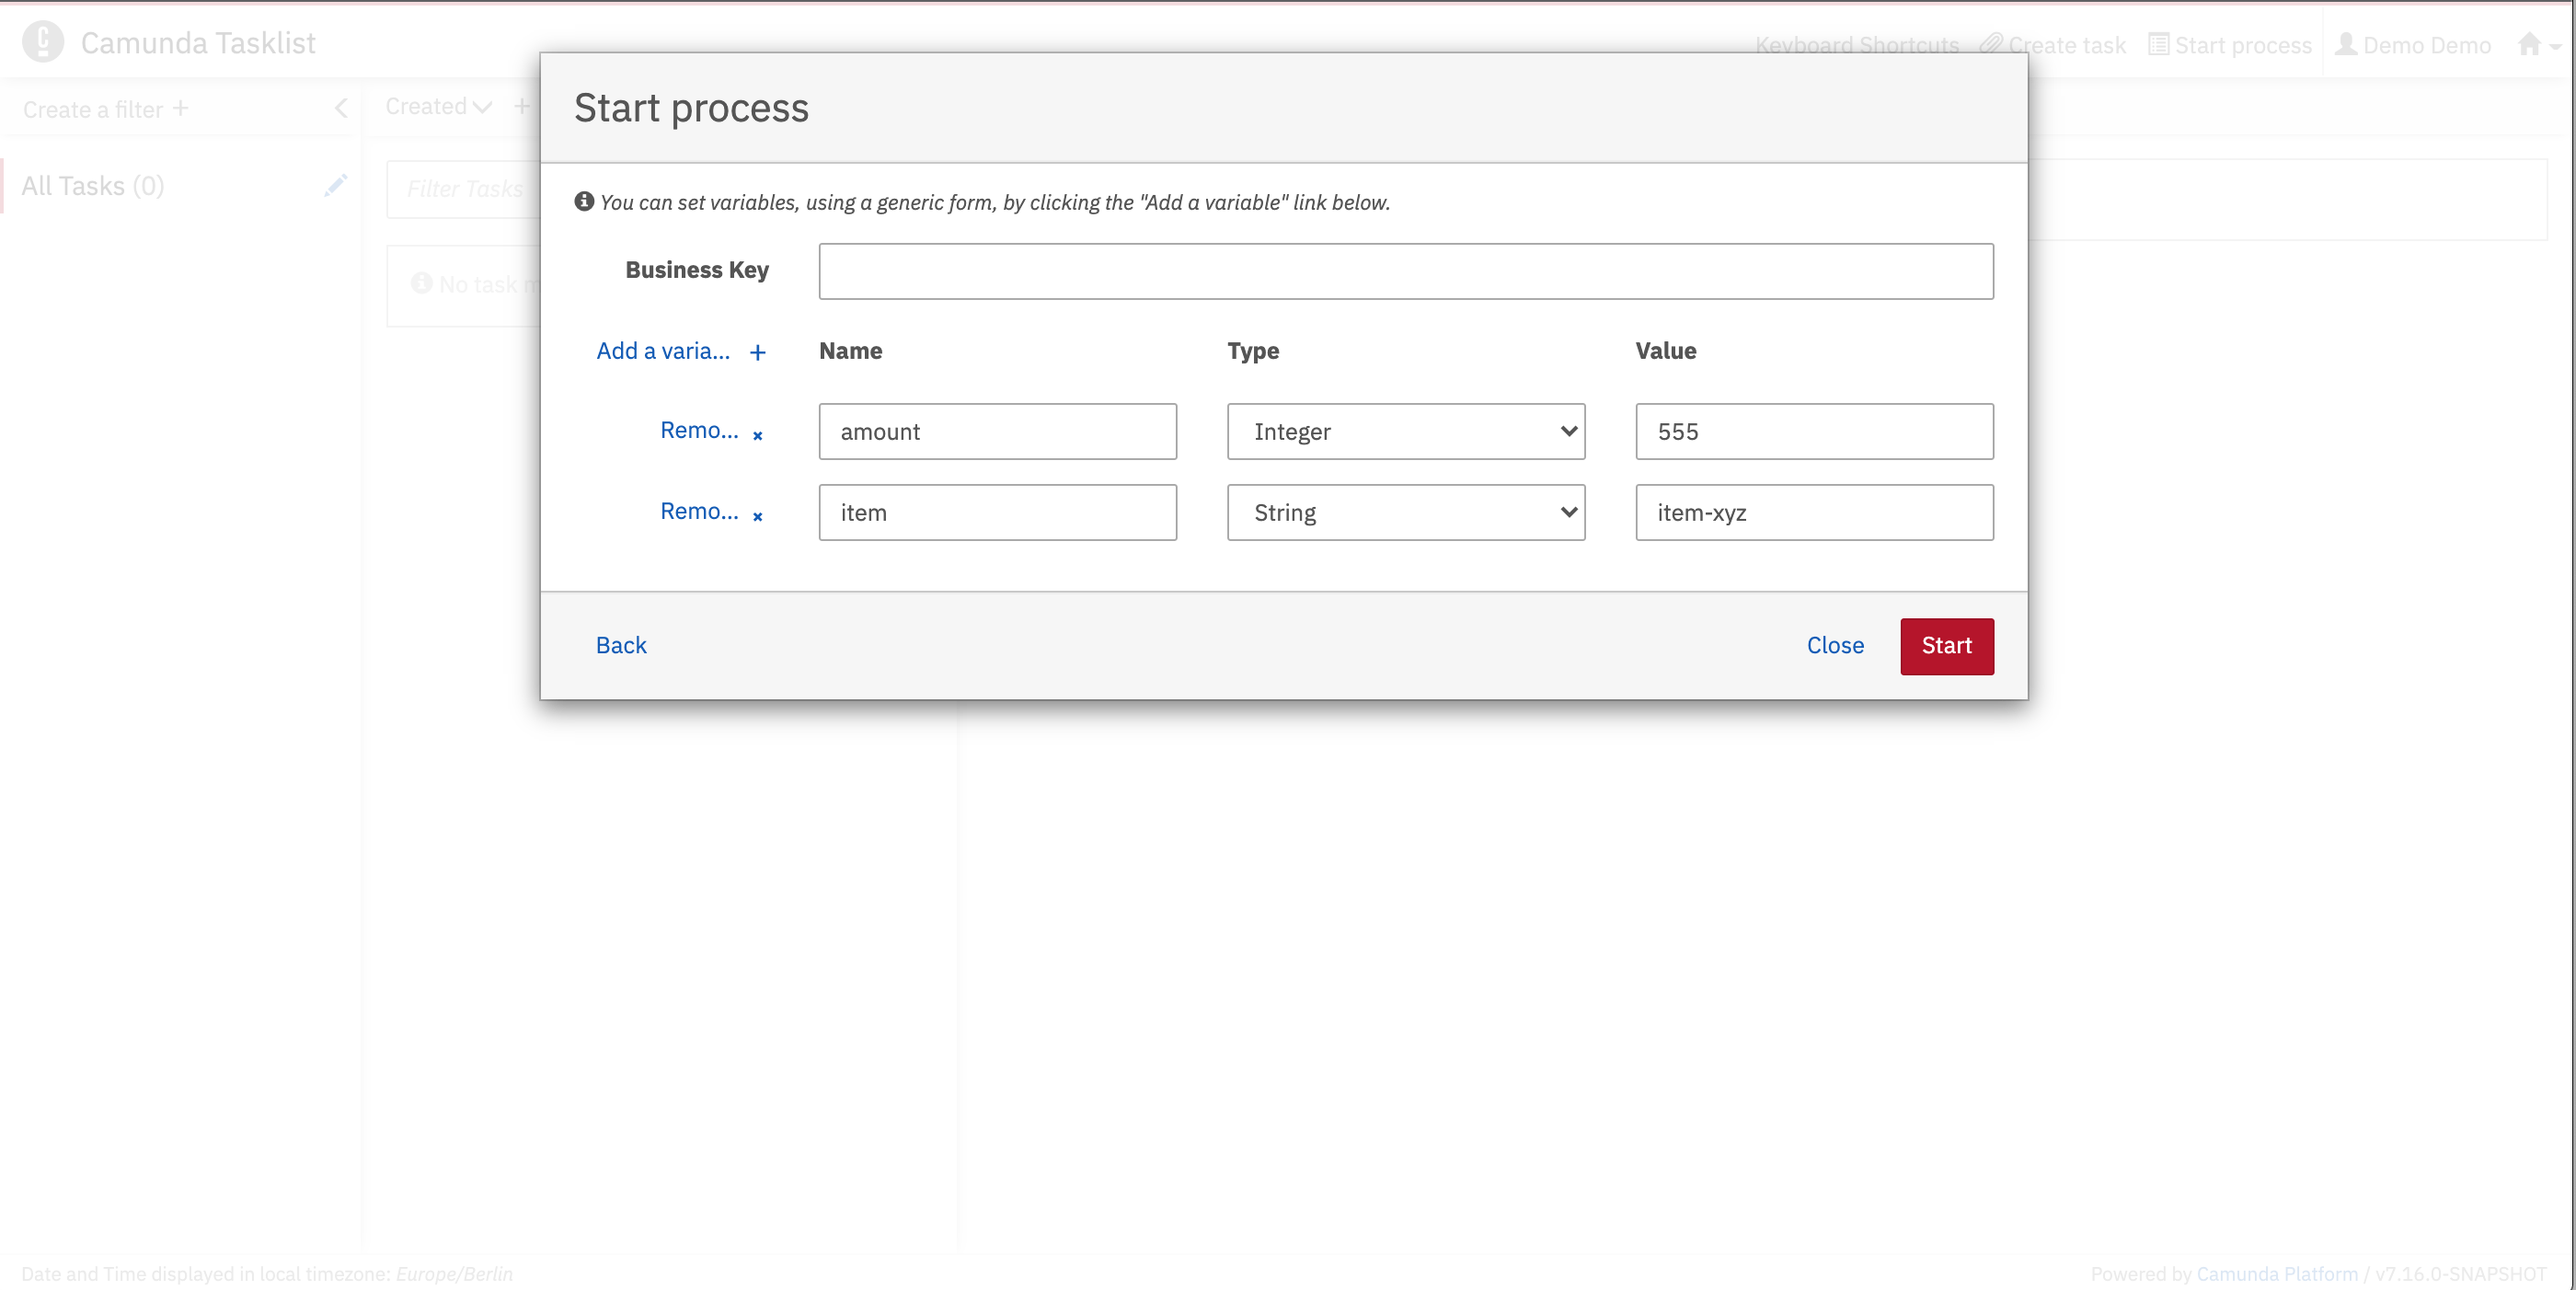
- Click Start process.
- Select Payment Retrieval from the list.
- Use the generic form to set process variables.
- Click Add a variable to create rows.
- Click Start.